PORSCHE 911, 1973 – Re Imagined
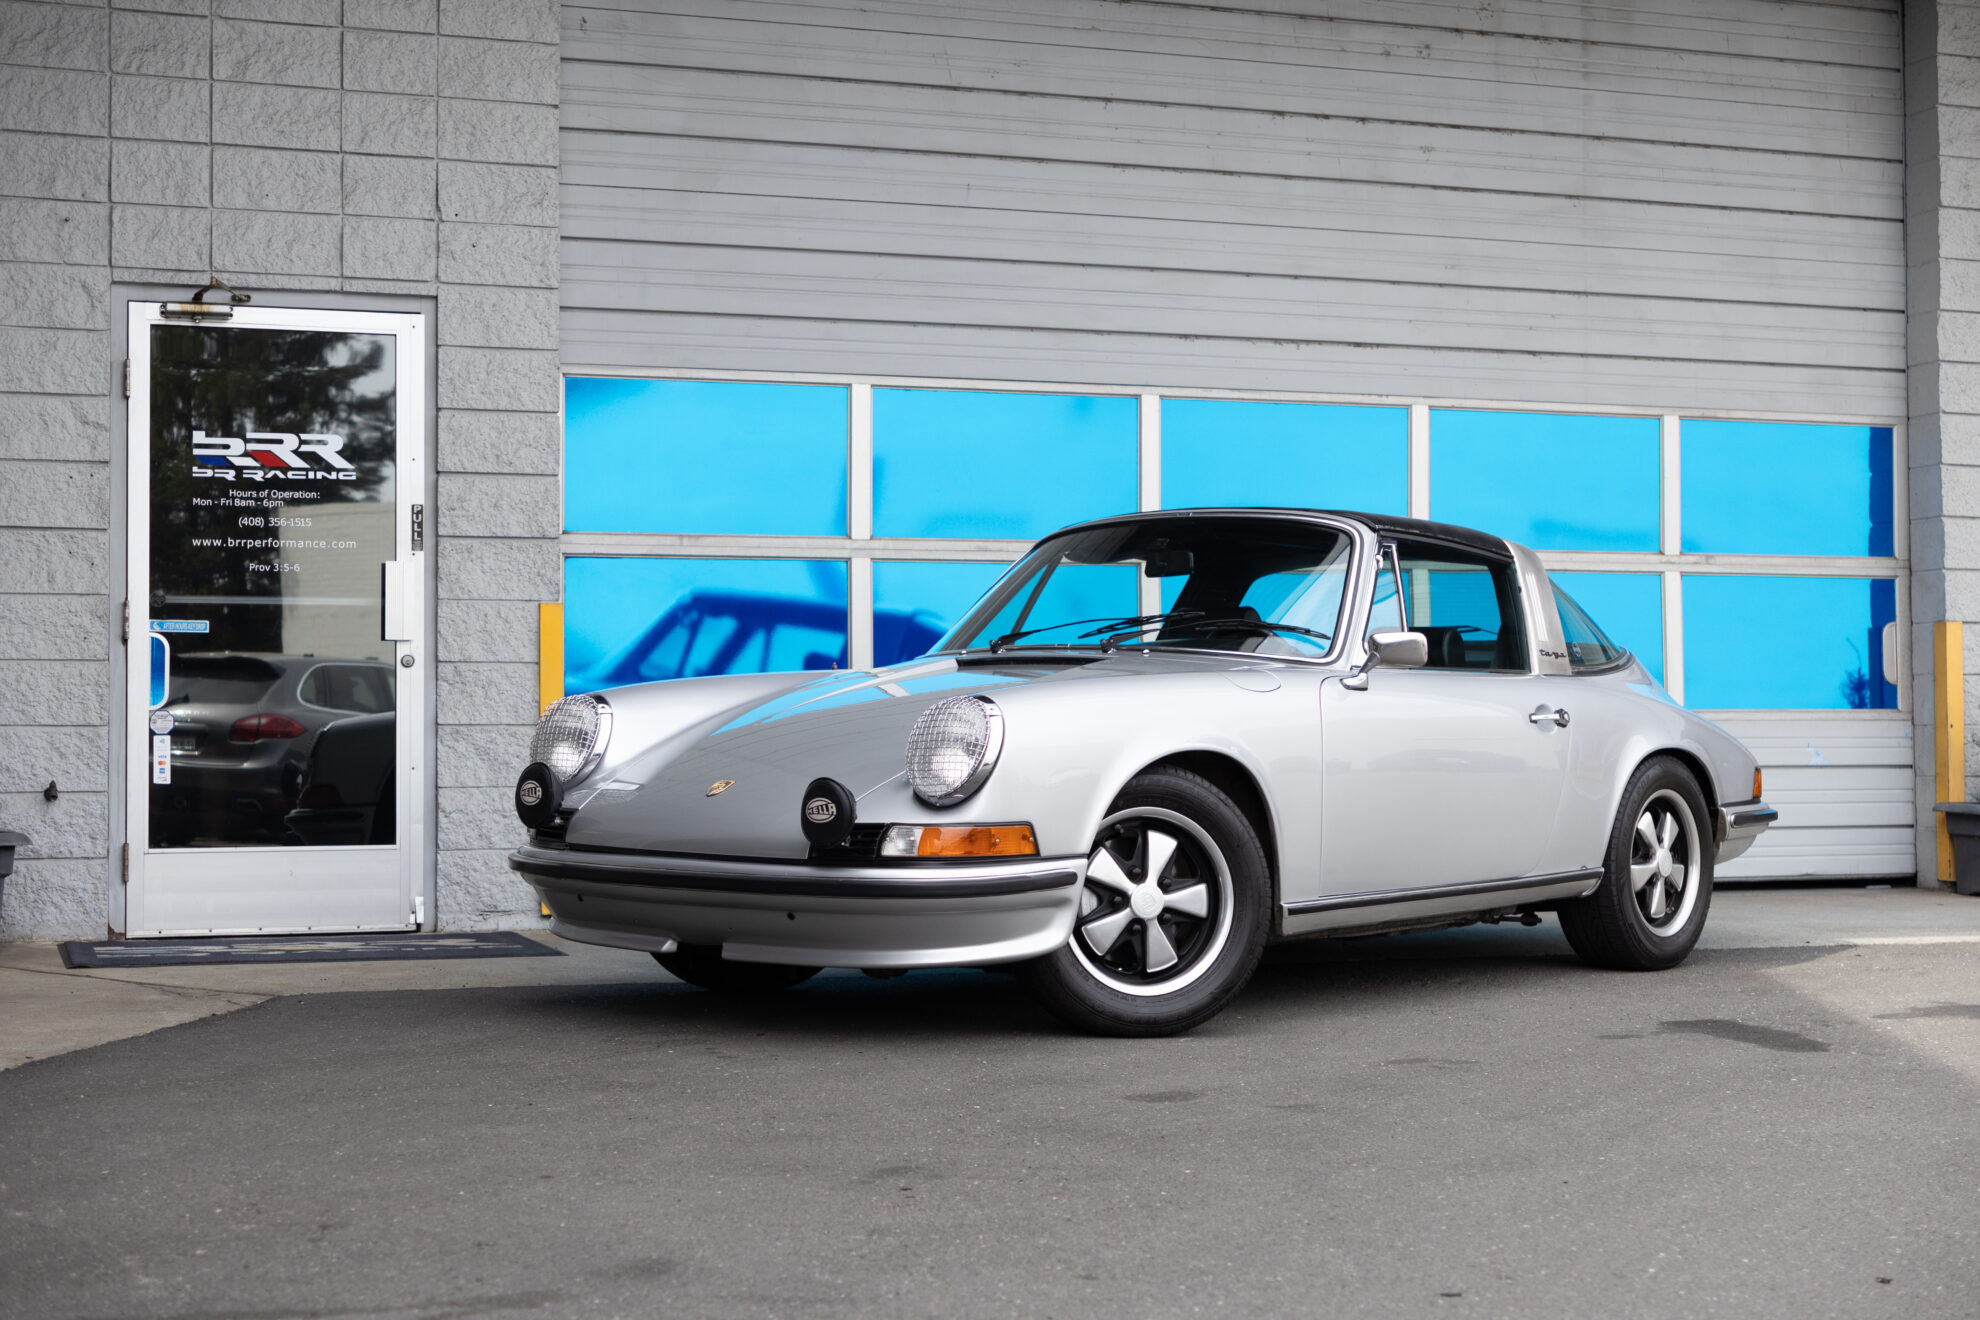
Each customer project is different. Different in scope, desire, intent, budget. But, this project seemed straightforward at the start, and then grew into something truly amazing. The base car was simple, 1973 Porsche 911 Targa. Not a high mileage car, but rough on the edges (hard to imagine that this car is over 50 years old, so, age does it’s thing to older cars). Processed the car thru a normal “pre-purchase” inspection, and indeed, had a long list of things that needed attention, refreshing. But, once we got into the project, we started to “re-imagine” what this car could be. So, the scope significantly changed, and instead of thinking how to refresh, the thinking was how to make “amazing”. This is not a “restore”, where you just replace everything without thought, this is a “refresh” and “what if” approach. What follows is that journey.
We will start each section with a review of how things were found, and needing attention, should you also have the chance to own an older 911, and can fathom what might lie ahead. Then, we will peel the onion a little deeper, and imagine what it could be. Such fun.
Background – 1973 Porsche 911 Targa
Powered by a 2.4L, flat six engine (Type 911/52) with the first generation of the mechanical fuel injection (CIS), producing 190HP at 6,500 RPM, paired to a 5-speed manual transmission w four wheel disc brakes. Target total weight is around 2,300 #. Targa means it has the removal roof section.
Suspension
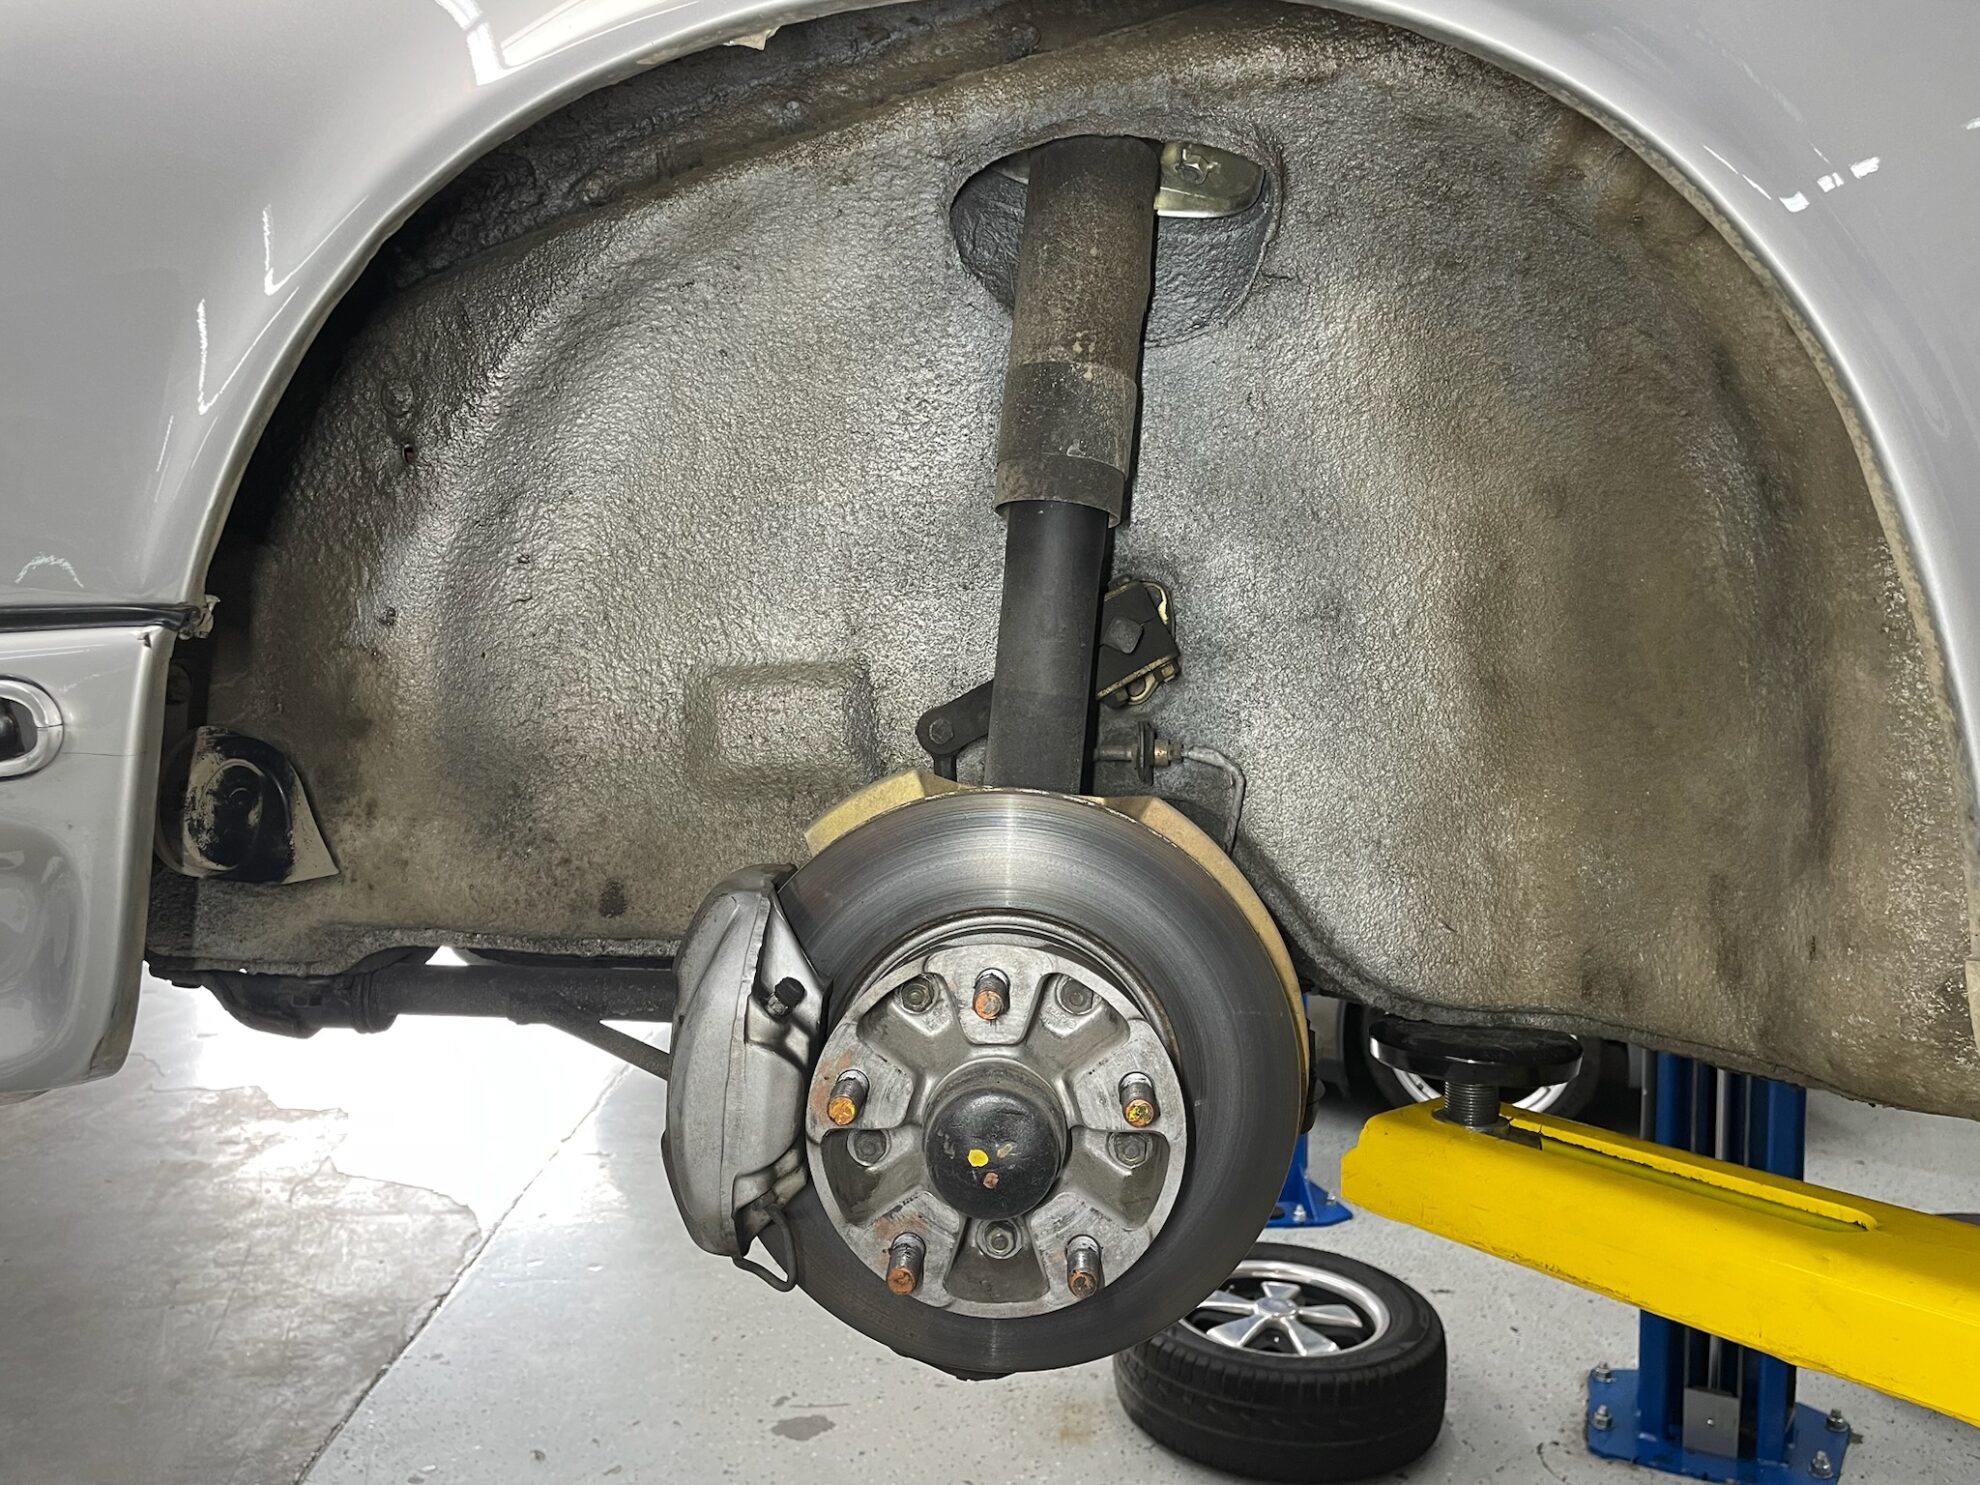
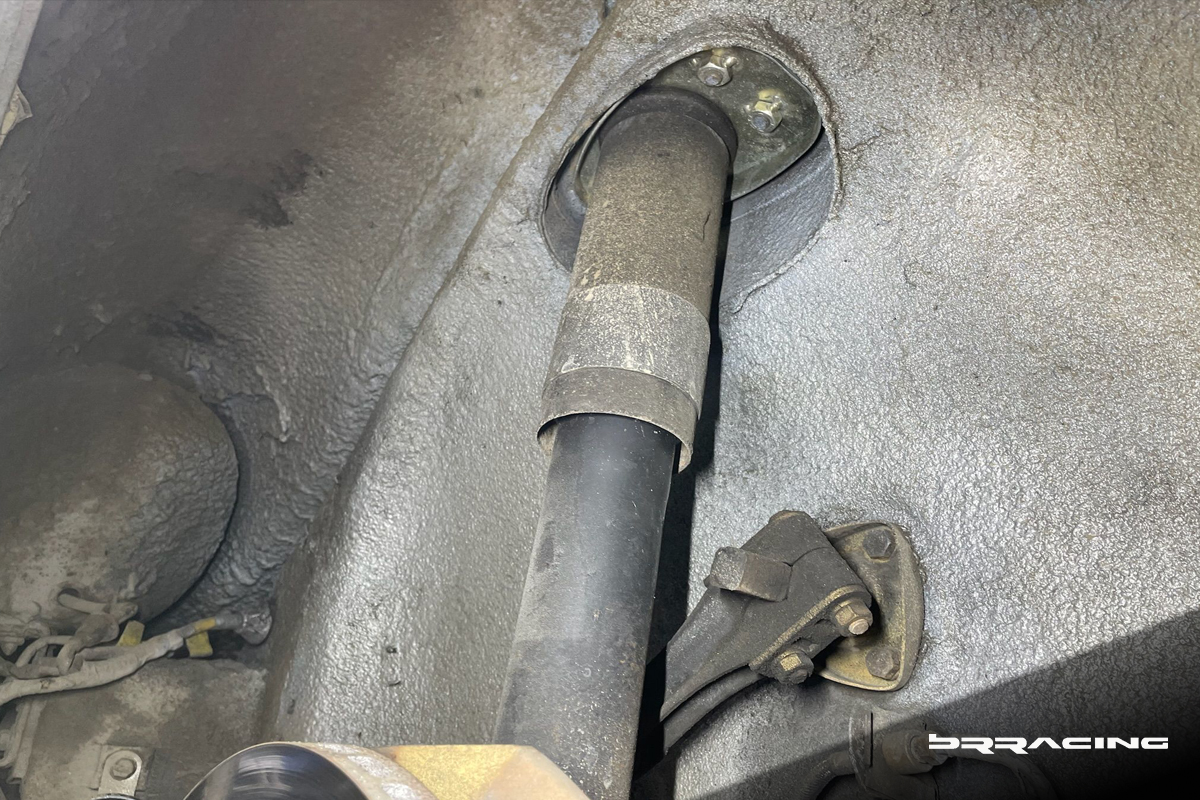
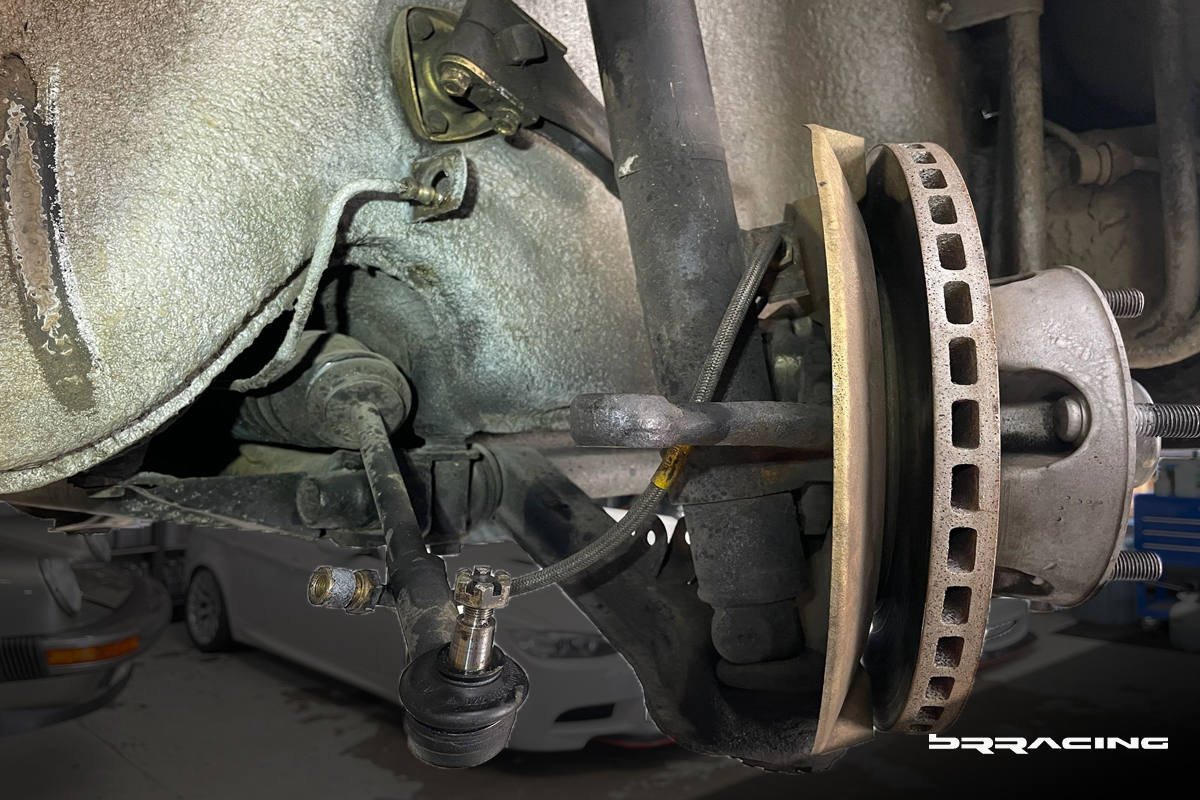
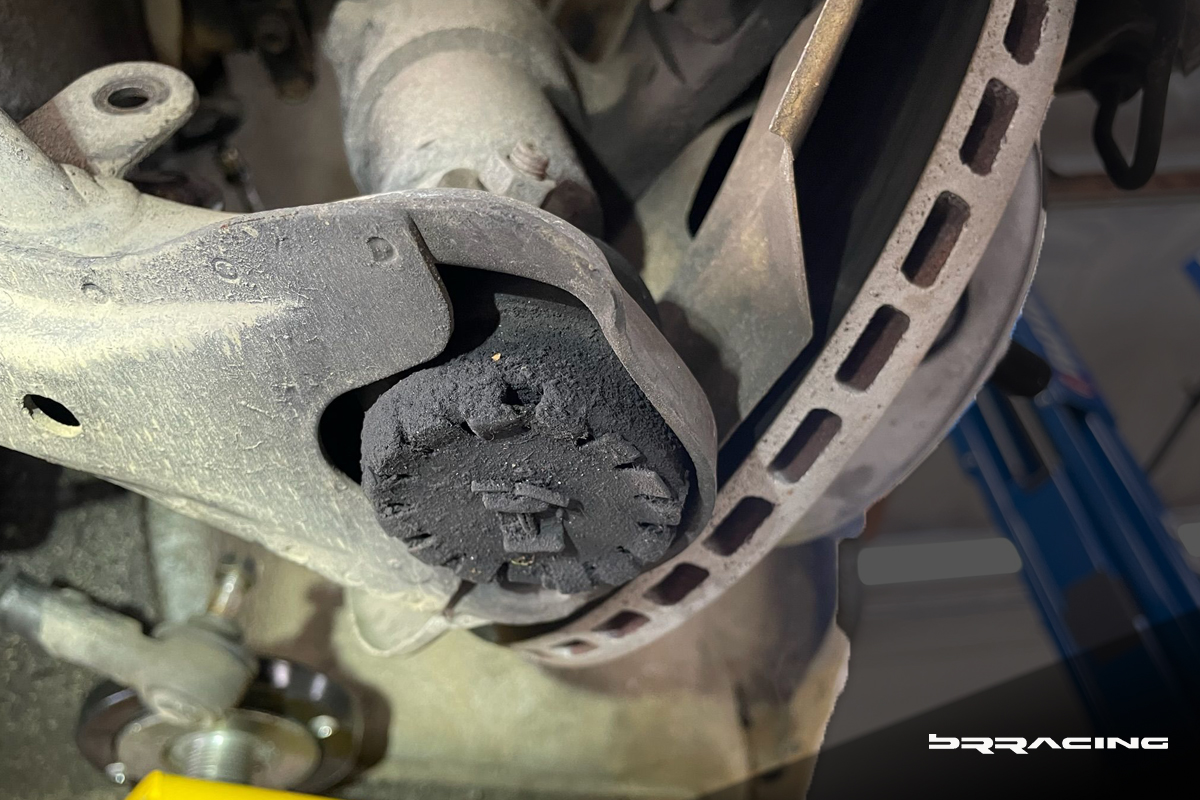
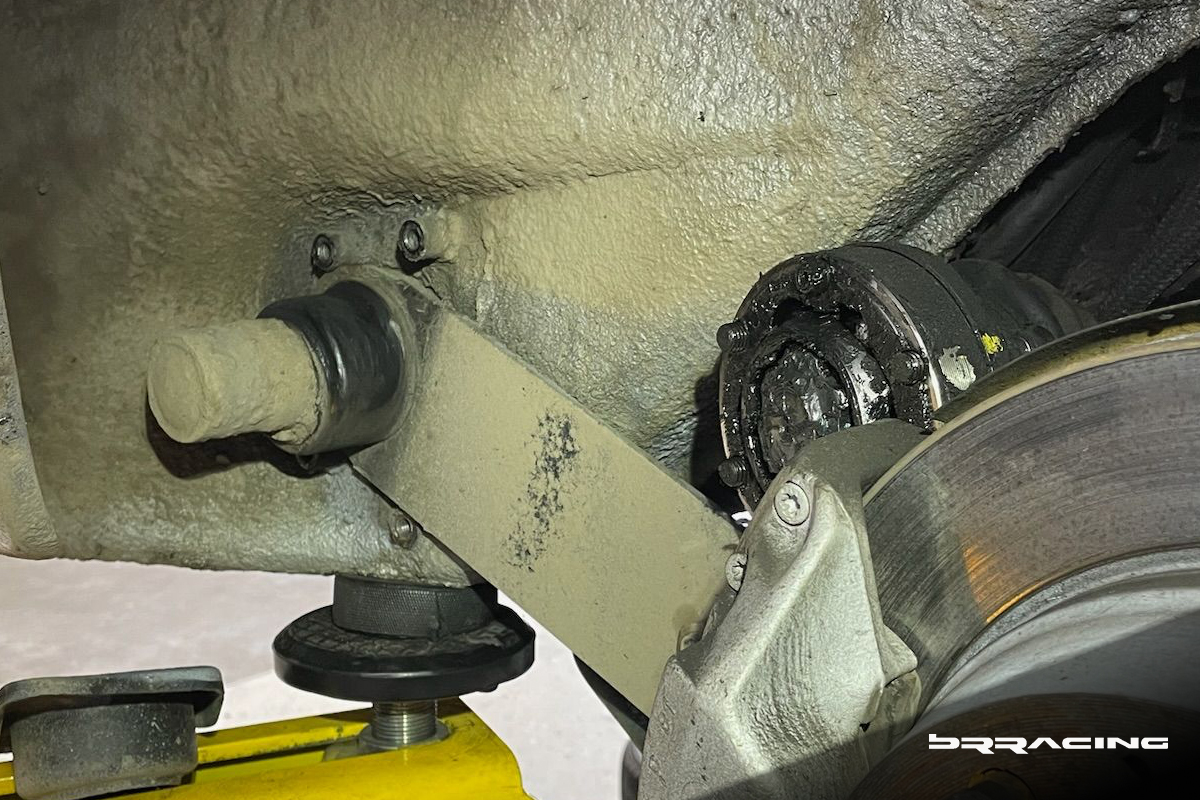
The inspection showed significant amounts of corrosion to all elements of the suspension. Here are the examples of what the car was showing us before refresh.
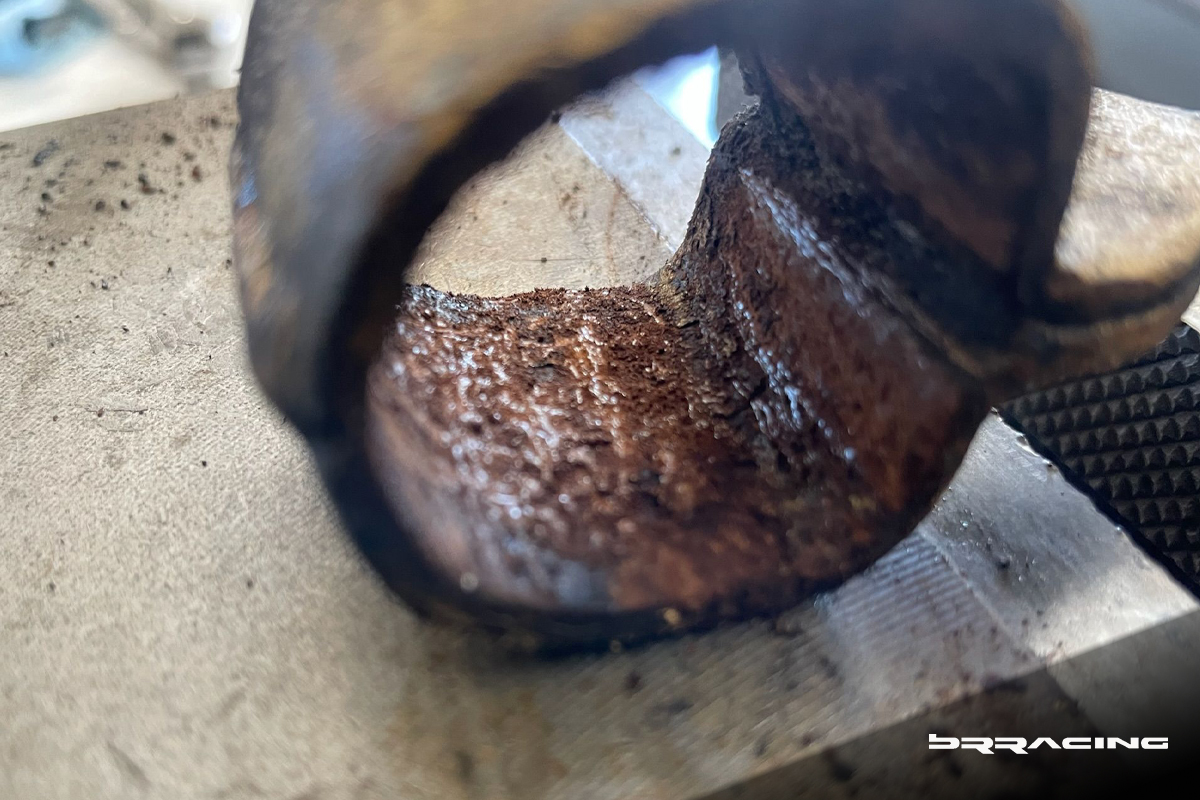
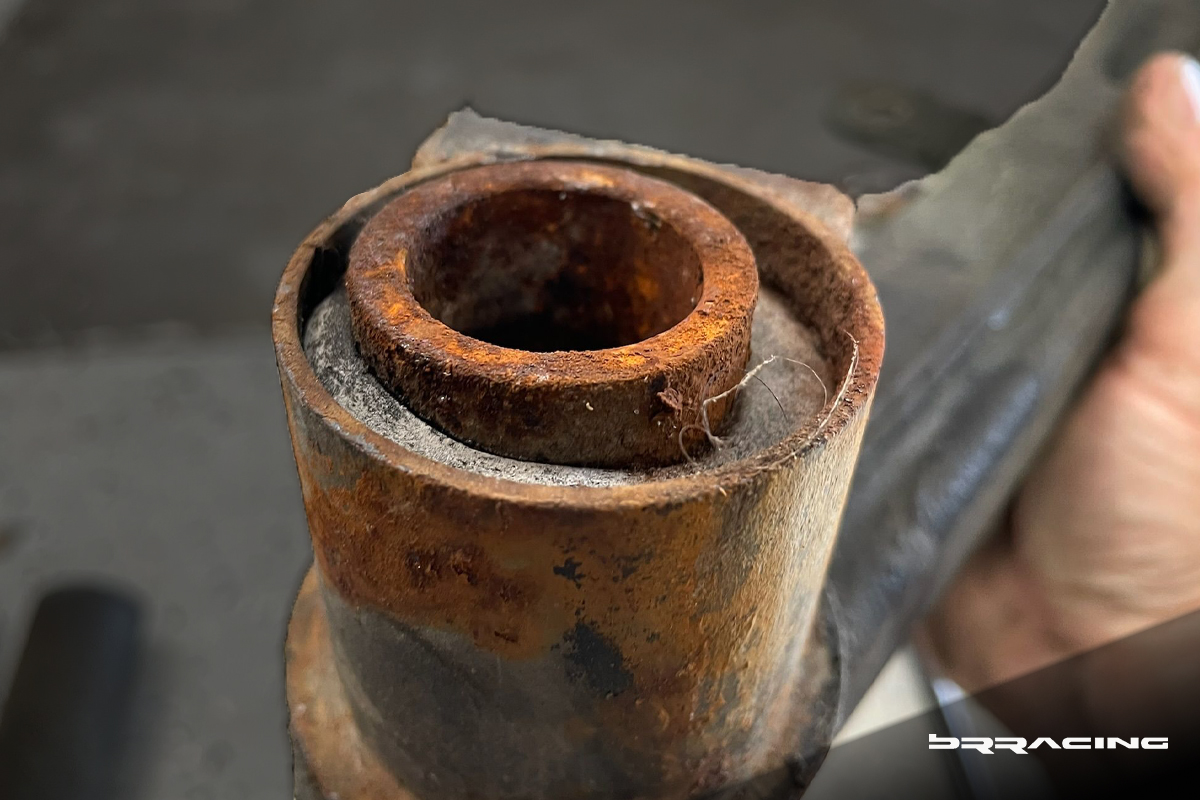
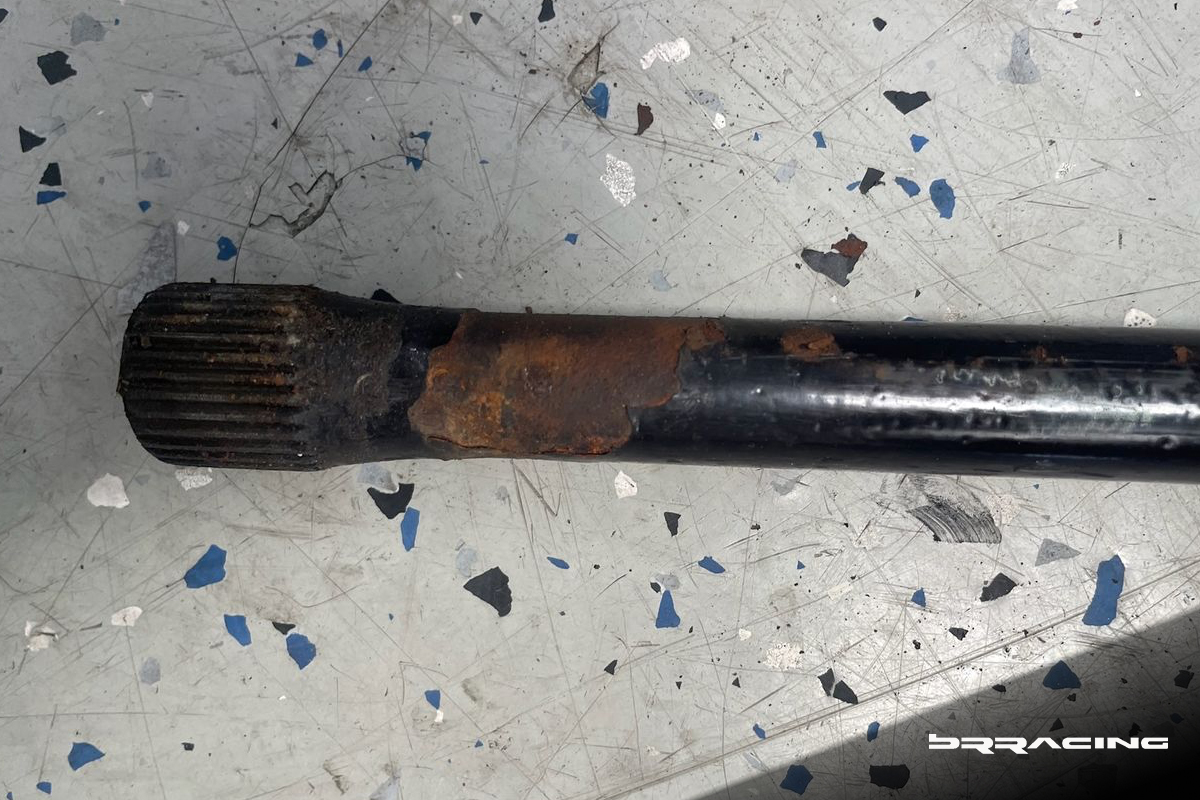
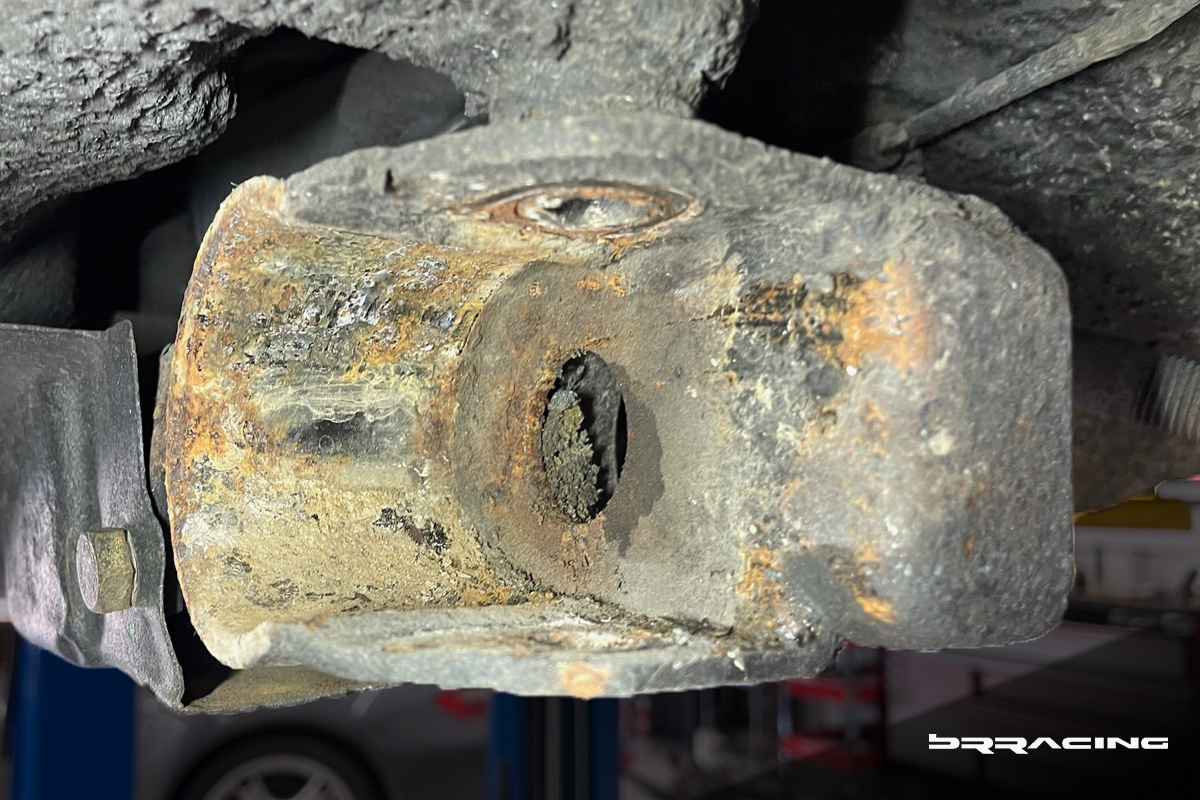
And, realize, this car lived it’s life mostly in California. If this had been like some of the other older 911 projects we have done that have come from the MidWest or the East, the damage would have been much worse. But, just because there is corrosion present, doesn’t mean they have to be replaced, there are many other options to refresh elements (vapor blasting, dry ice cleaning, soda blasting, and then, re-plating, re-painting, or powder coating). Let’s continue to investigate what we have.
And the same sort of findings on the rear suspension –
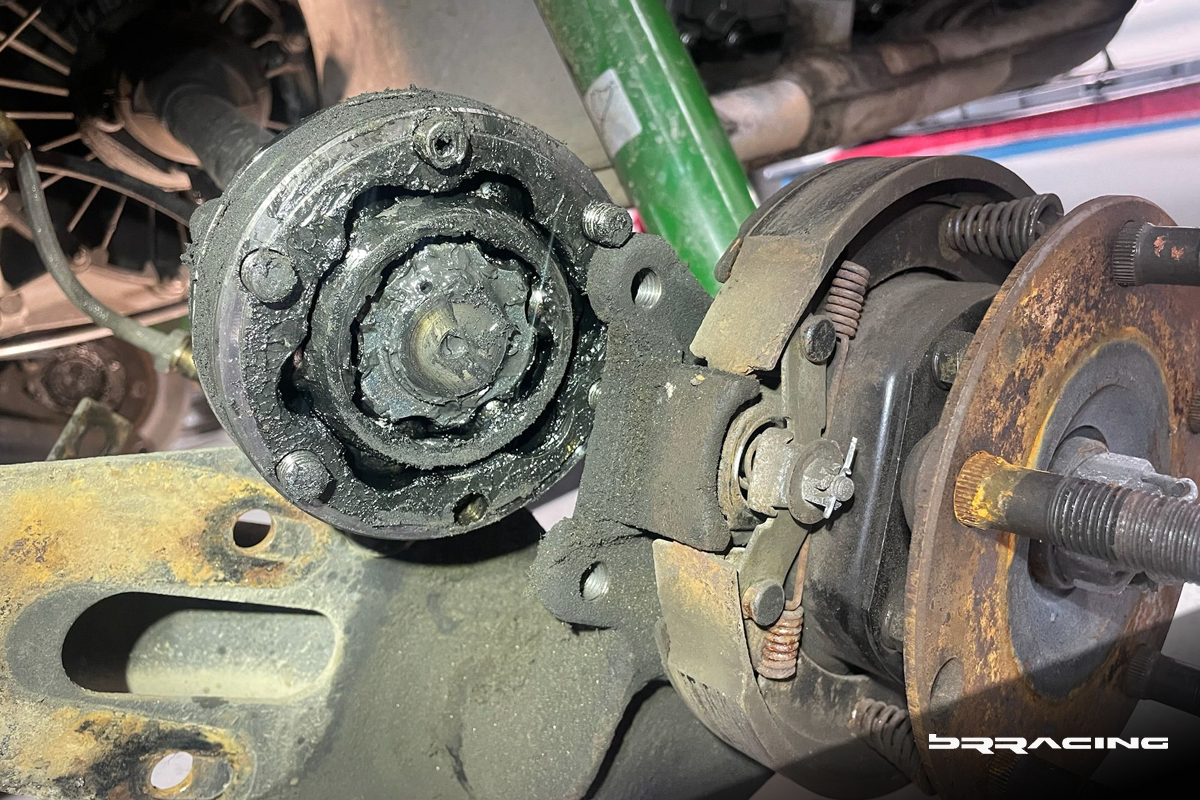
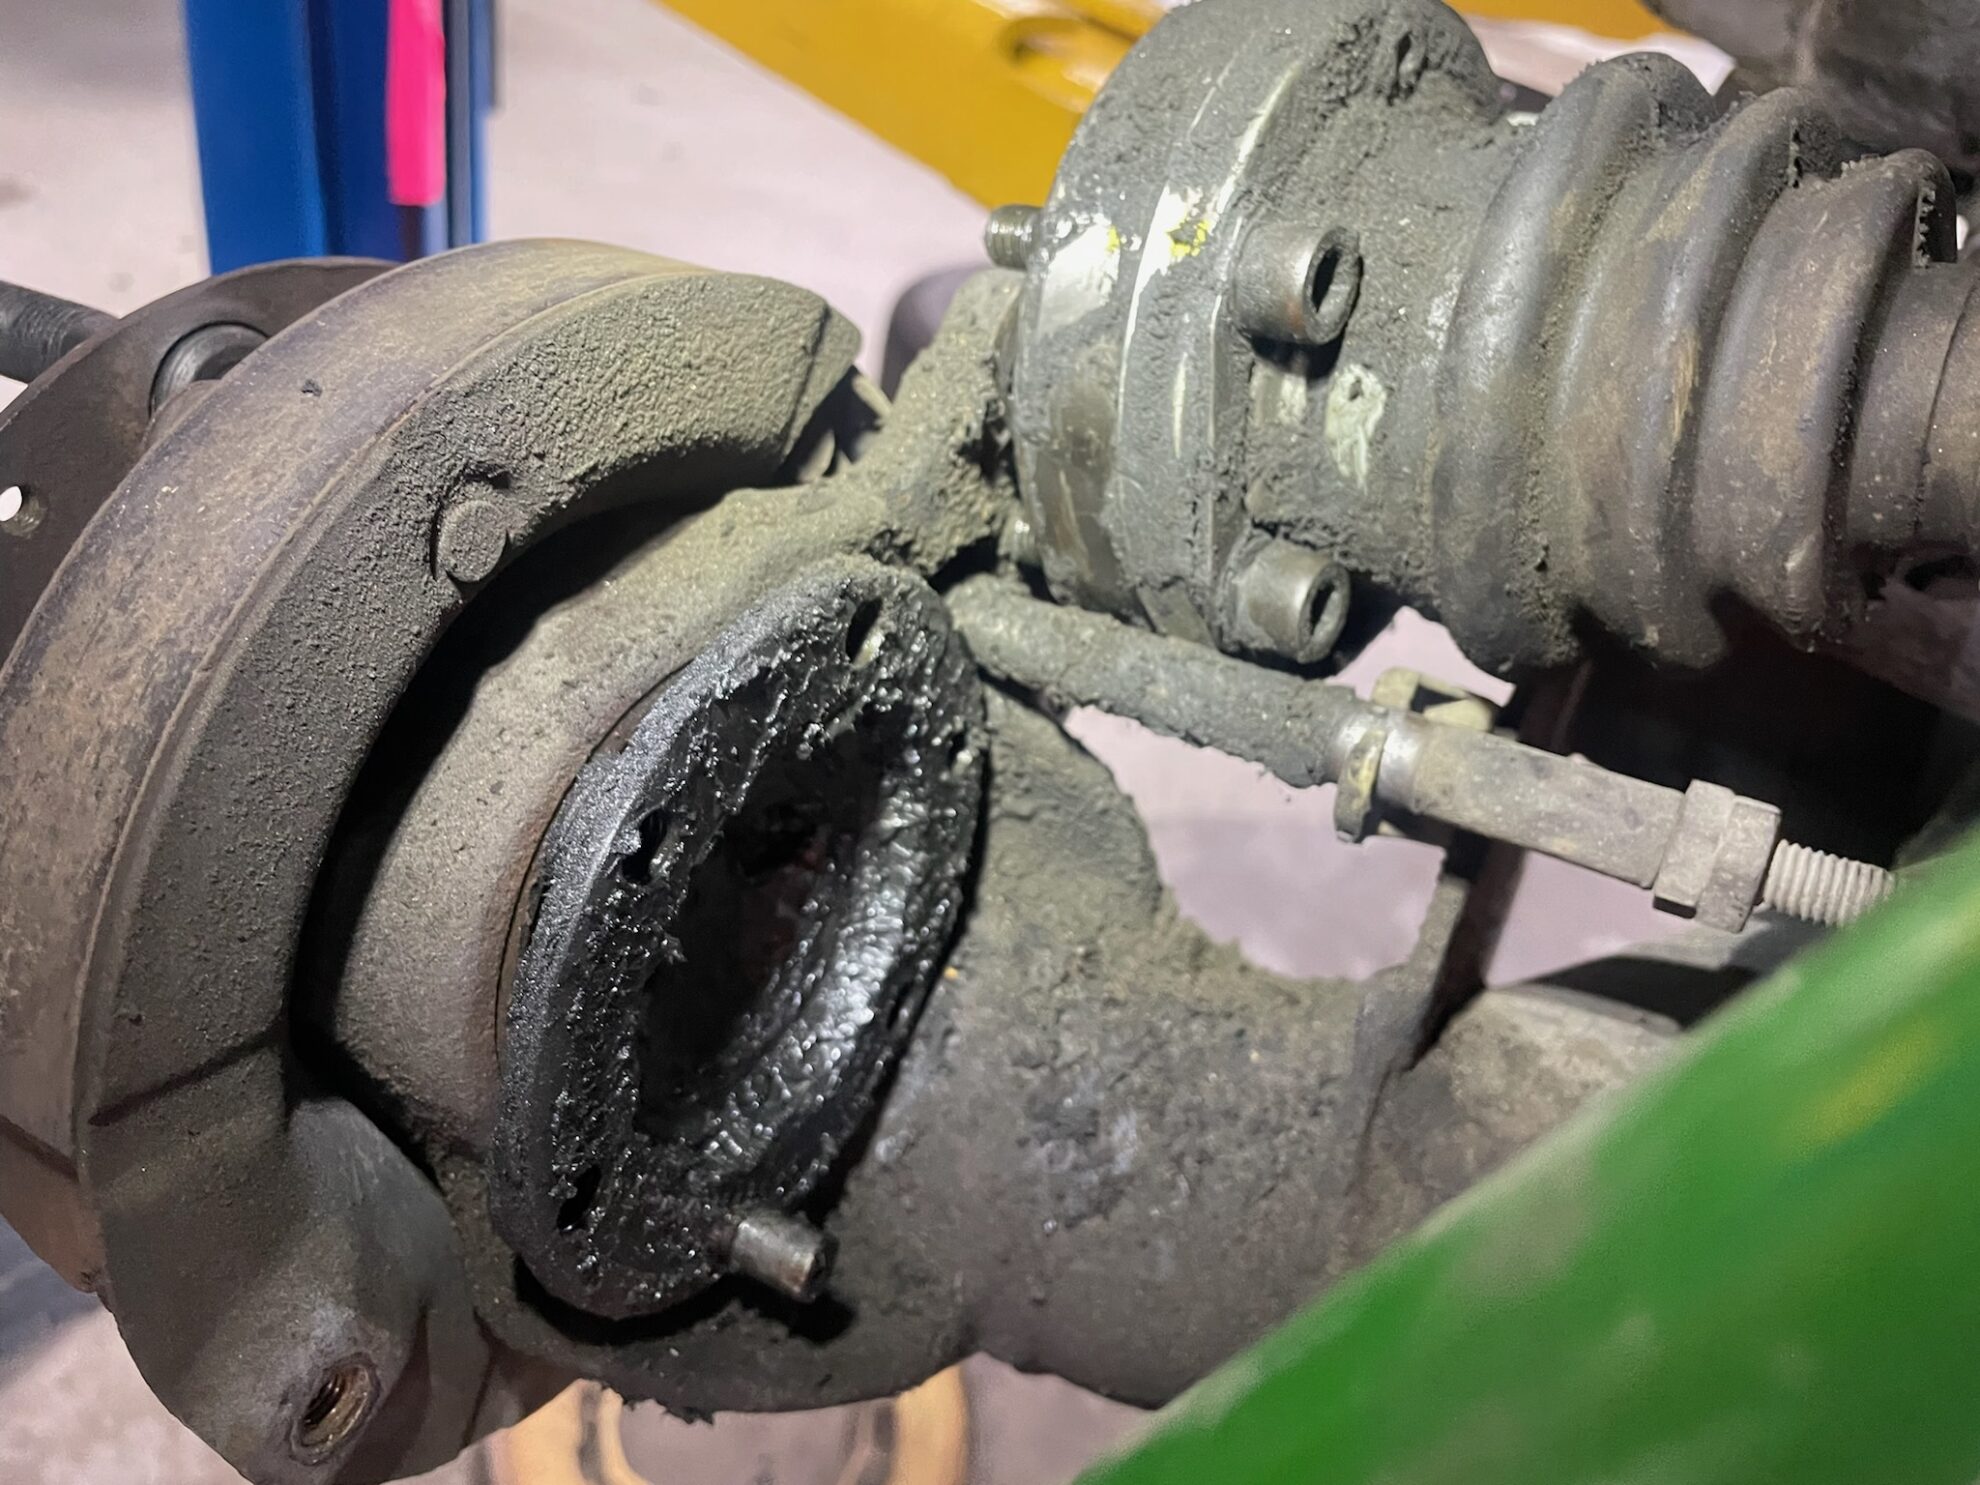
This is the view of one of the rear axles (below). At first glance, sort of what you might expect given the age and mileage. And, no torn, cracked CV boots. So, you would think you are good. But, you need to dig a little deeper, to really know what you have.
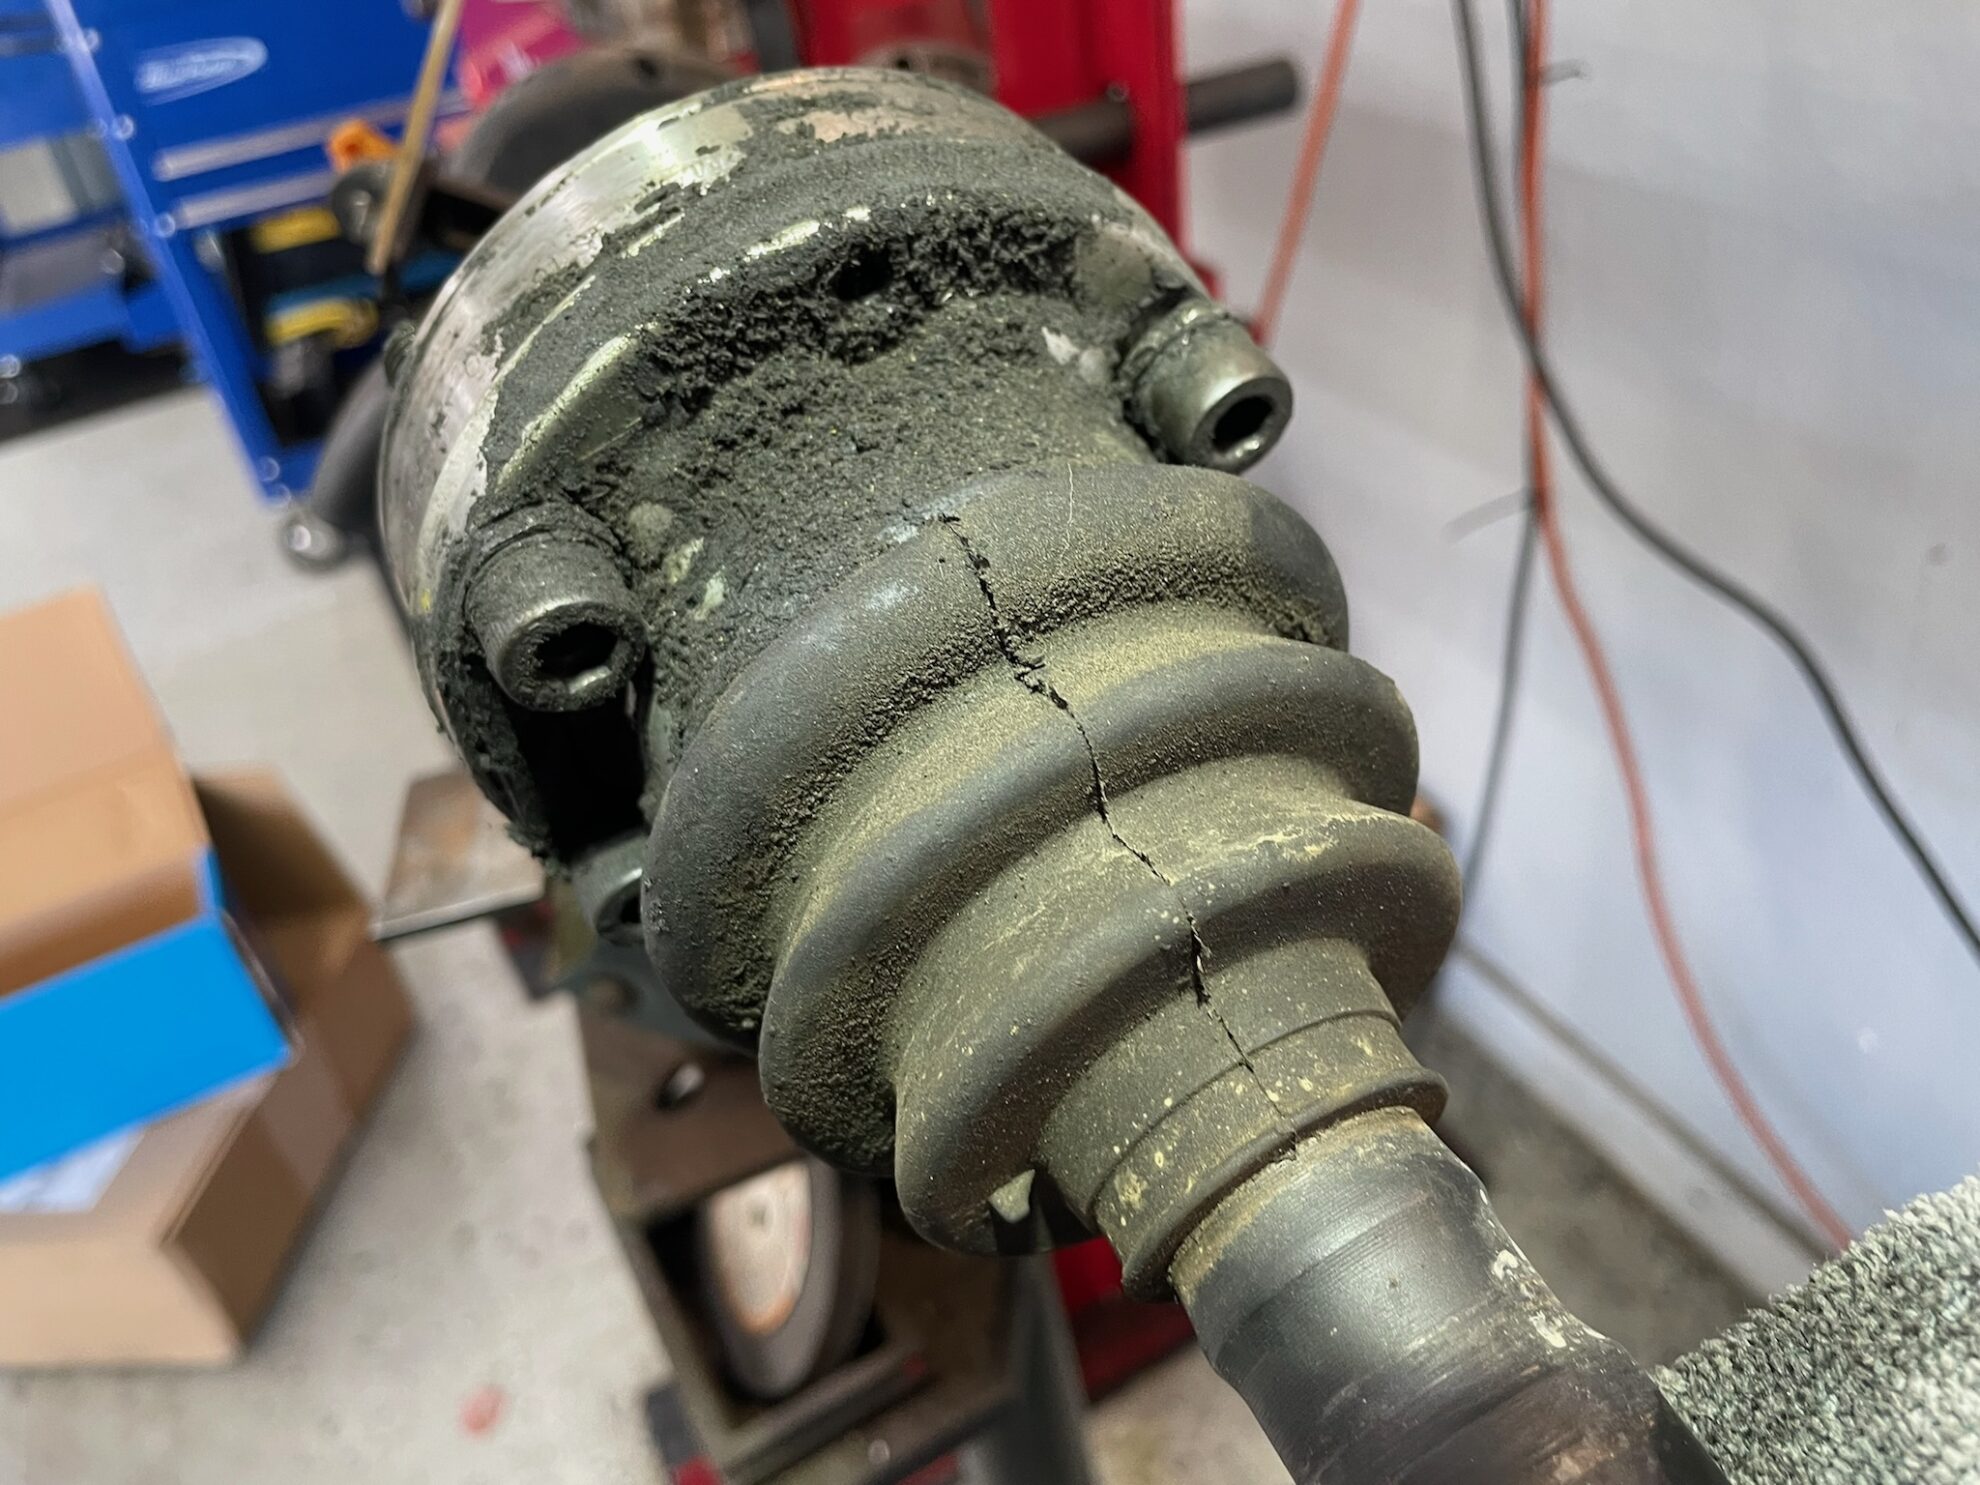
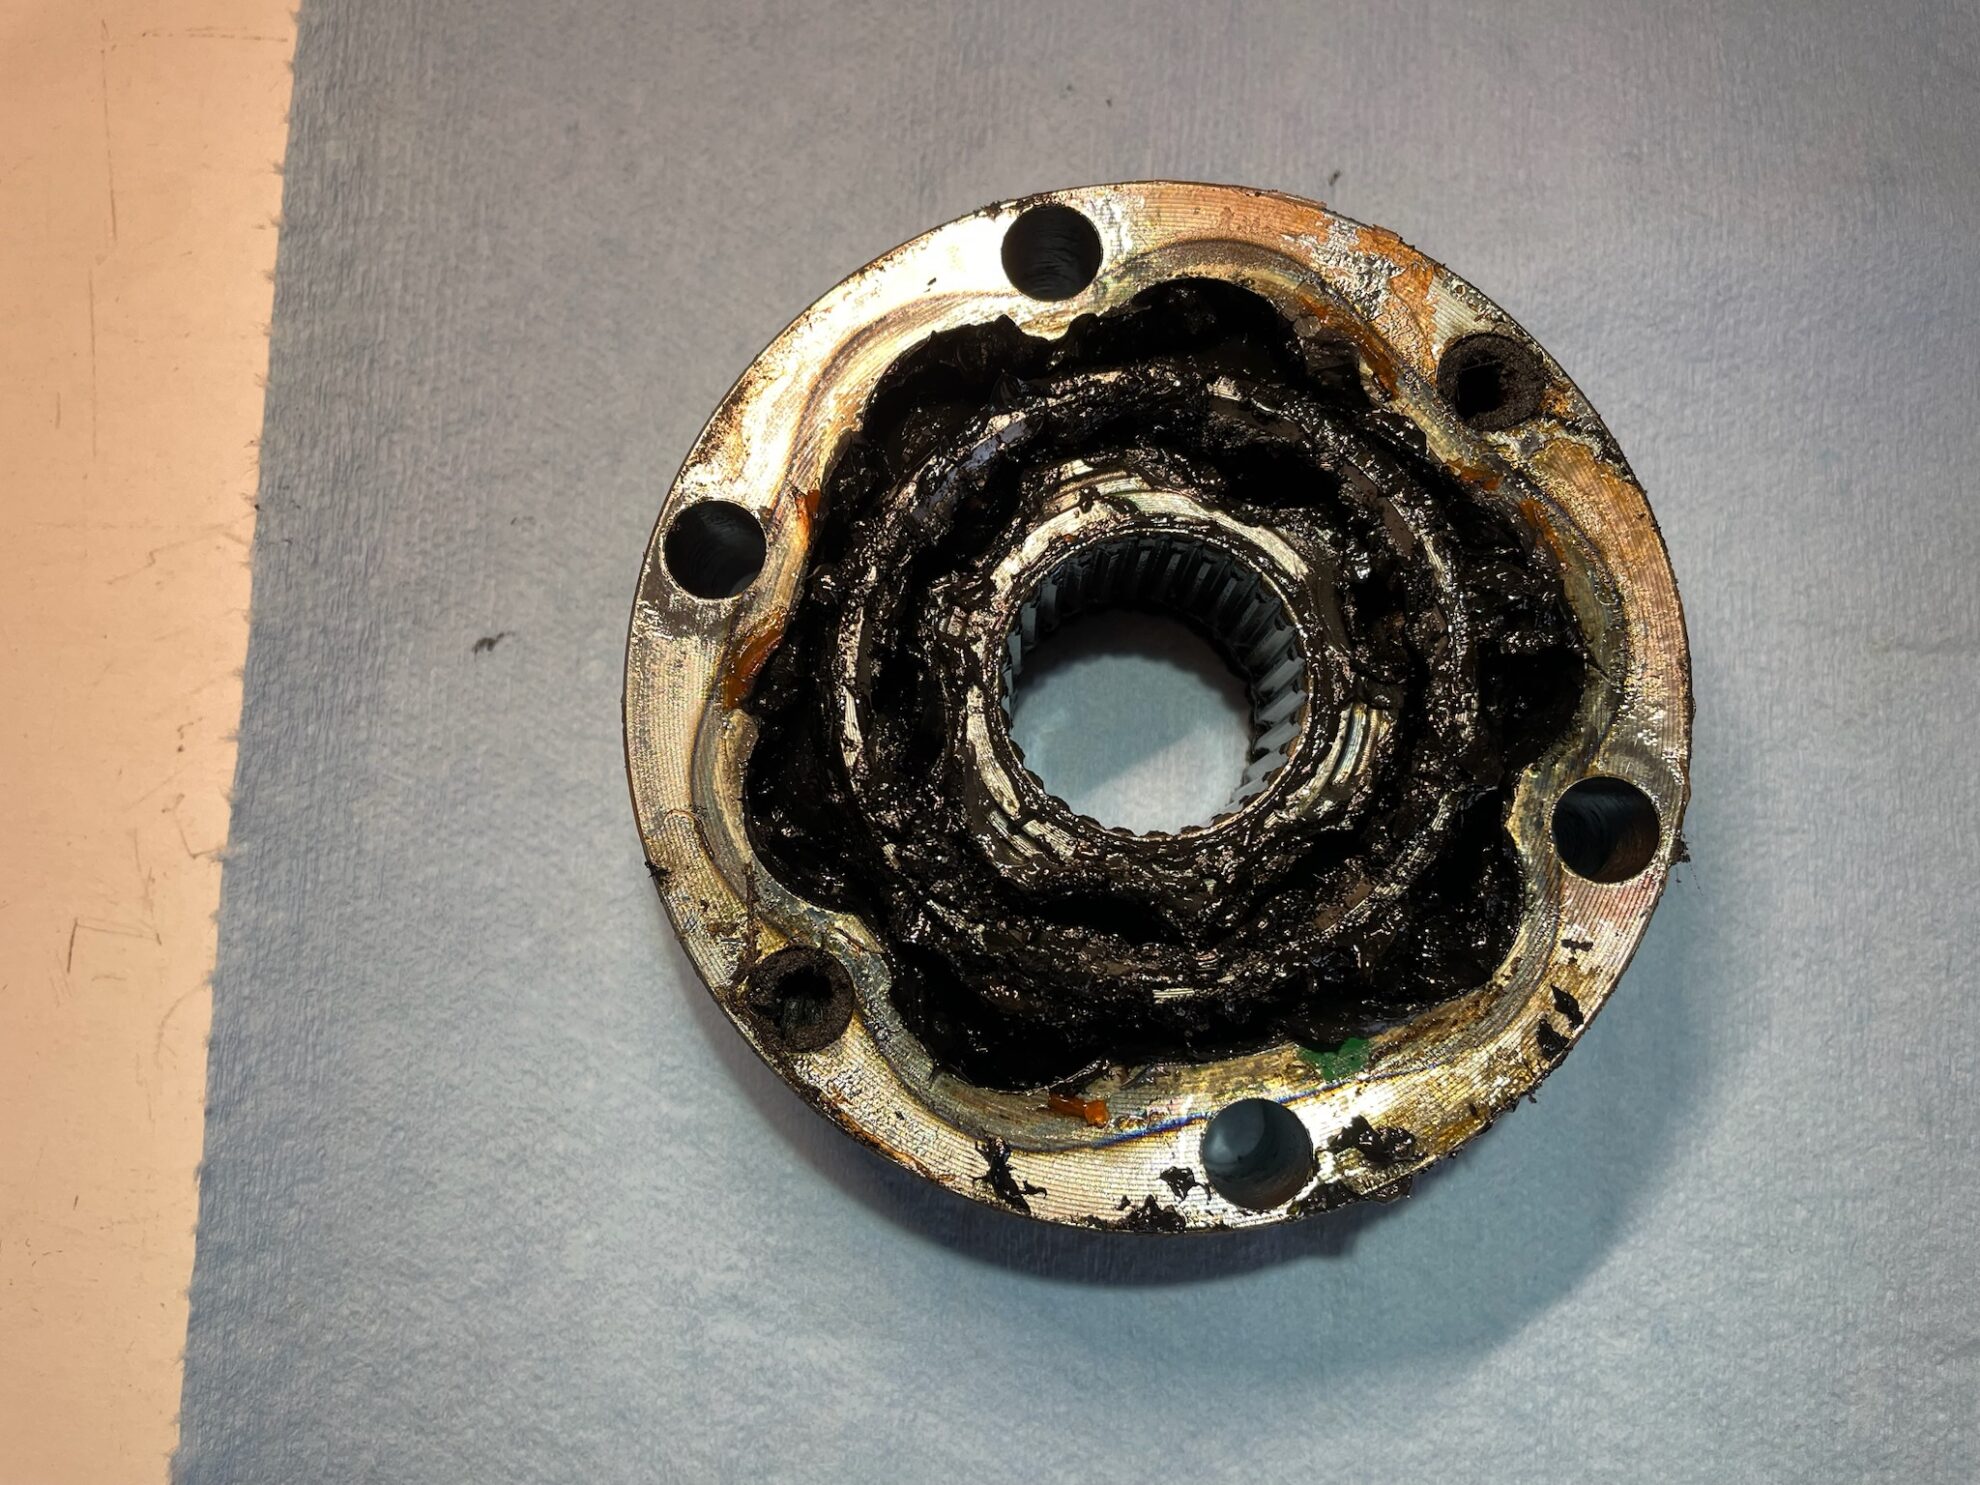
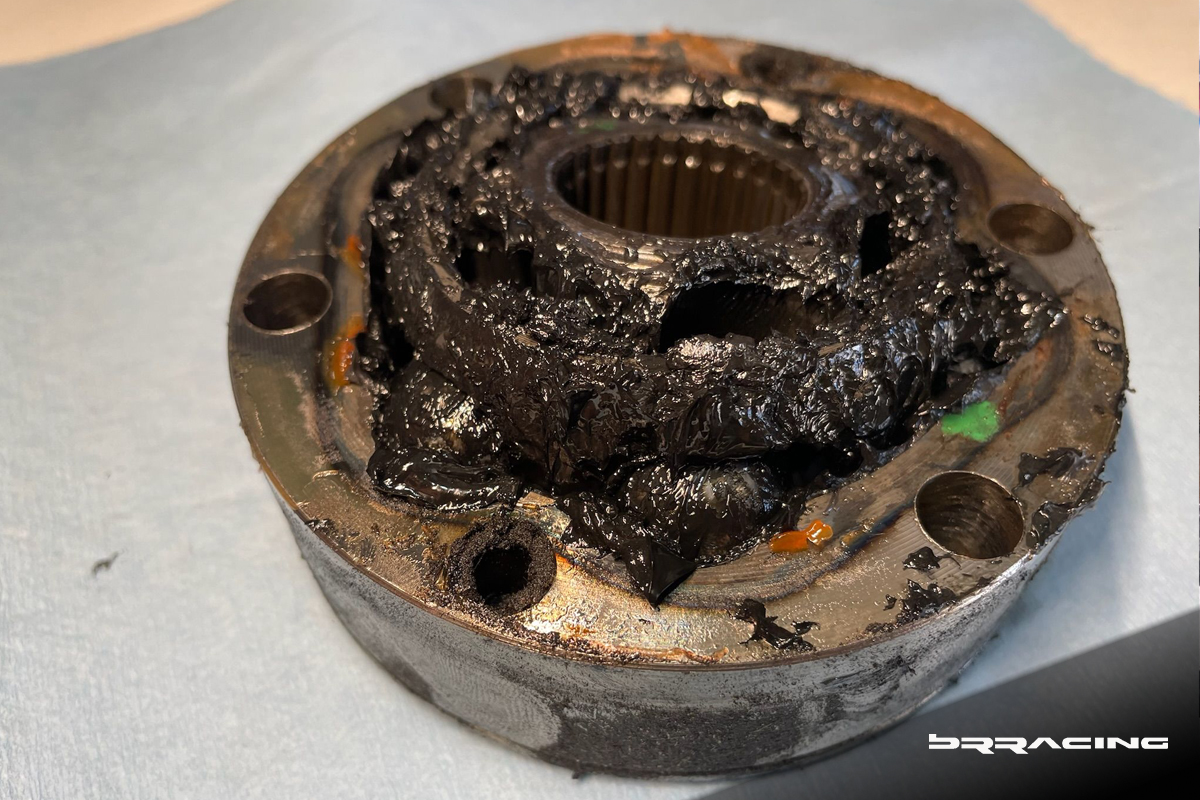
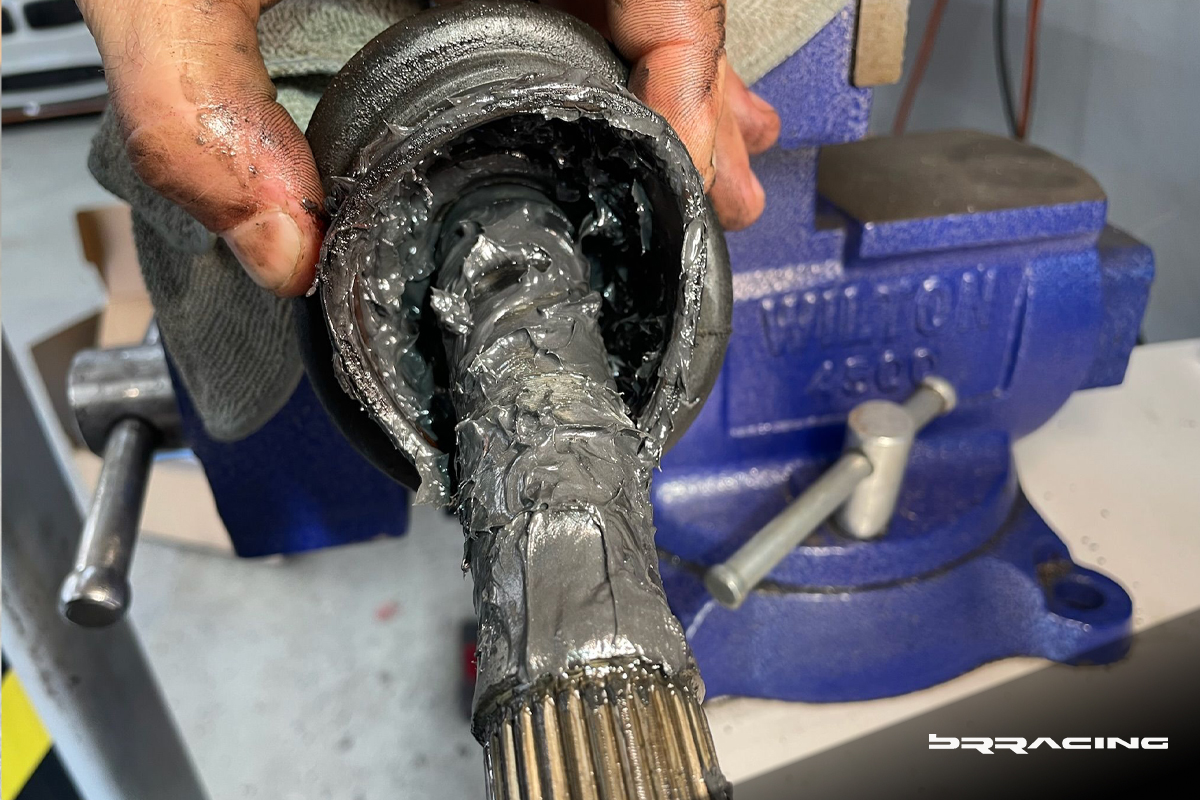
Therefore, complete rebuild needed on the rear axles.
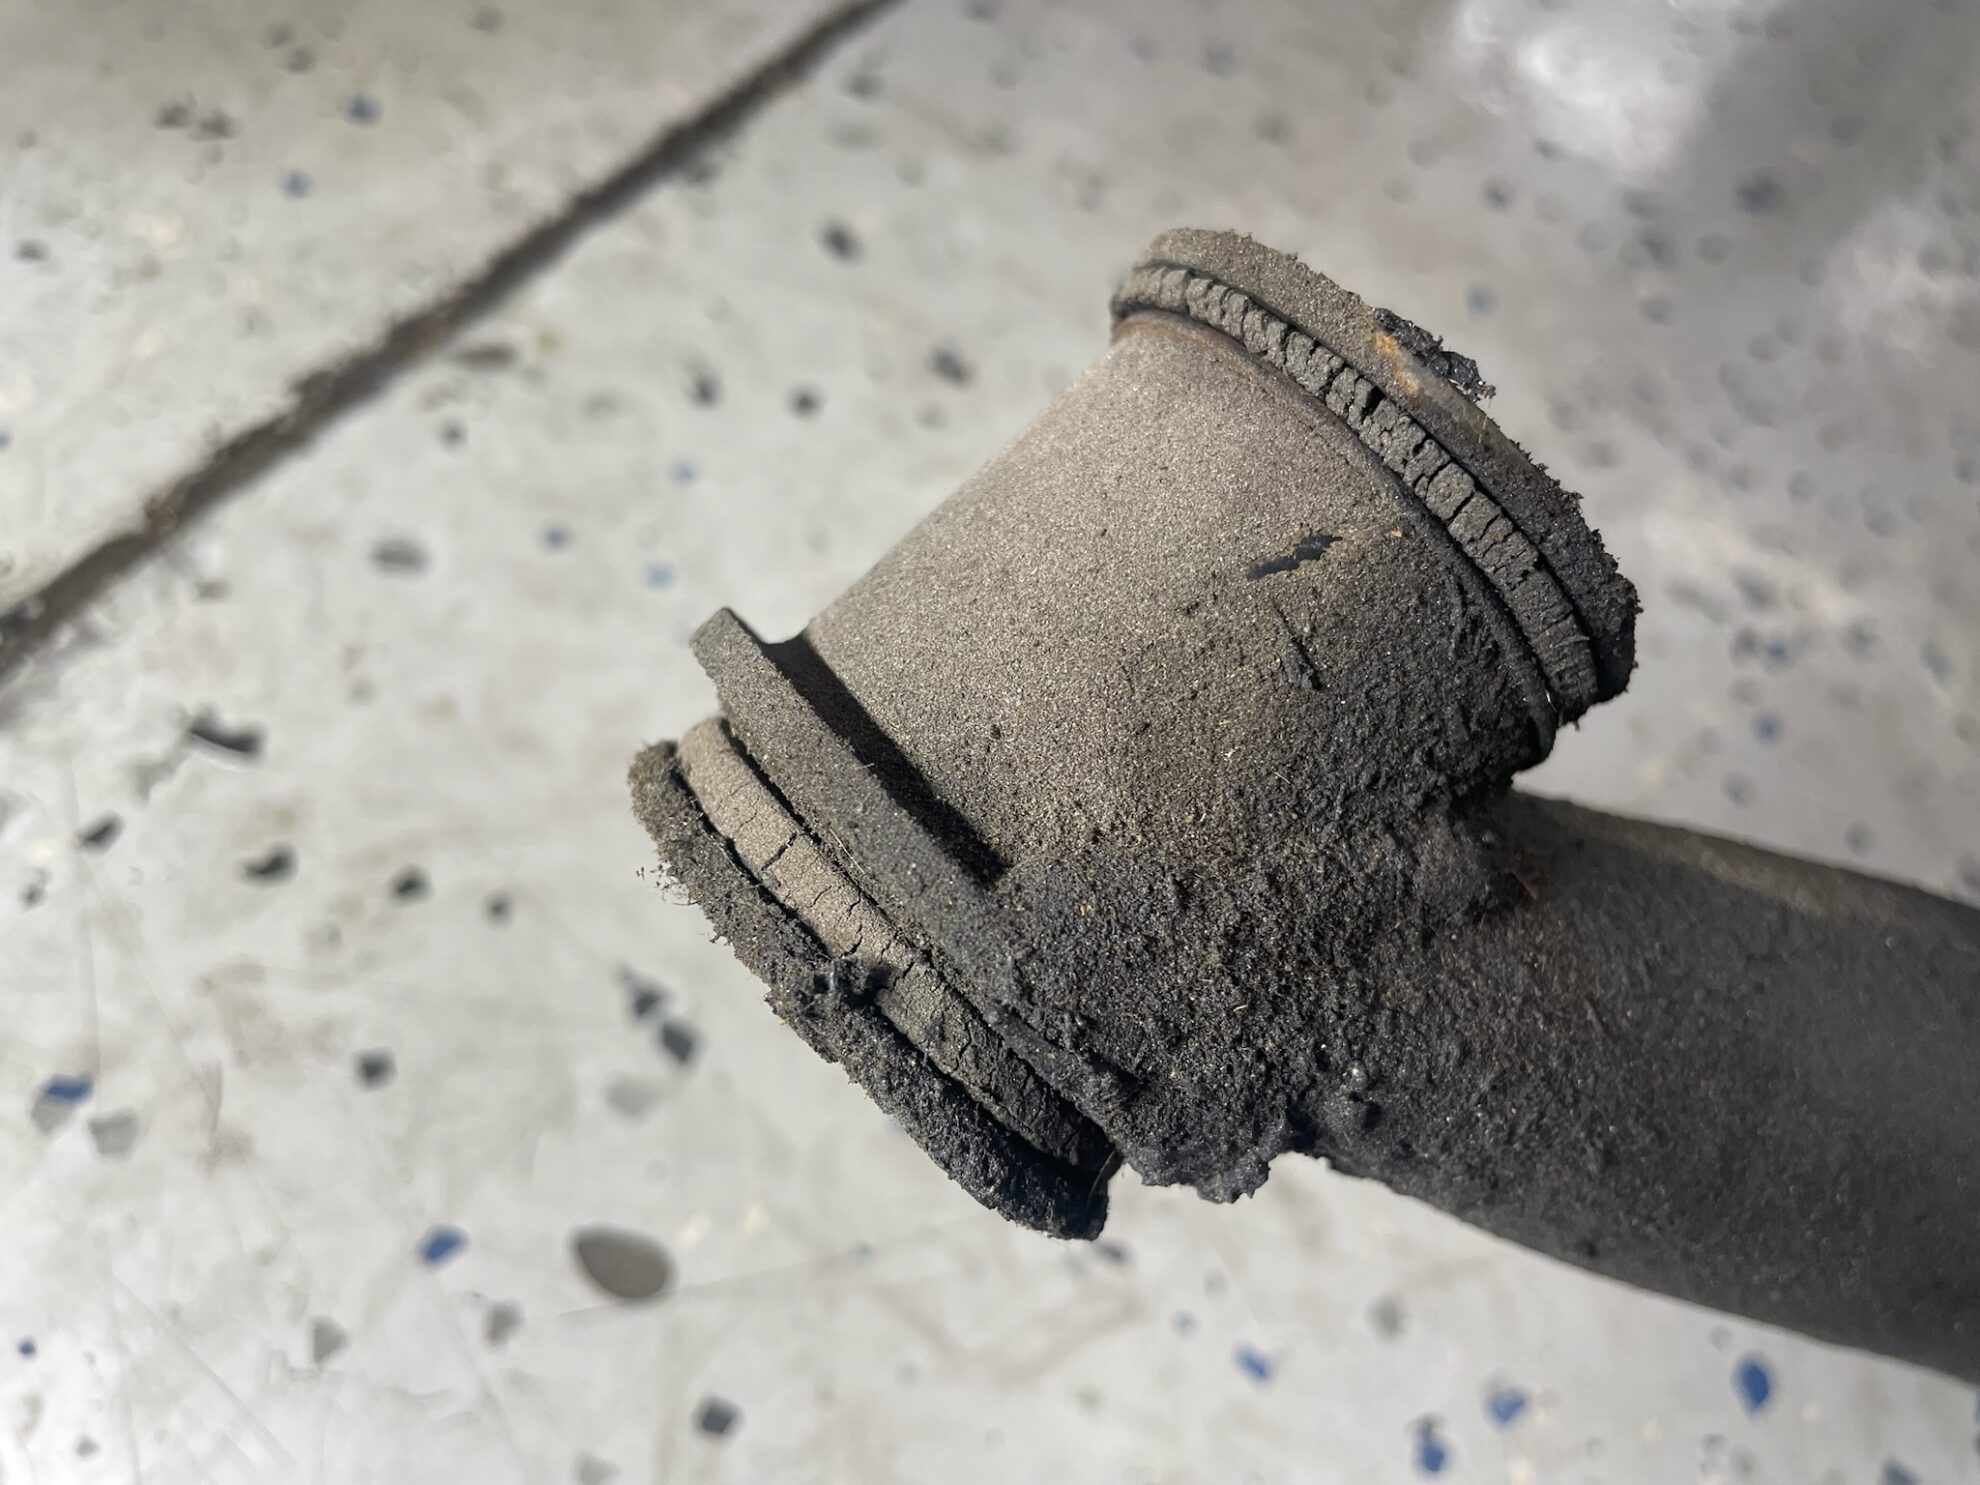
Below, rear control arm bushings. Aged out, cracked, torn, needs to be replaced.
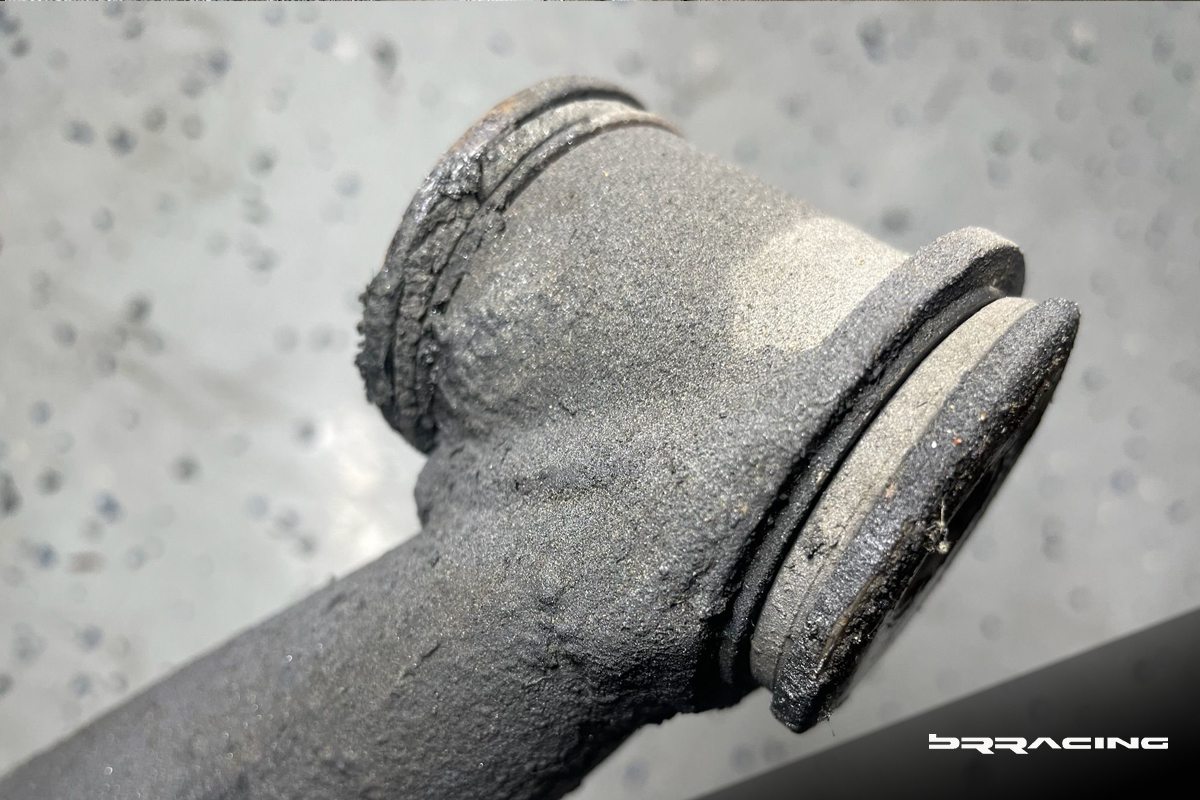
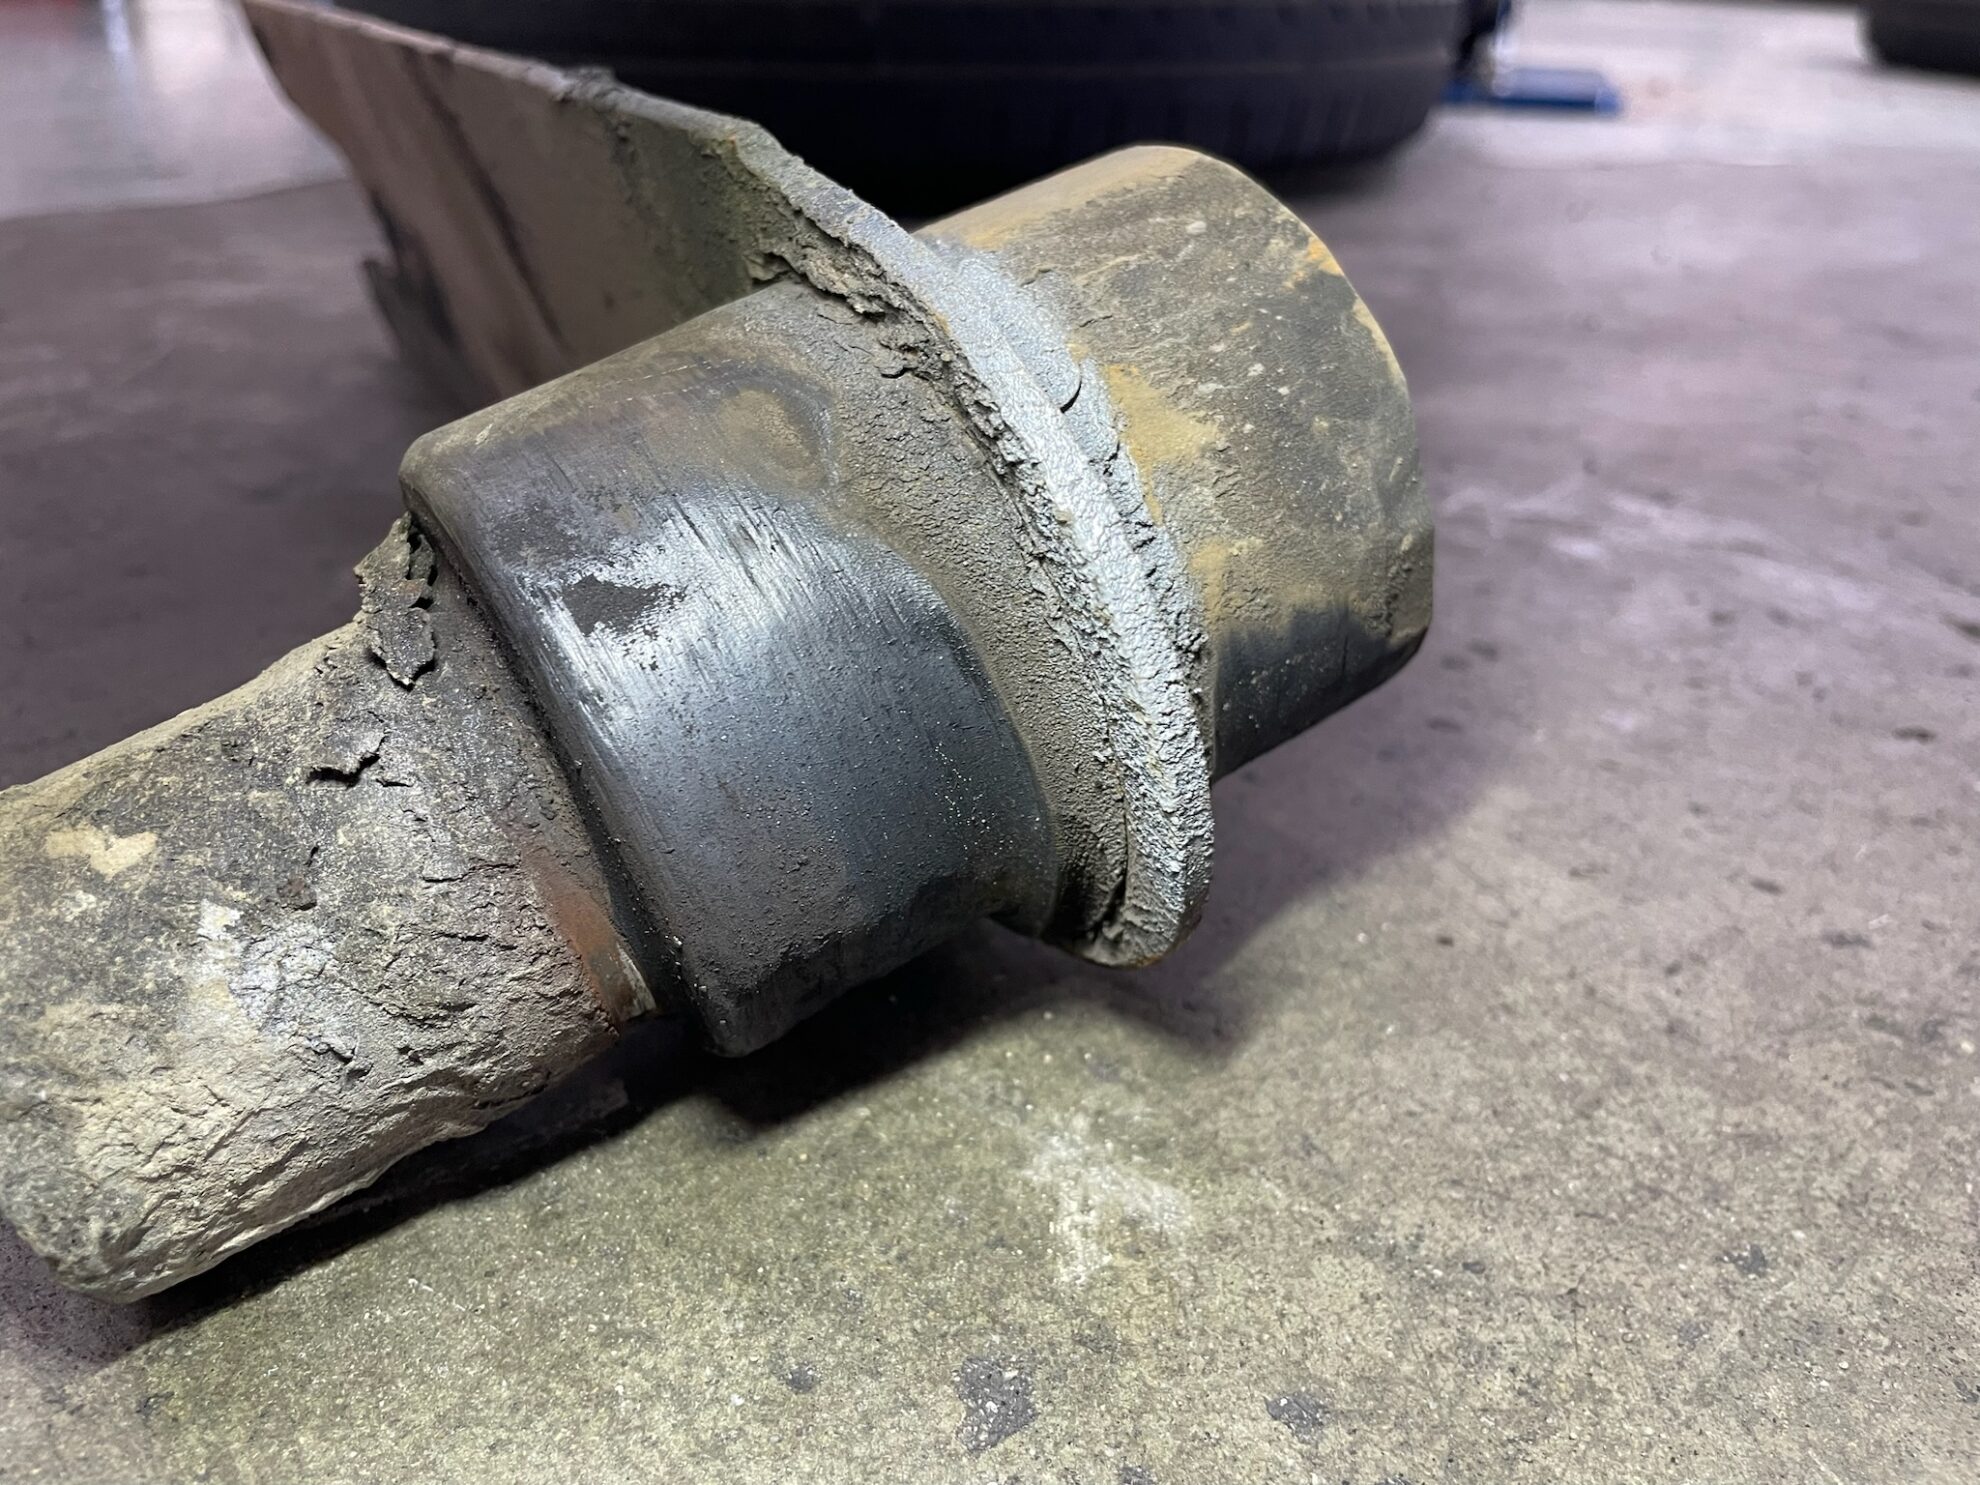
Rear torsion bar bushings seen below. Old, hard, not round, need to be replaced.
So, you now have a pretty good sense that nothing had been done over the ages to the suspension on this car, and it would take a complete refresh to bring it back to life.
Now, recall that this is a street car, being RE-IMAGINED, to bring smiles for miles. But, it is not a race car, or a track car. This is a driver. For the older 911’s, there’s a fundamental decision when reviewing options on the suspension. Do you stay w the stock torsion bar approach, or do you change to something like a full “coil-over” implementation? There are many advantages to the coil-over approach – potentially fully adjustable shocks, selection of spring rates, greater ride height range, potentially greater range of adjustment on alignment. However, there are hidden requirements if the transformation is to be made to go to coil-overs….the front and rear of the car are not designed to absorb the forces that will now be exerted by the coil-over system. To do this right, the front upper strut area needs to be reinforced and upgraded, along w the rear upper shock tower area. This means full body alteration. On the other hand, the torsion bar approach is simple, light weight, offers a range of torsion bar “spring” rates, and offers lots of choices. For this project and customer, we elected to stay w the torsion bar approach and implementation, but virtually every part needed to be fully refreshed, all bushings replaced, all mounts / carriers assessed for re-use or replacement.
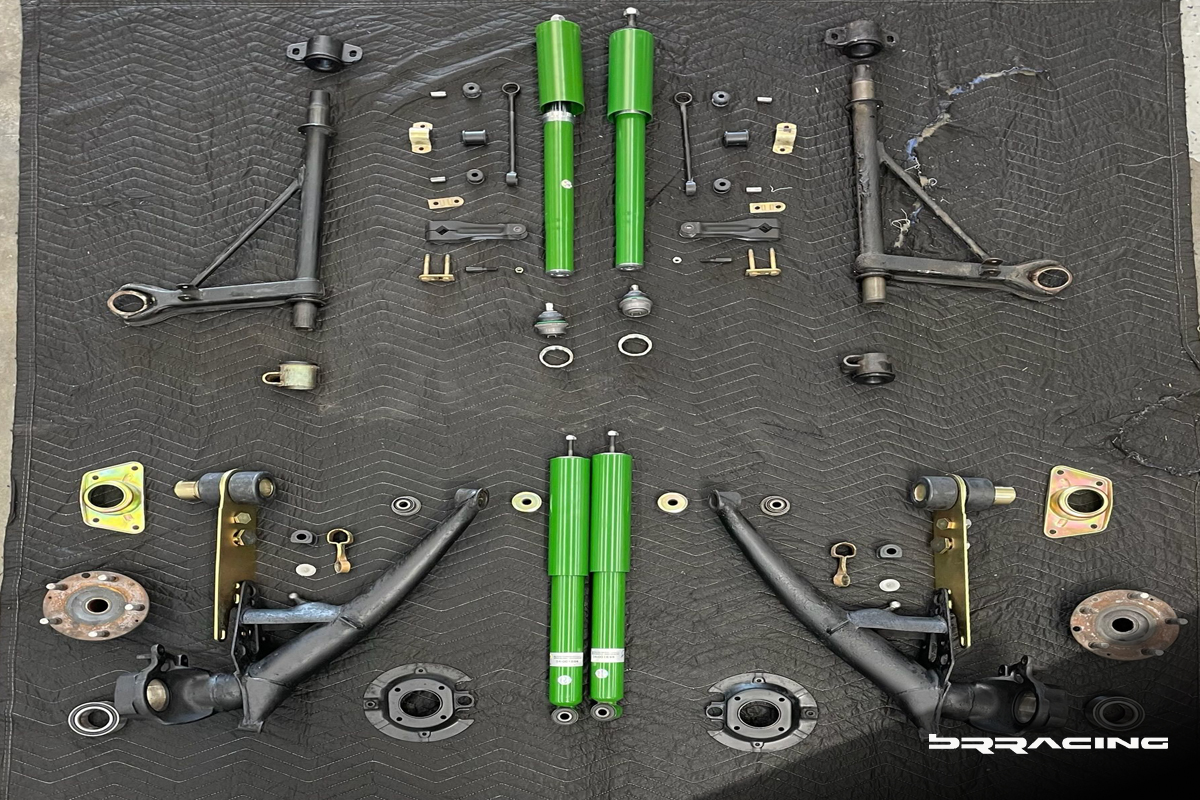
Here is the sum of the parts that we implemented for this project –
Everything got fully cleaned, vapor blasted to assess it’s state. The two main pieces, the front lower control arm and the rear trailing arms were determined as re-usable, same with the front spindle’s, and the rear uprights. But, all other pieces would get replaced. The older 911’s used Bilstein or Boge shocks. Here we moved the peg one step forward, choosing Bilstein B6 shocks over the slightly softer, OEM, Bilstein B4’s. Lots of options too for the control arm bushings – stock (rubber), poly-bronze, or full monoball. We would think about full monoball if this were a race car or track car, but it is not. We want to improve the feedback and crispness of the suspension, but we don’t want to introduce harshness, noise, or vibration.
One area that has indeed over the ages been upgraded, and improved, are the rear spring plates. Again, lots of options here. We choose to upgrade the spring plate, predominantly to improve the adjustability of the rear for alignment (the older 911’s are very sensitive to the ride height (don’t ever lower an older 911, anything from a 993 to older versions too low, or you will quickly be introduced to a truly EVIL handling car).
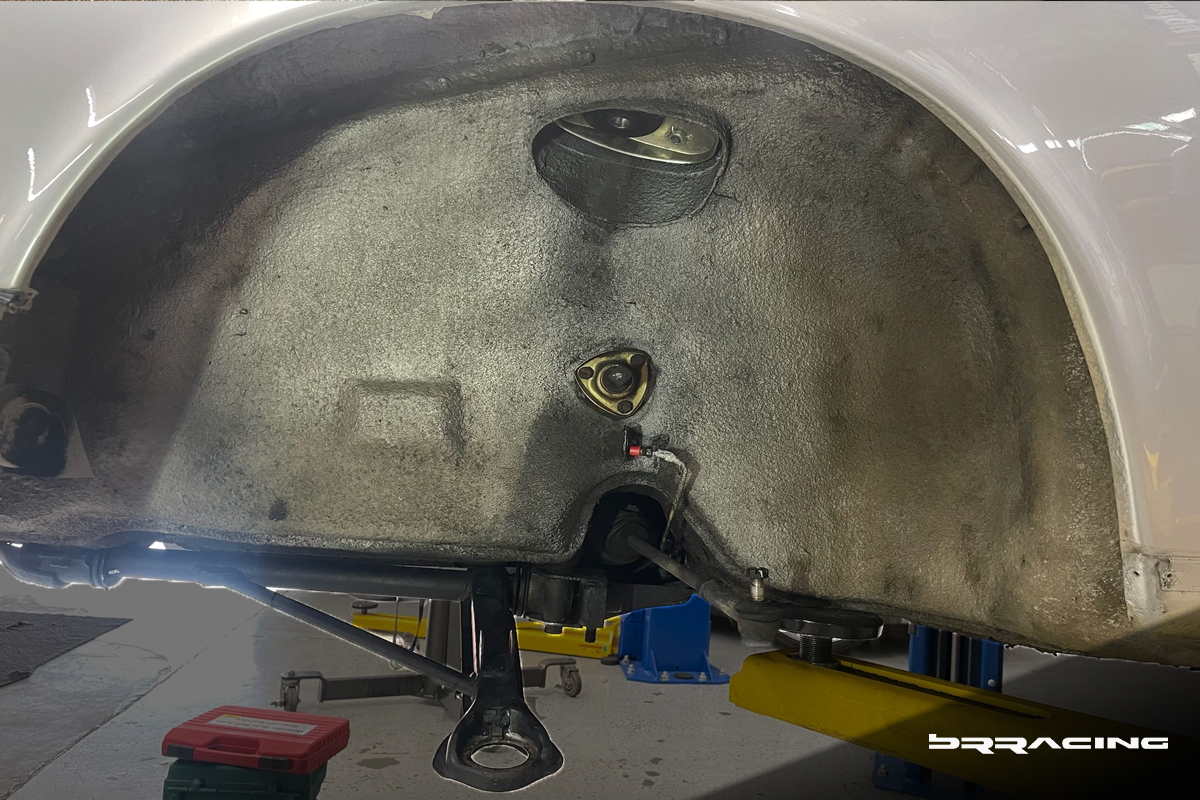
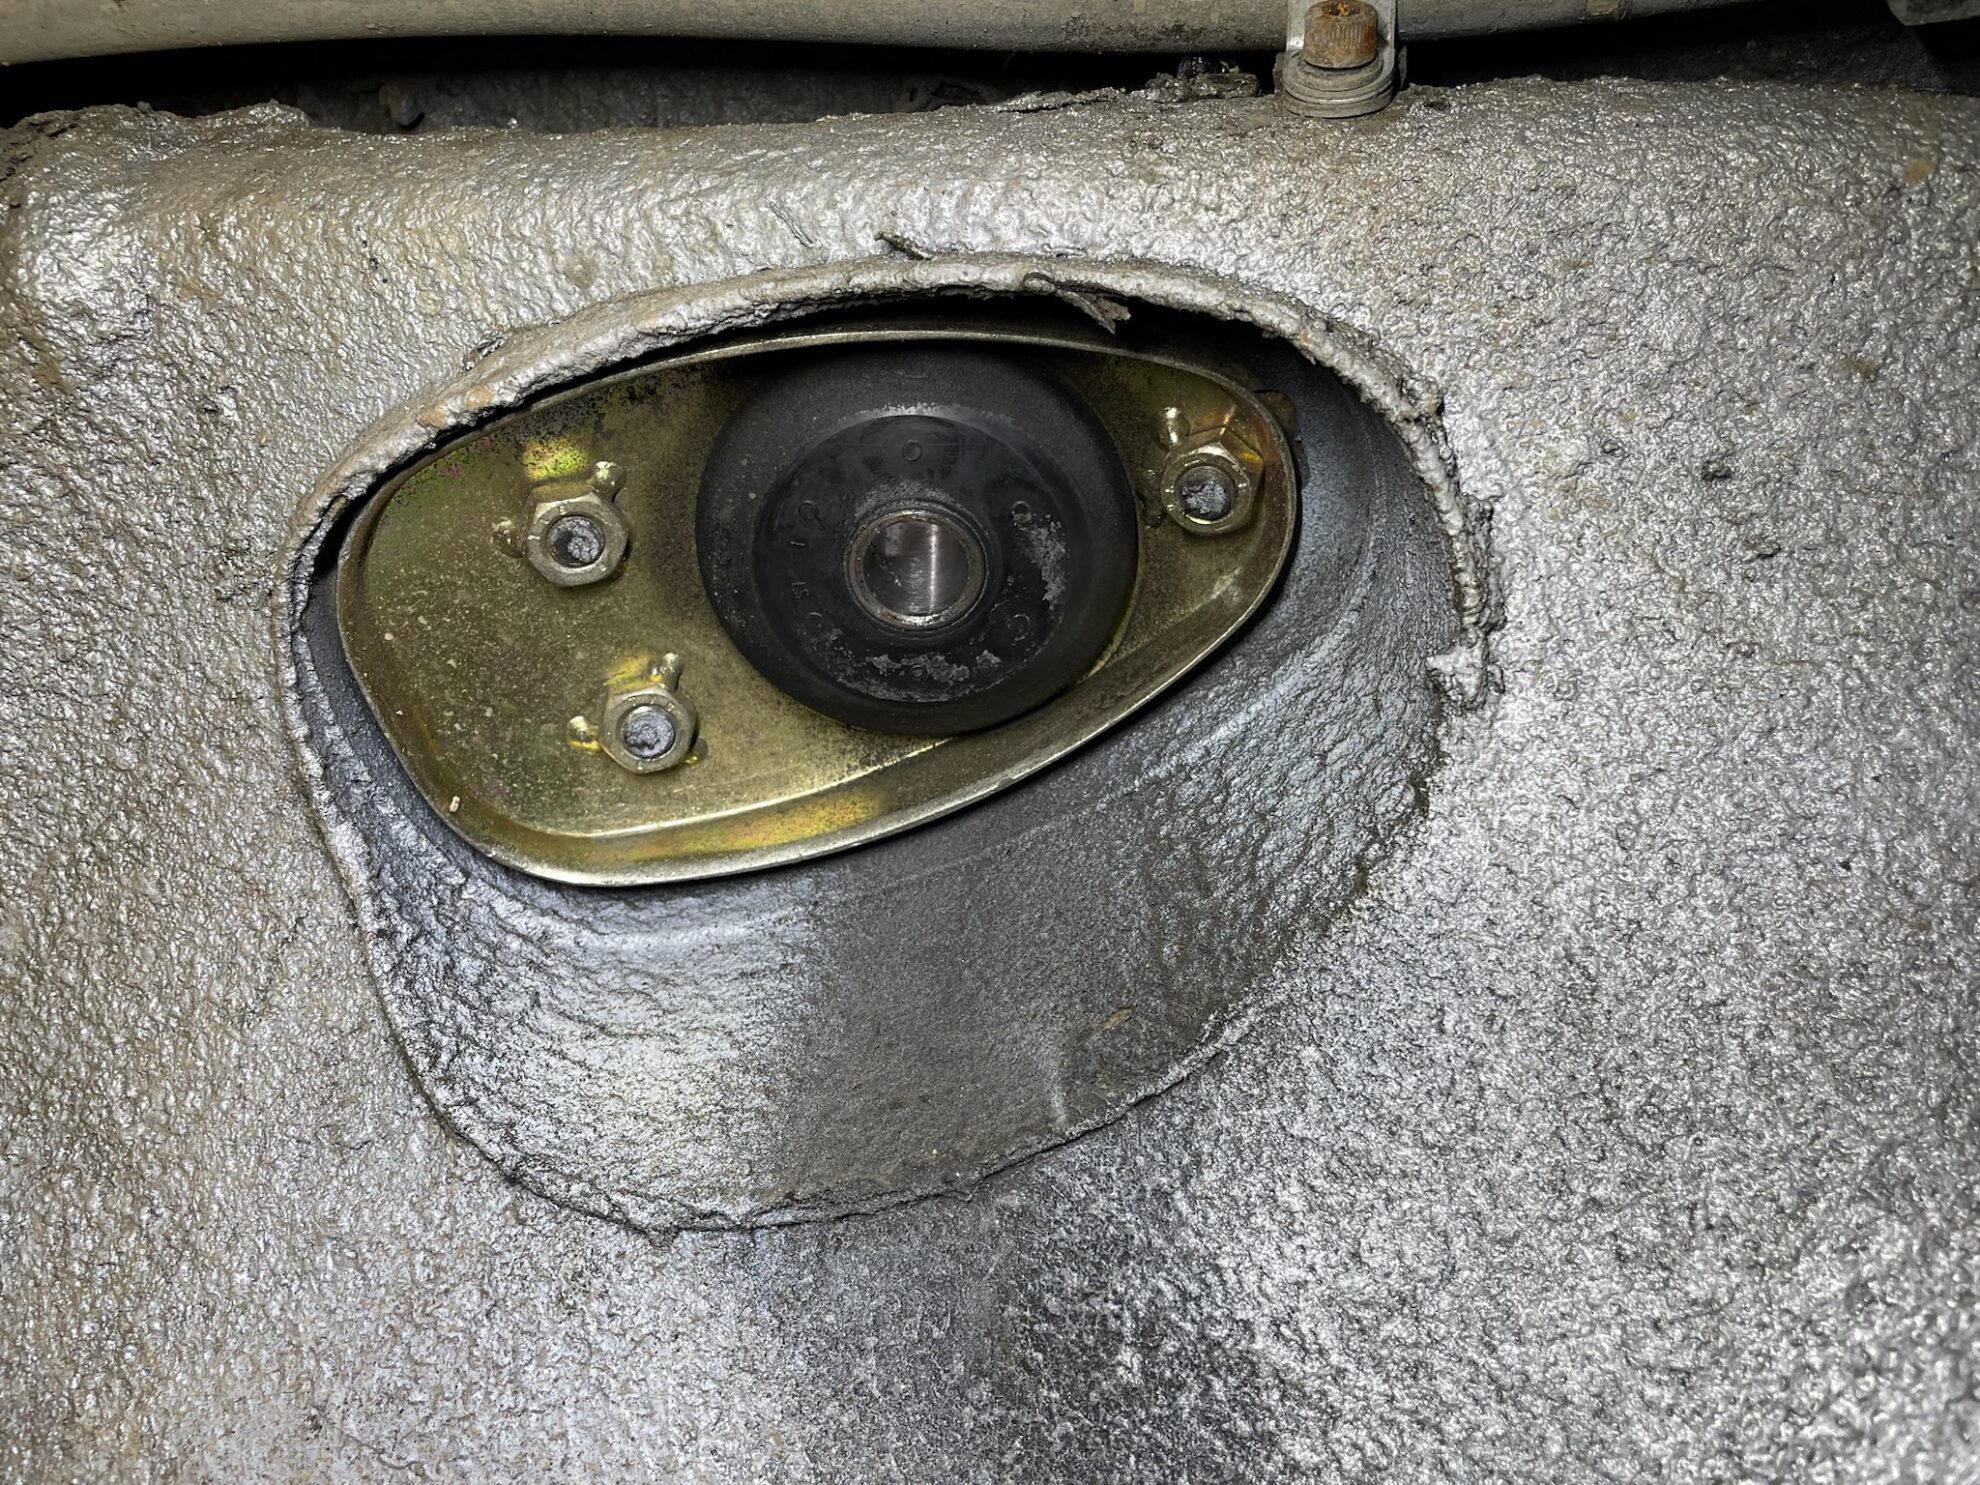
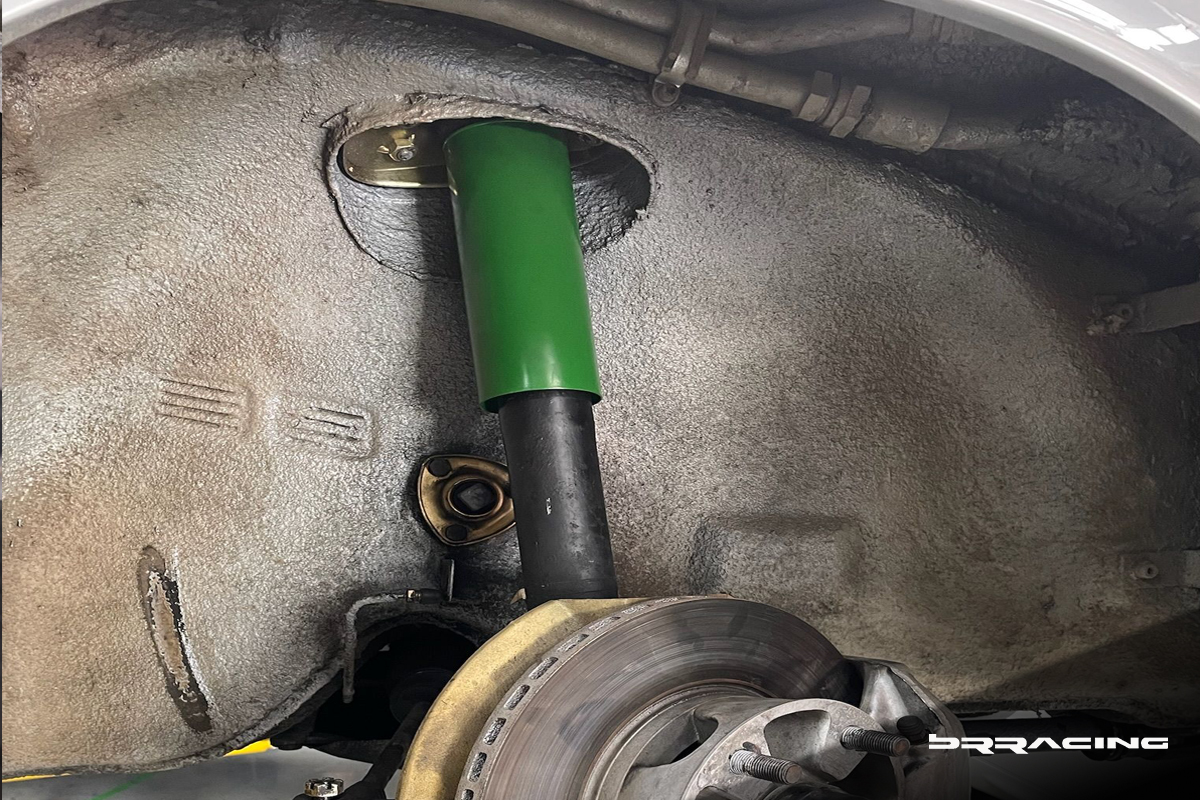
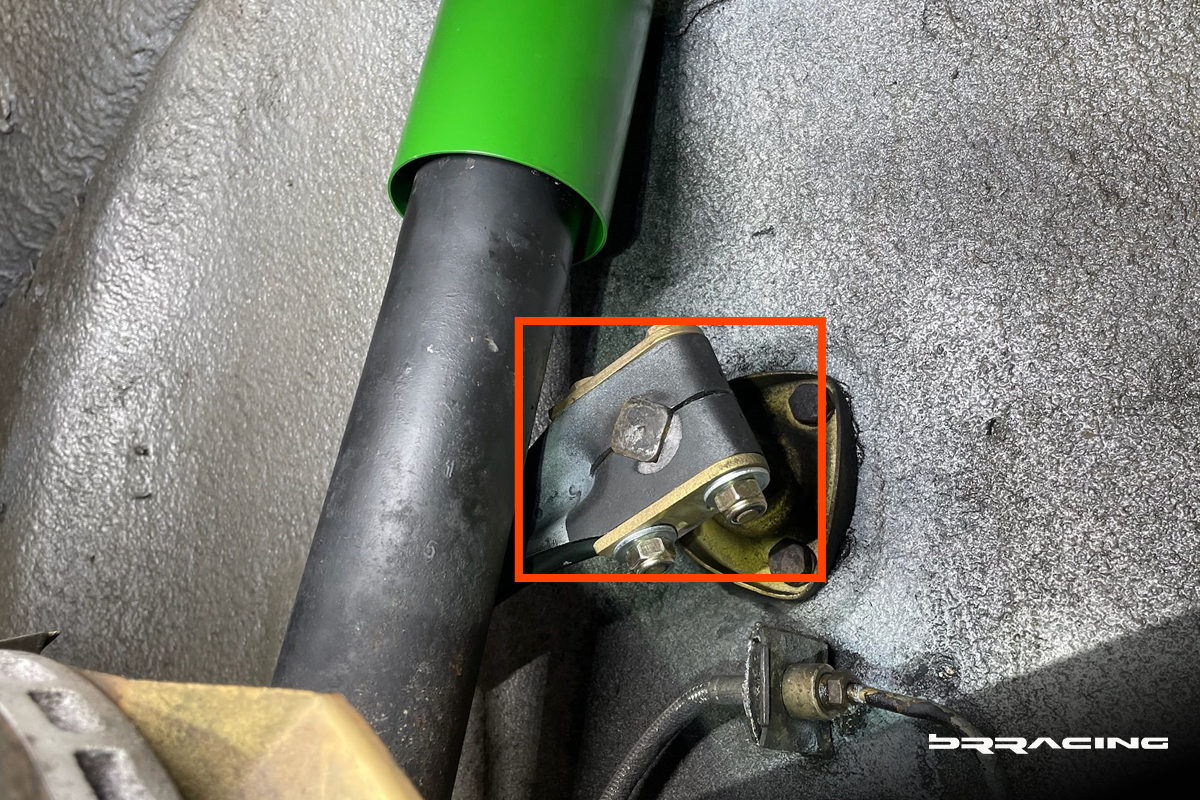
New front upper strut mounts w rubber bushings.
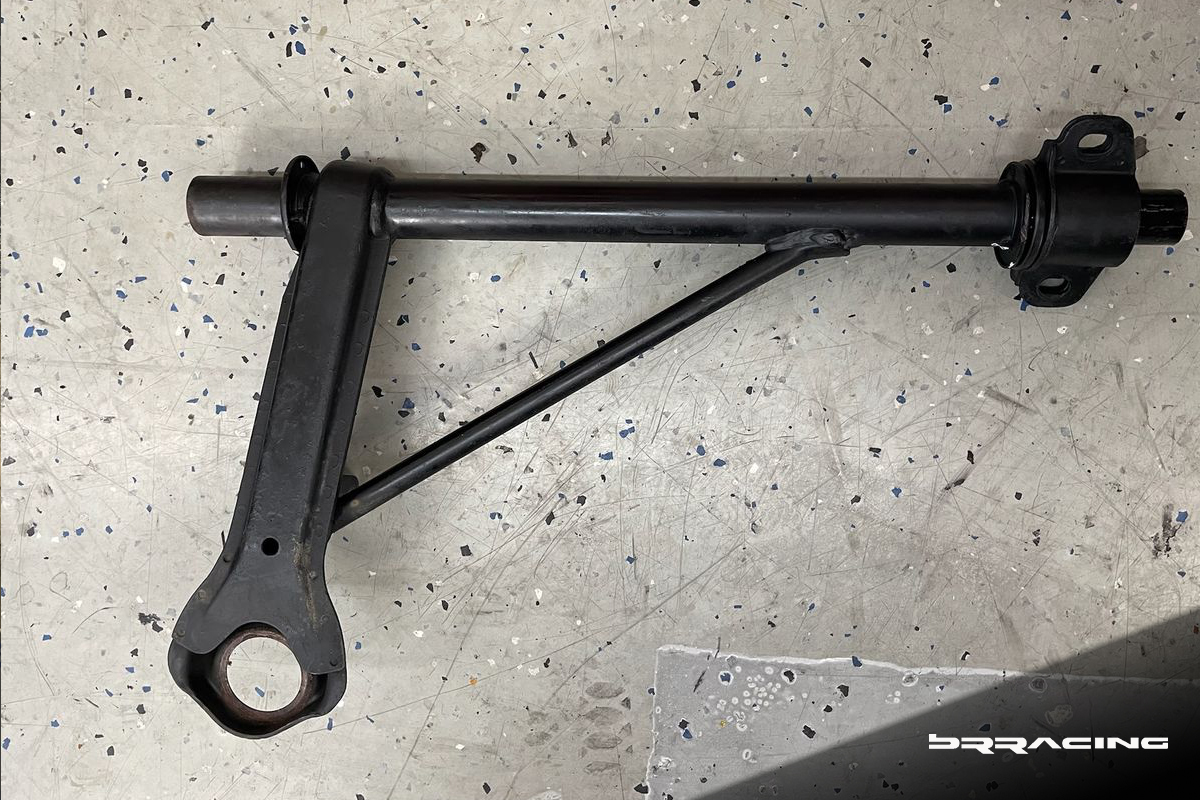
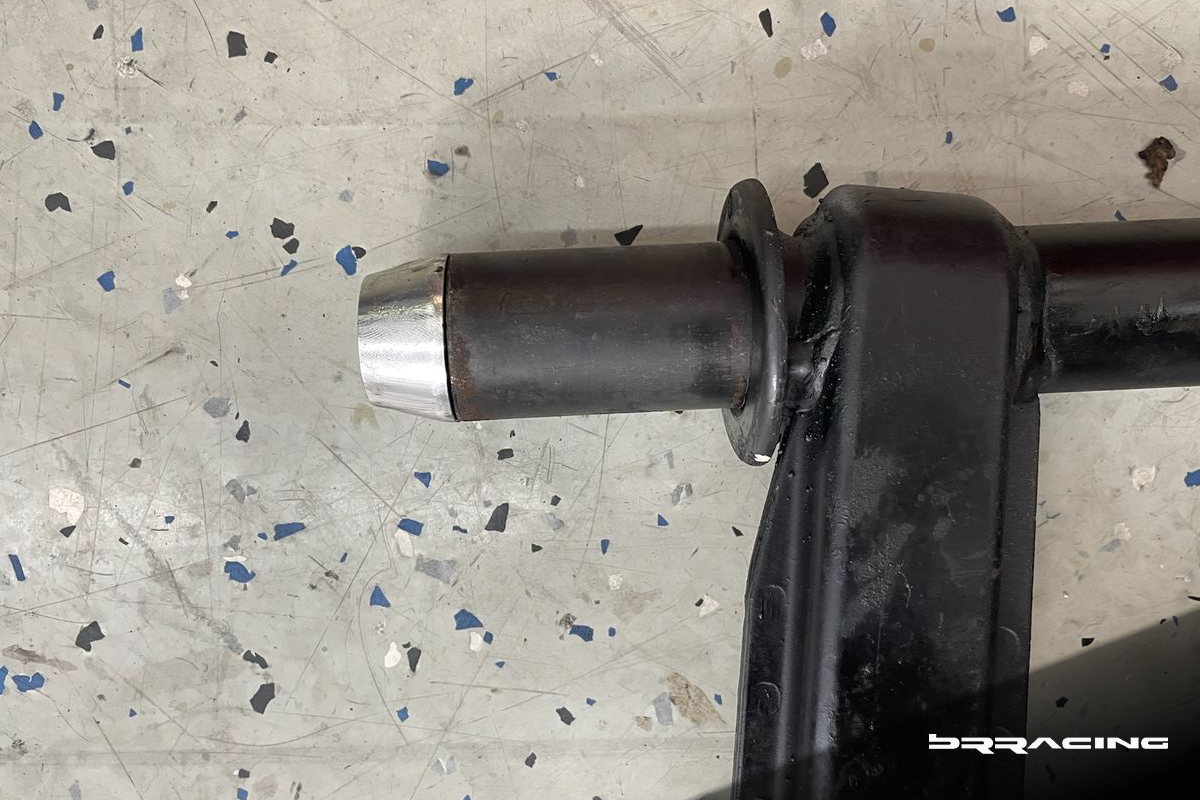
Front, existing lower control arm, with outer rear bushing removed. Several choices here, but we choose to go w the Elephant Racing “poly bronze” versions. Improves responsiveness, feeling, but without premature wear from street abuse.
Elephant Racing “Poly-Bronze” front inner control arm bushings. Seen below.
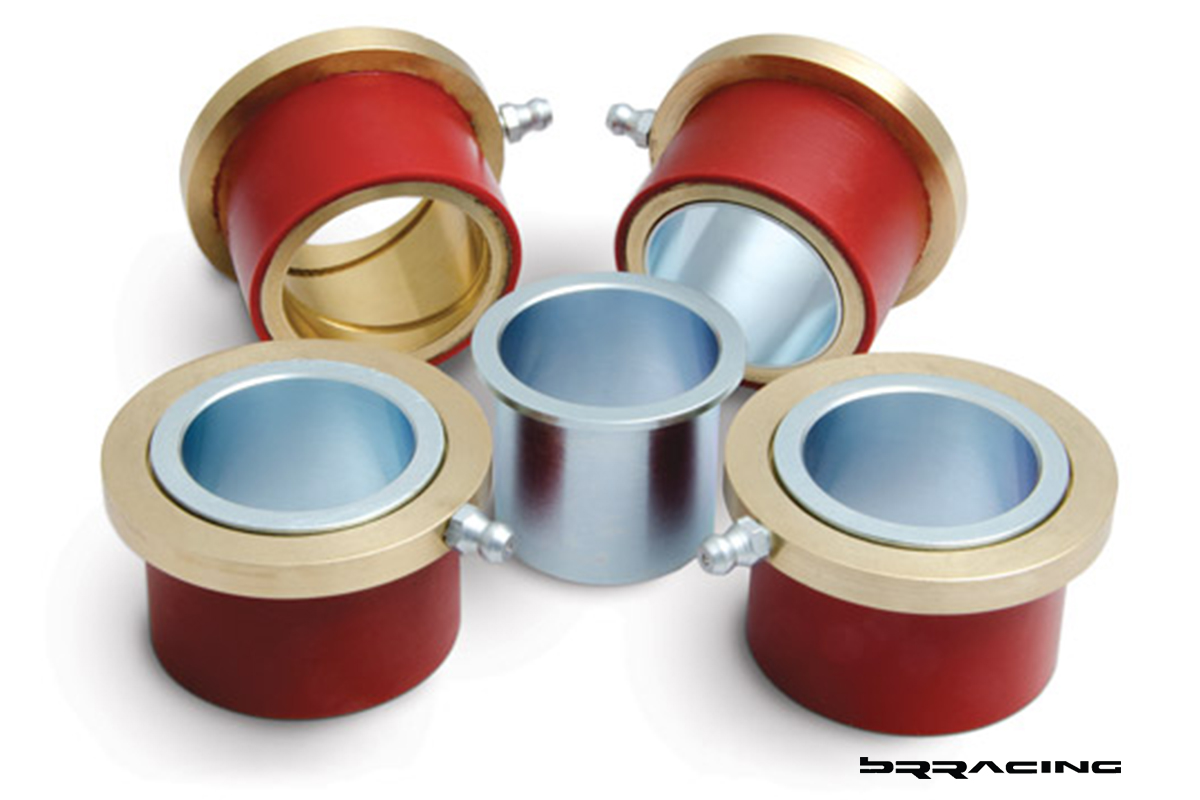
New front “poly-bronze” lower control arm bushings, where you can see the grease fittings exposed for future servicing –
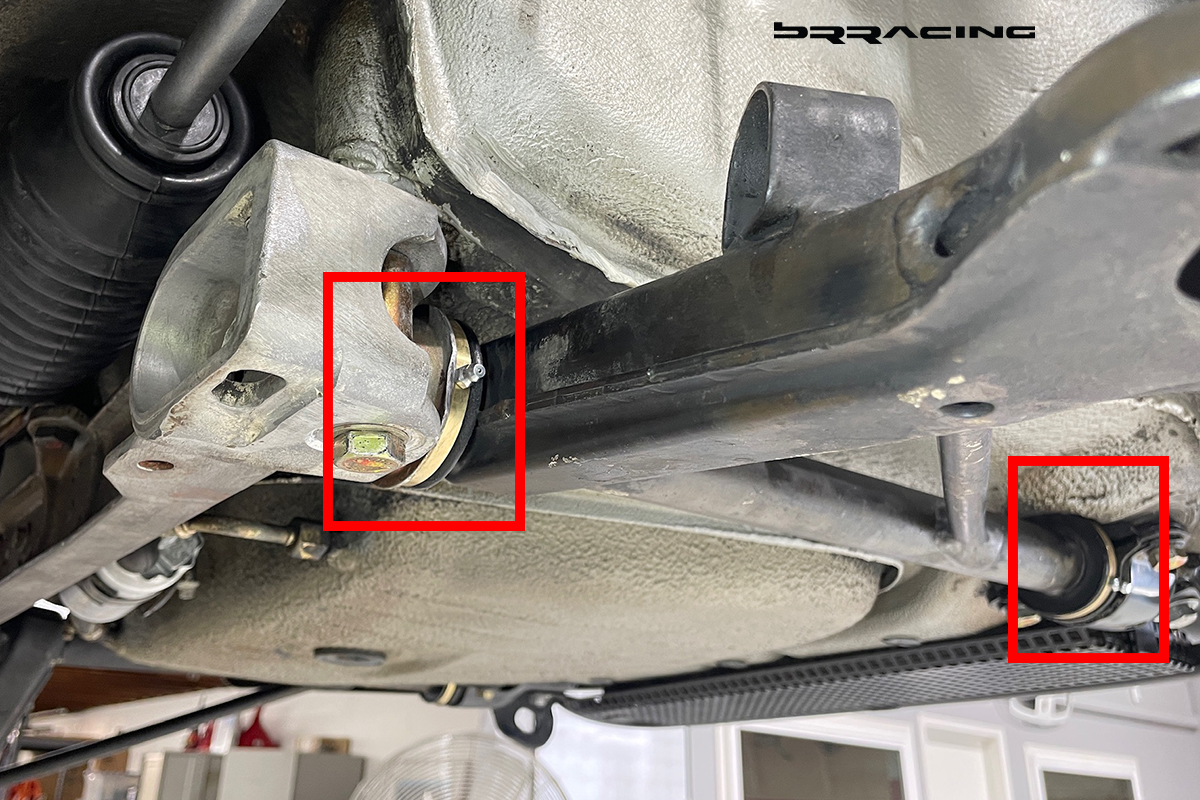
Front sway bar mount, bushings after replacement.
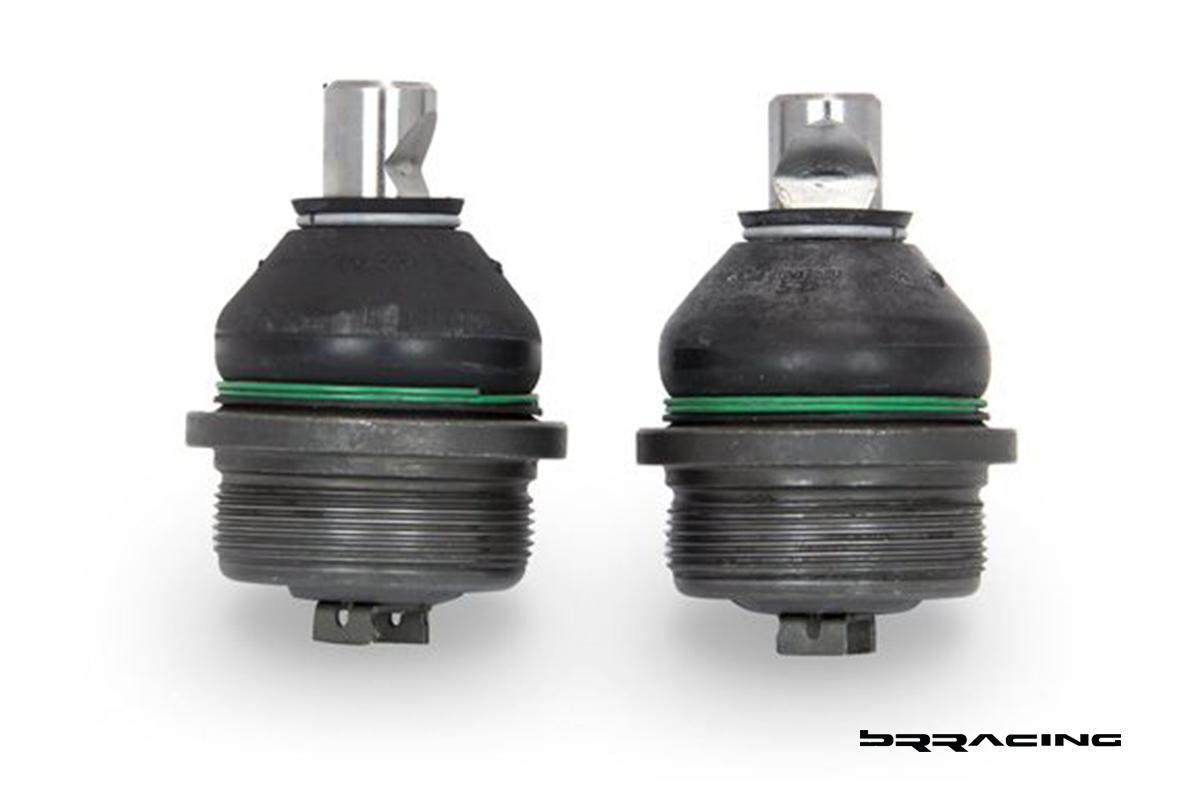
With the refresh of the front lower control arms, that also provided the right moment to refresh / replace the front outer ball joints. Two options here, if this were a track car, then we could choose “offset” ball joints to provide more negative camber. But, this is not a track car, so we elected to stay w the stock type front outer ball joints (good news, easily replaceable)
Now, on to the rear suspension. Torsion bar, spring plate, rear control arm, sway bar, sway bar end links. This project was not a “restore”, but “refresh” and “imagine”, so this theme carried us in each step of the evaluation and assessment. If it could really be “refreshed”….like the existing main rear control arm, then it would be thoroughly cleaned, vapor blasted, and bushings replaced, and be as good or better in some cases than new.
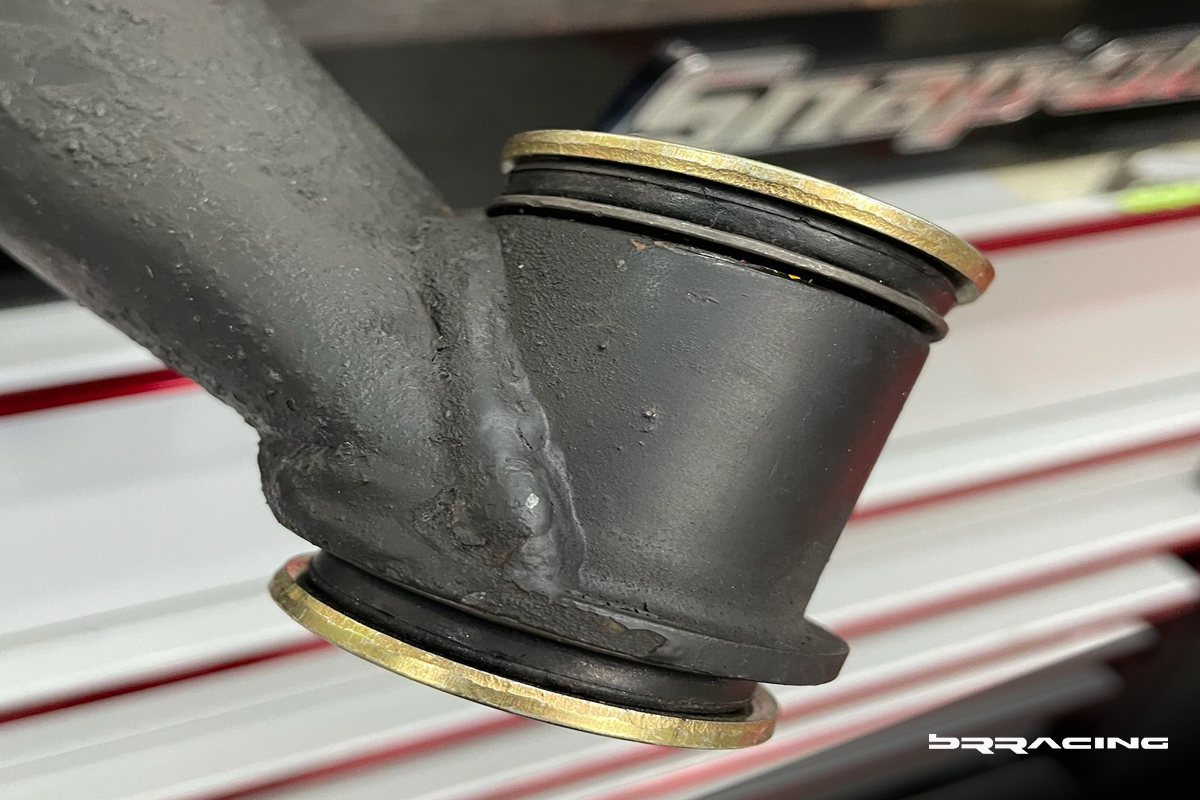
The big opportunity on the rear suspension was on the rear “spring plate” arm, torsion bar. Many of the pieces here needed attention, and, at the same time, the industry has moved forward and created upgraded, better options than stock. Torsion bar bushings replaced (again, several options) and the torsion bar cover. Spring plate, new, upgraded, and now adjustable (there is a track version as well, that offers a much greater range of adjustment, but this is not a track car, so that was not chosen).
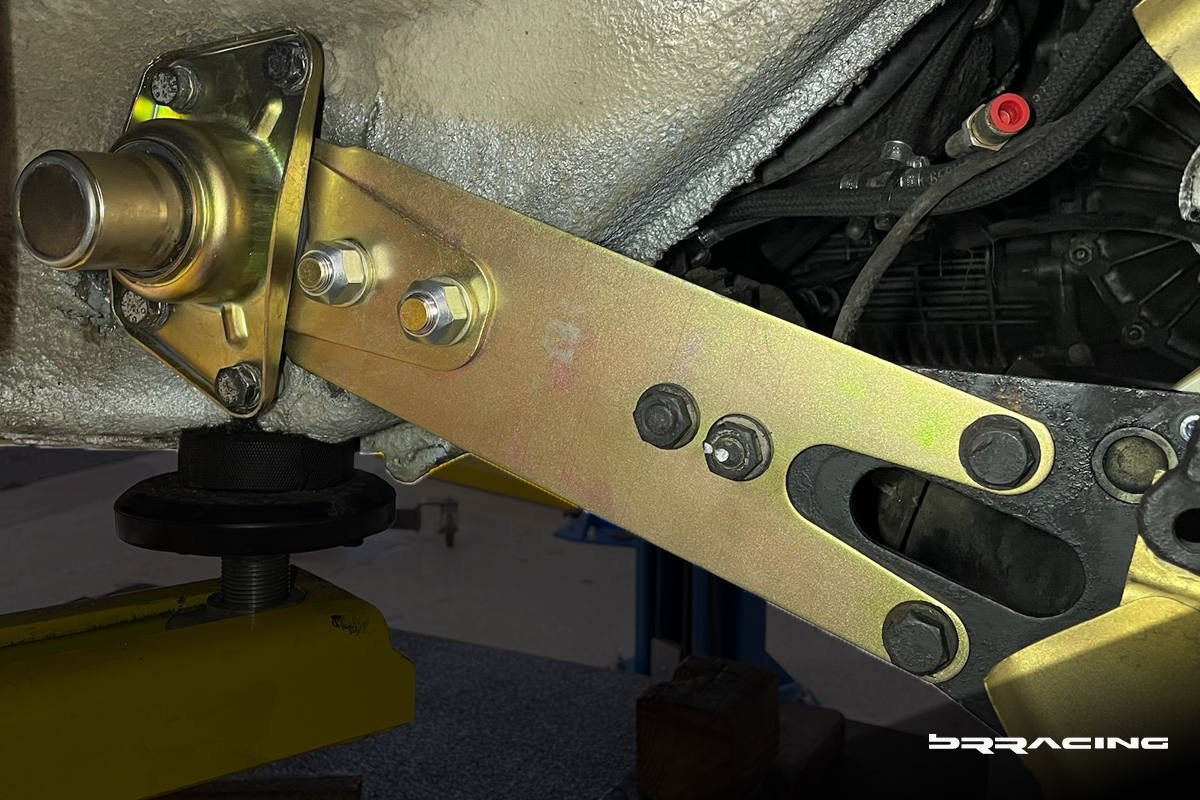
A view of the backside of the new spring plate showing the adjustment slots (rear camber, toe).
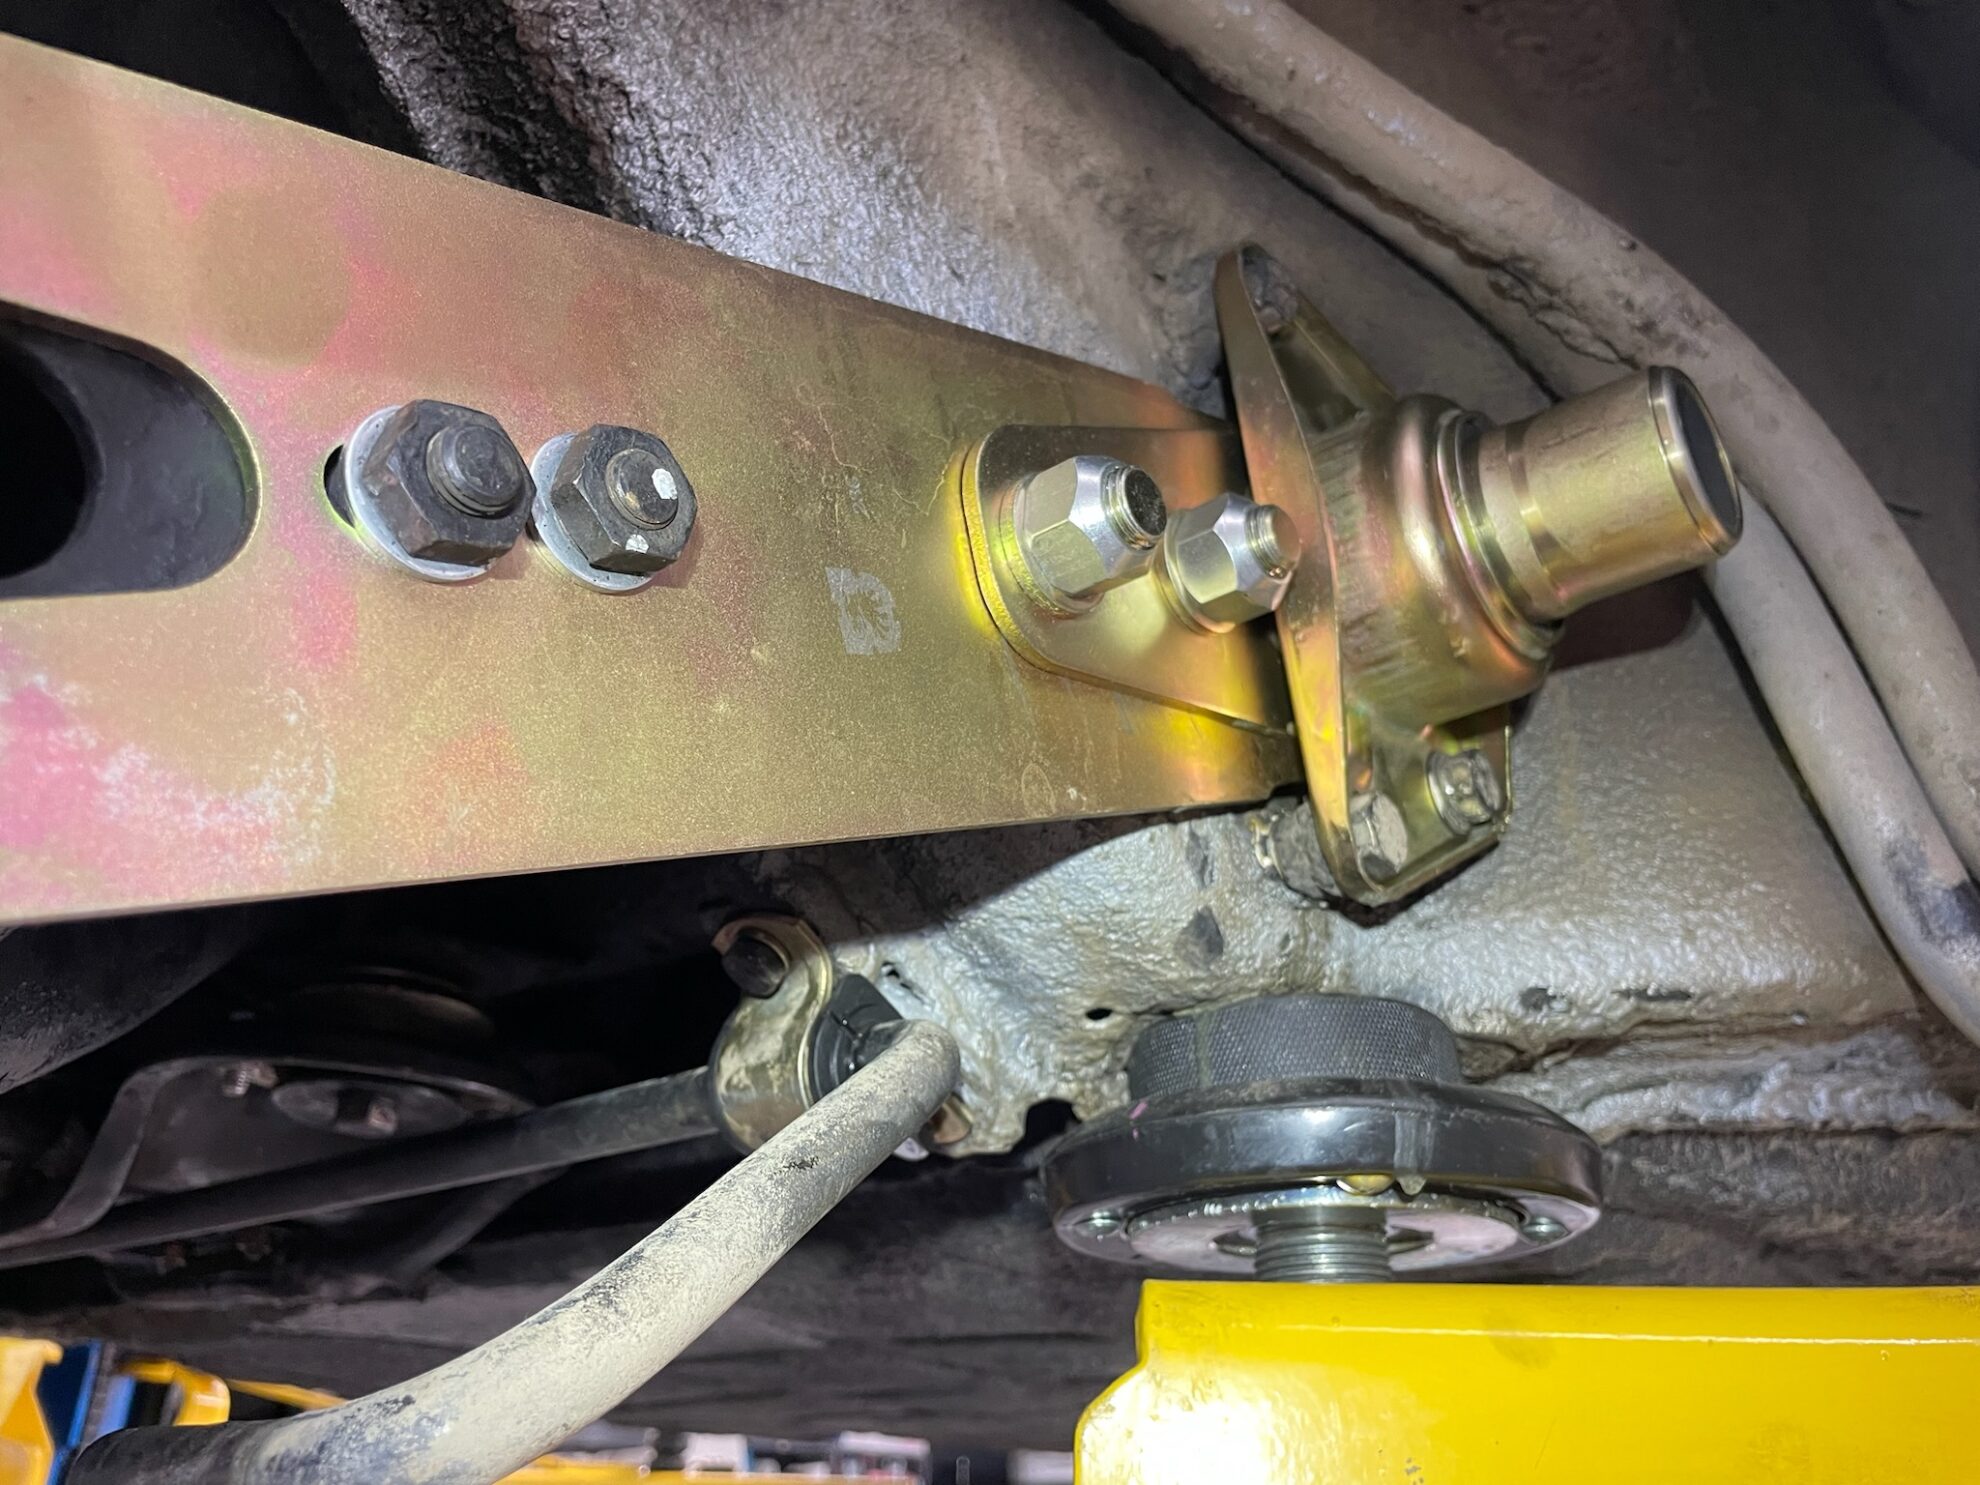
Rear Sway Bar, End Links, Bushings
The rear sway bar itself was just fine, but the bushings, end links, and mounts all needed to be replaced.
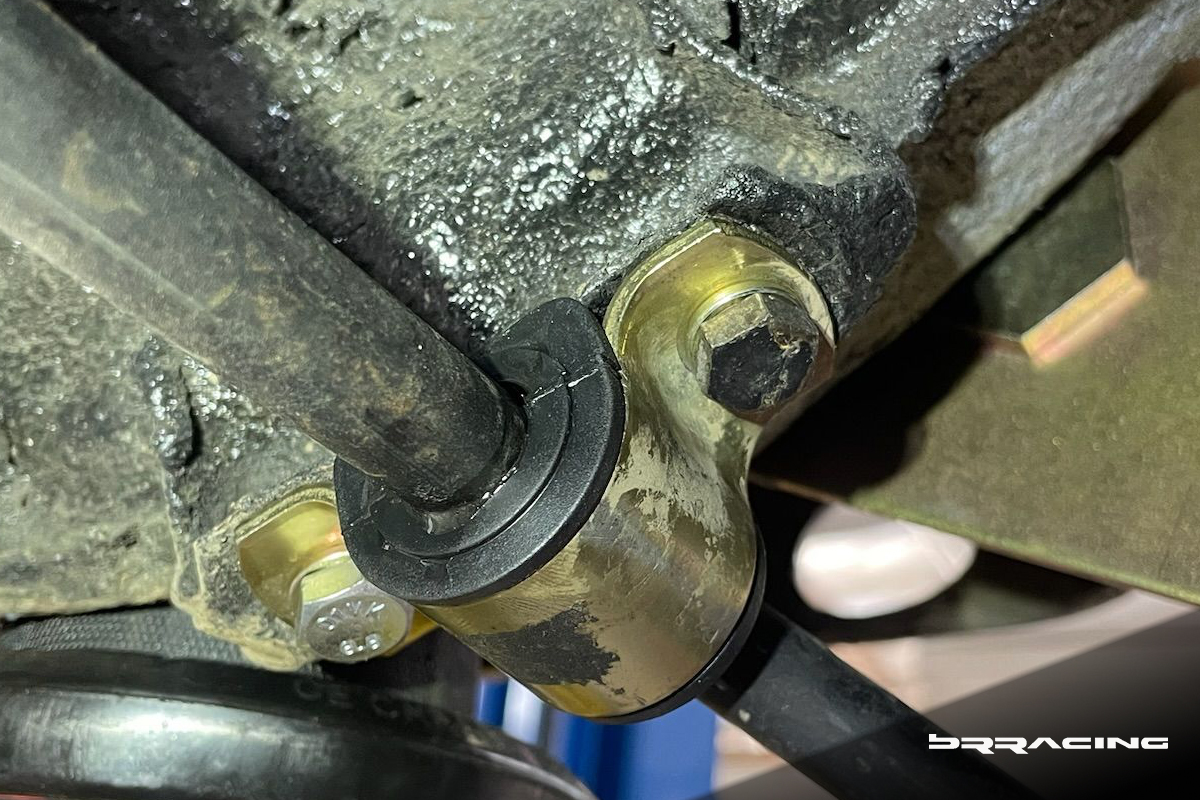
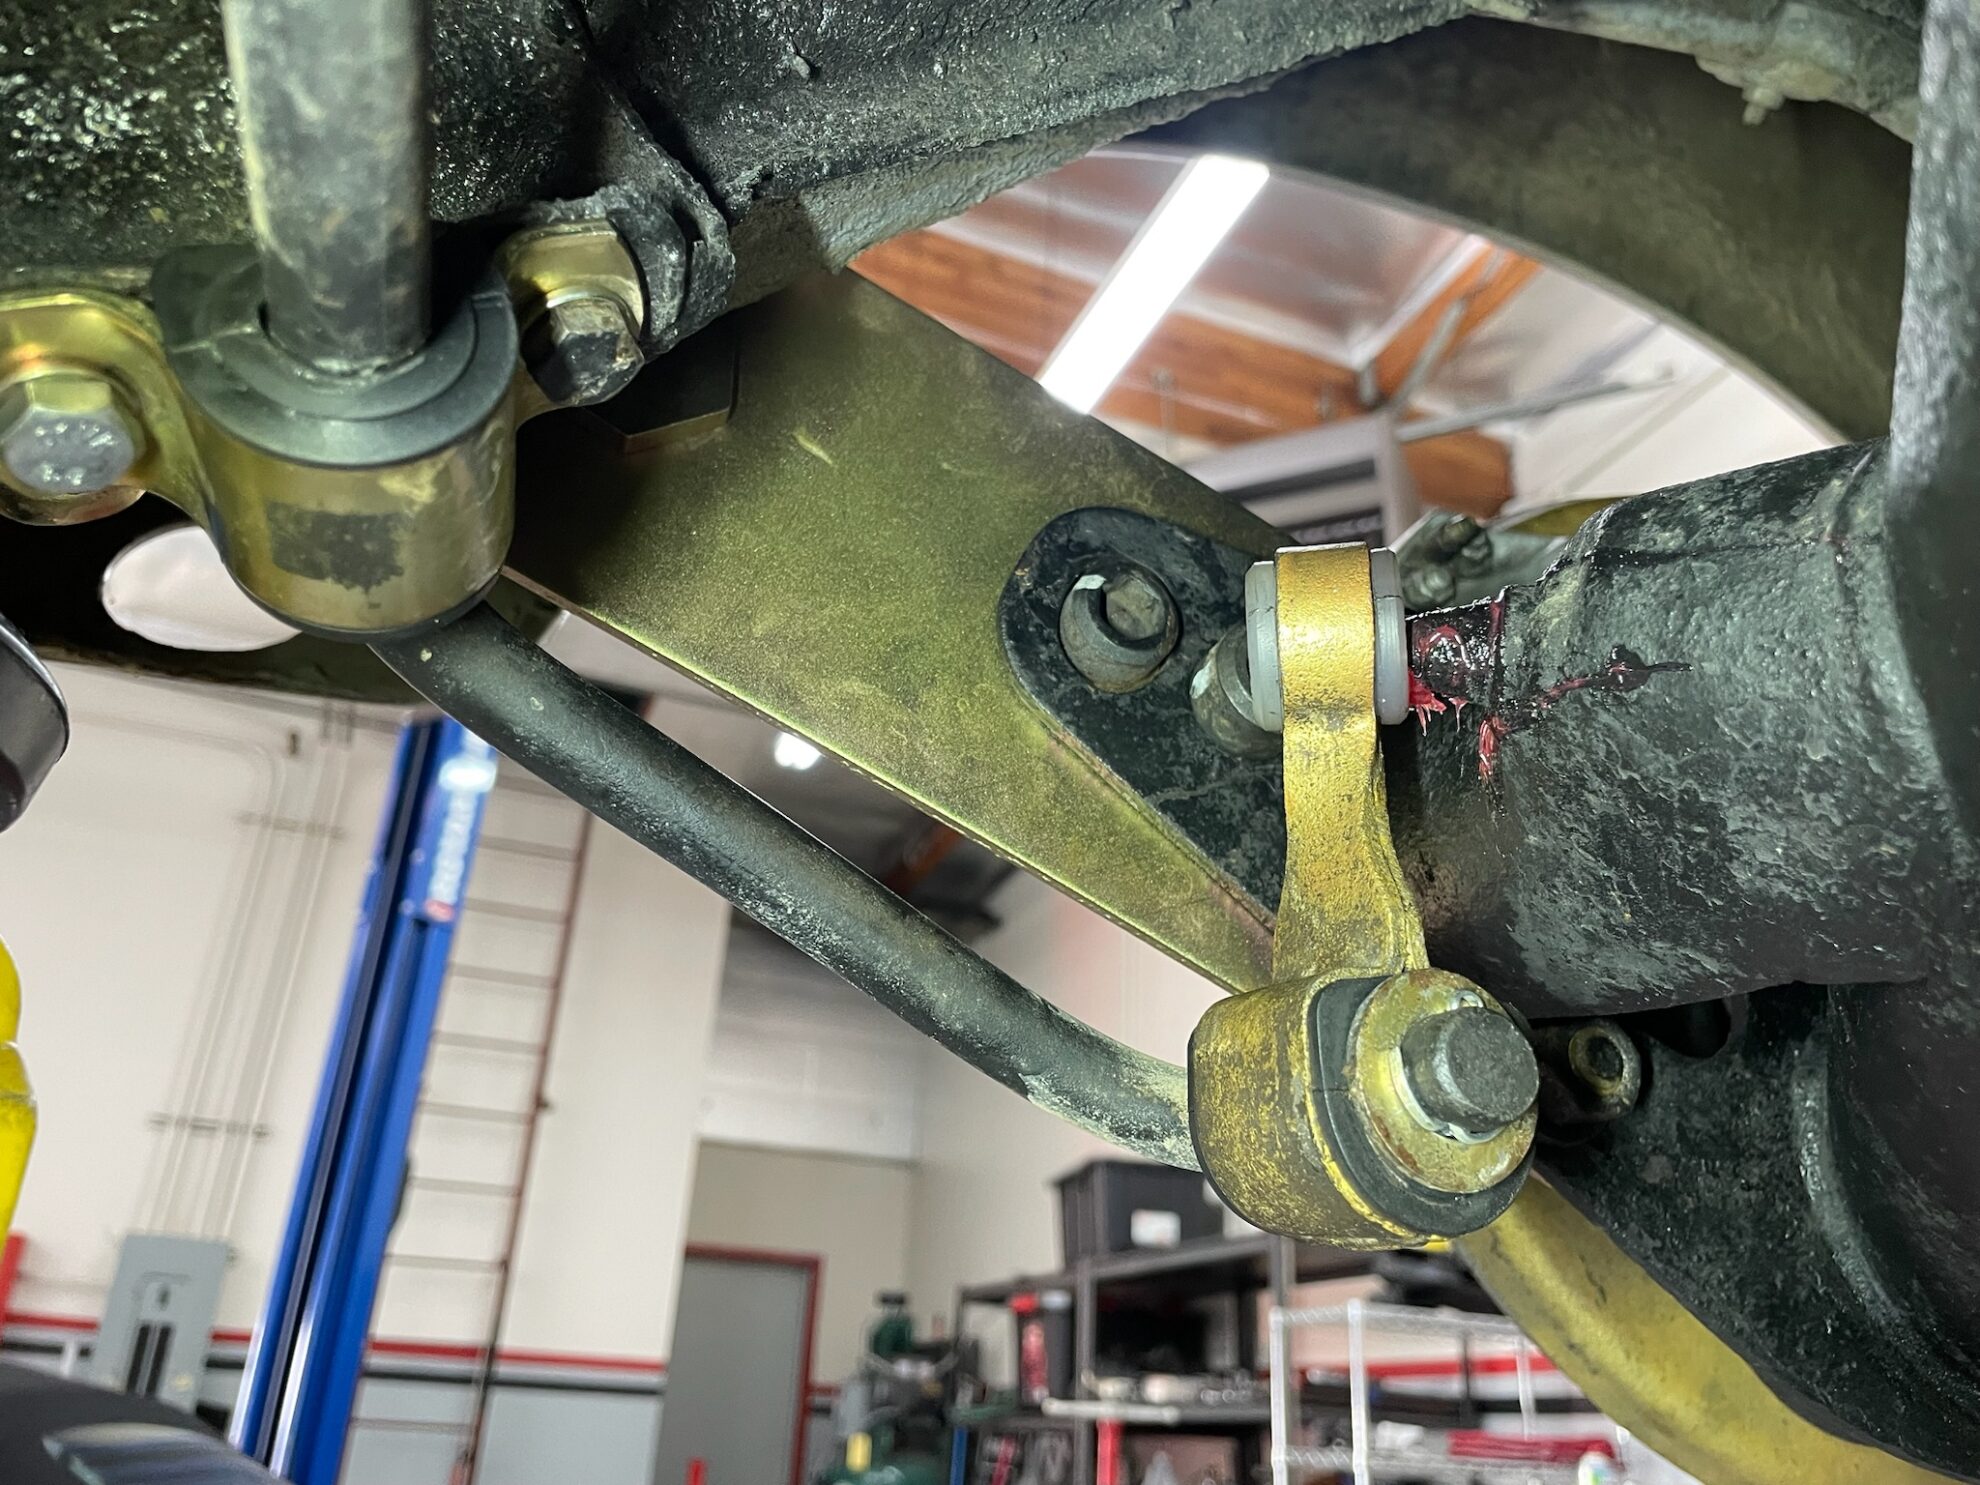
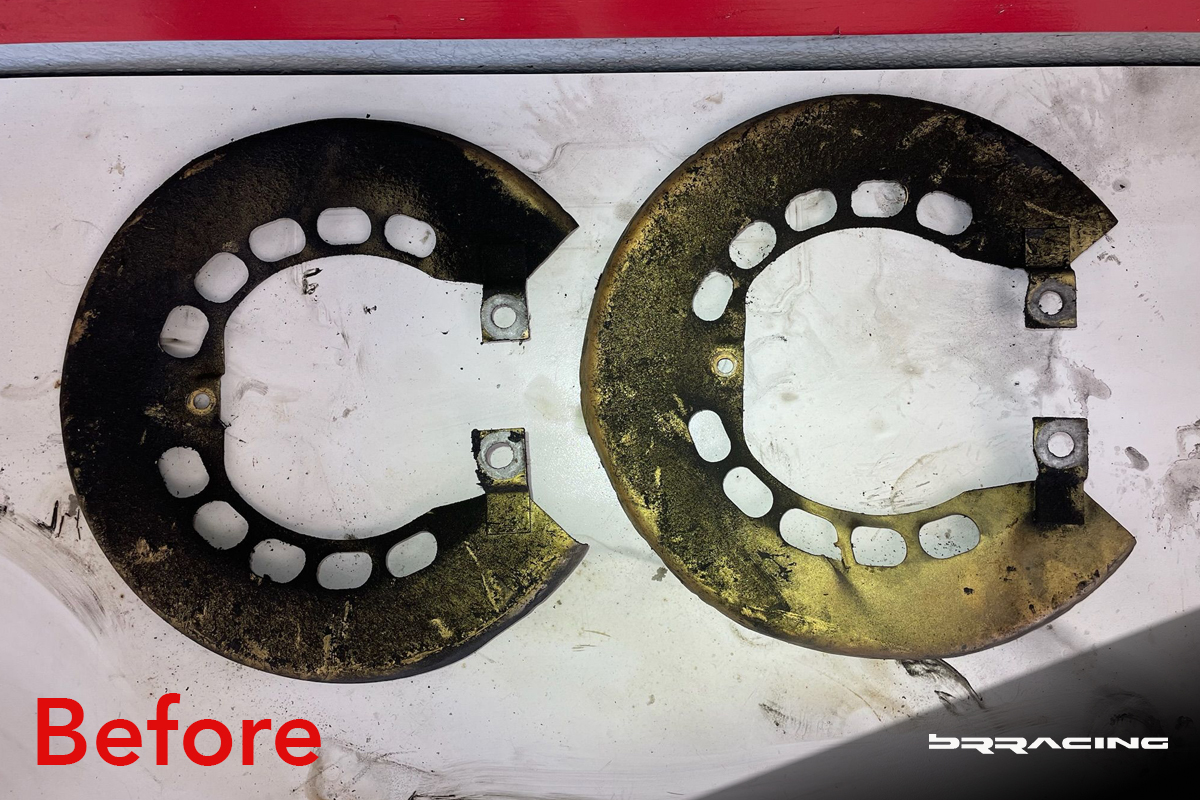
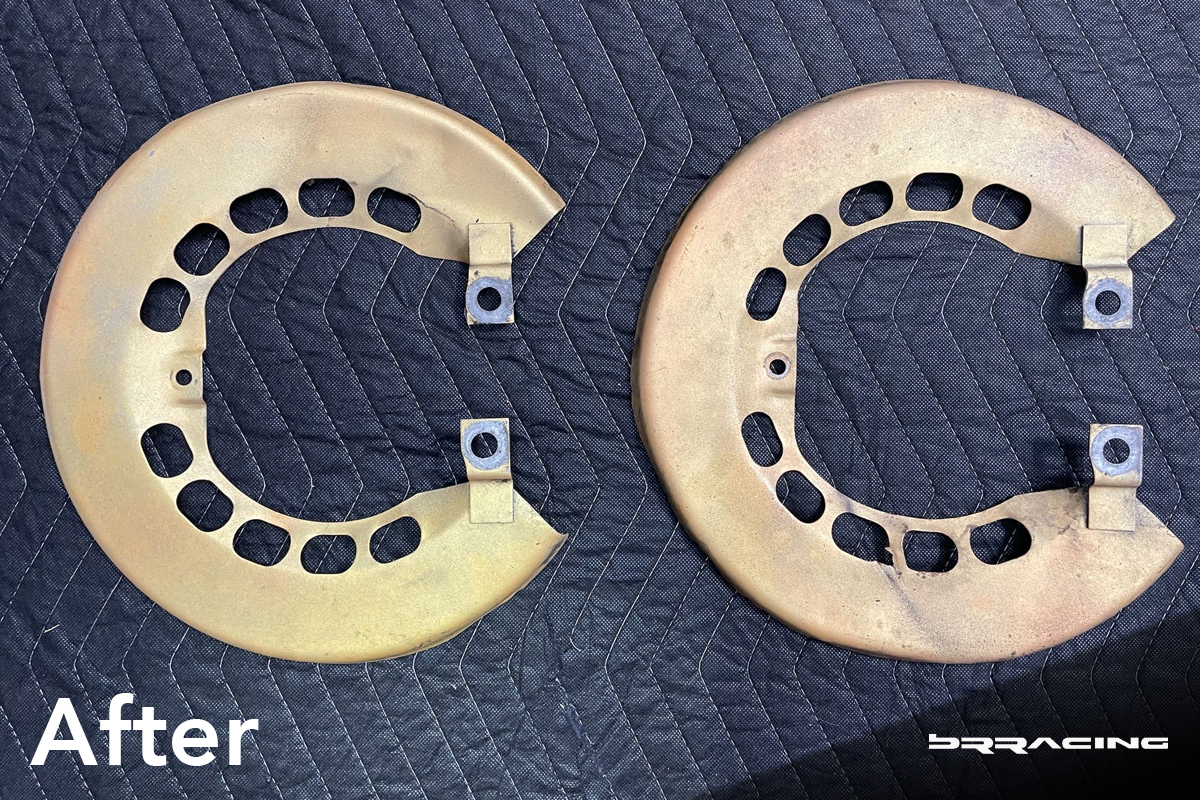
Then, there are the little touches that make the project a whole, like the brake backing plates.
Here is their “before” state, or as they came off the car –
And now, after cleaning, prepping, vapor blasting…you get –
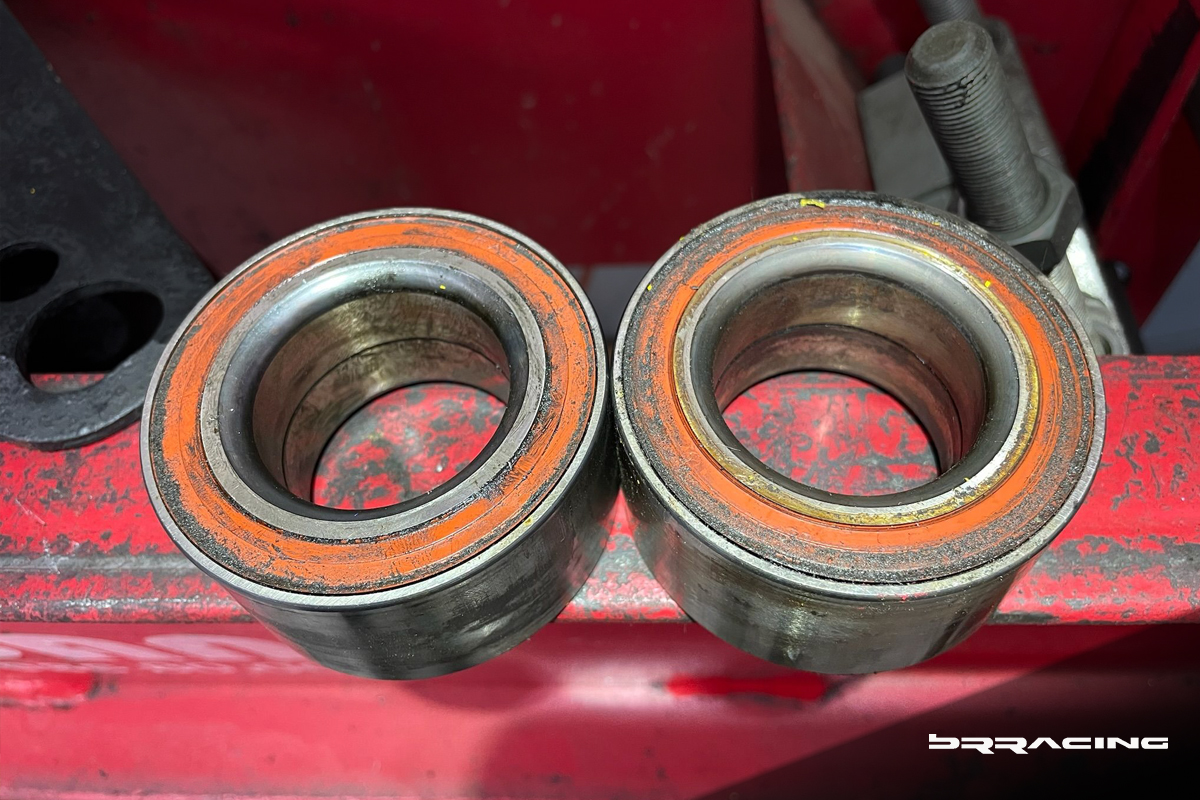
One of the other normal pieces that wears over time, wheel bearings. Front and rear, normal replacement elements.
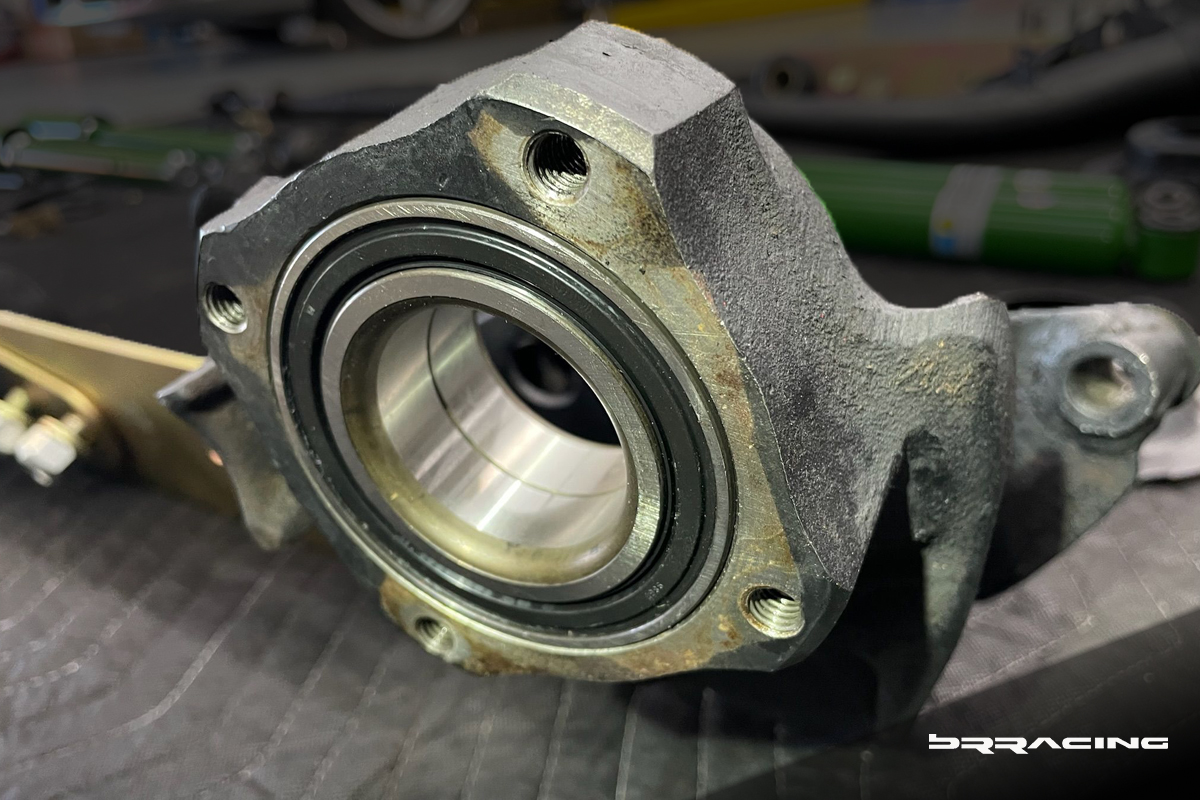
Old wheel bearings (dirty, greasy, worn, slight play)
New wheel bearings pressed into the hubs / uprights
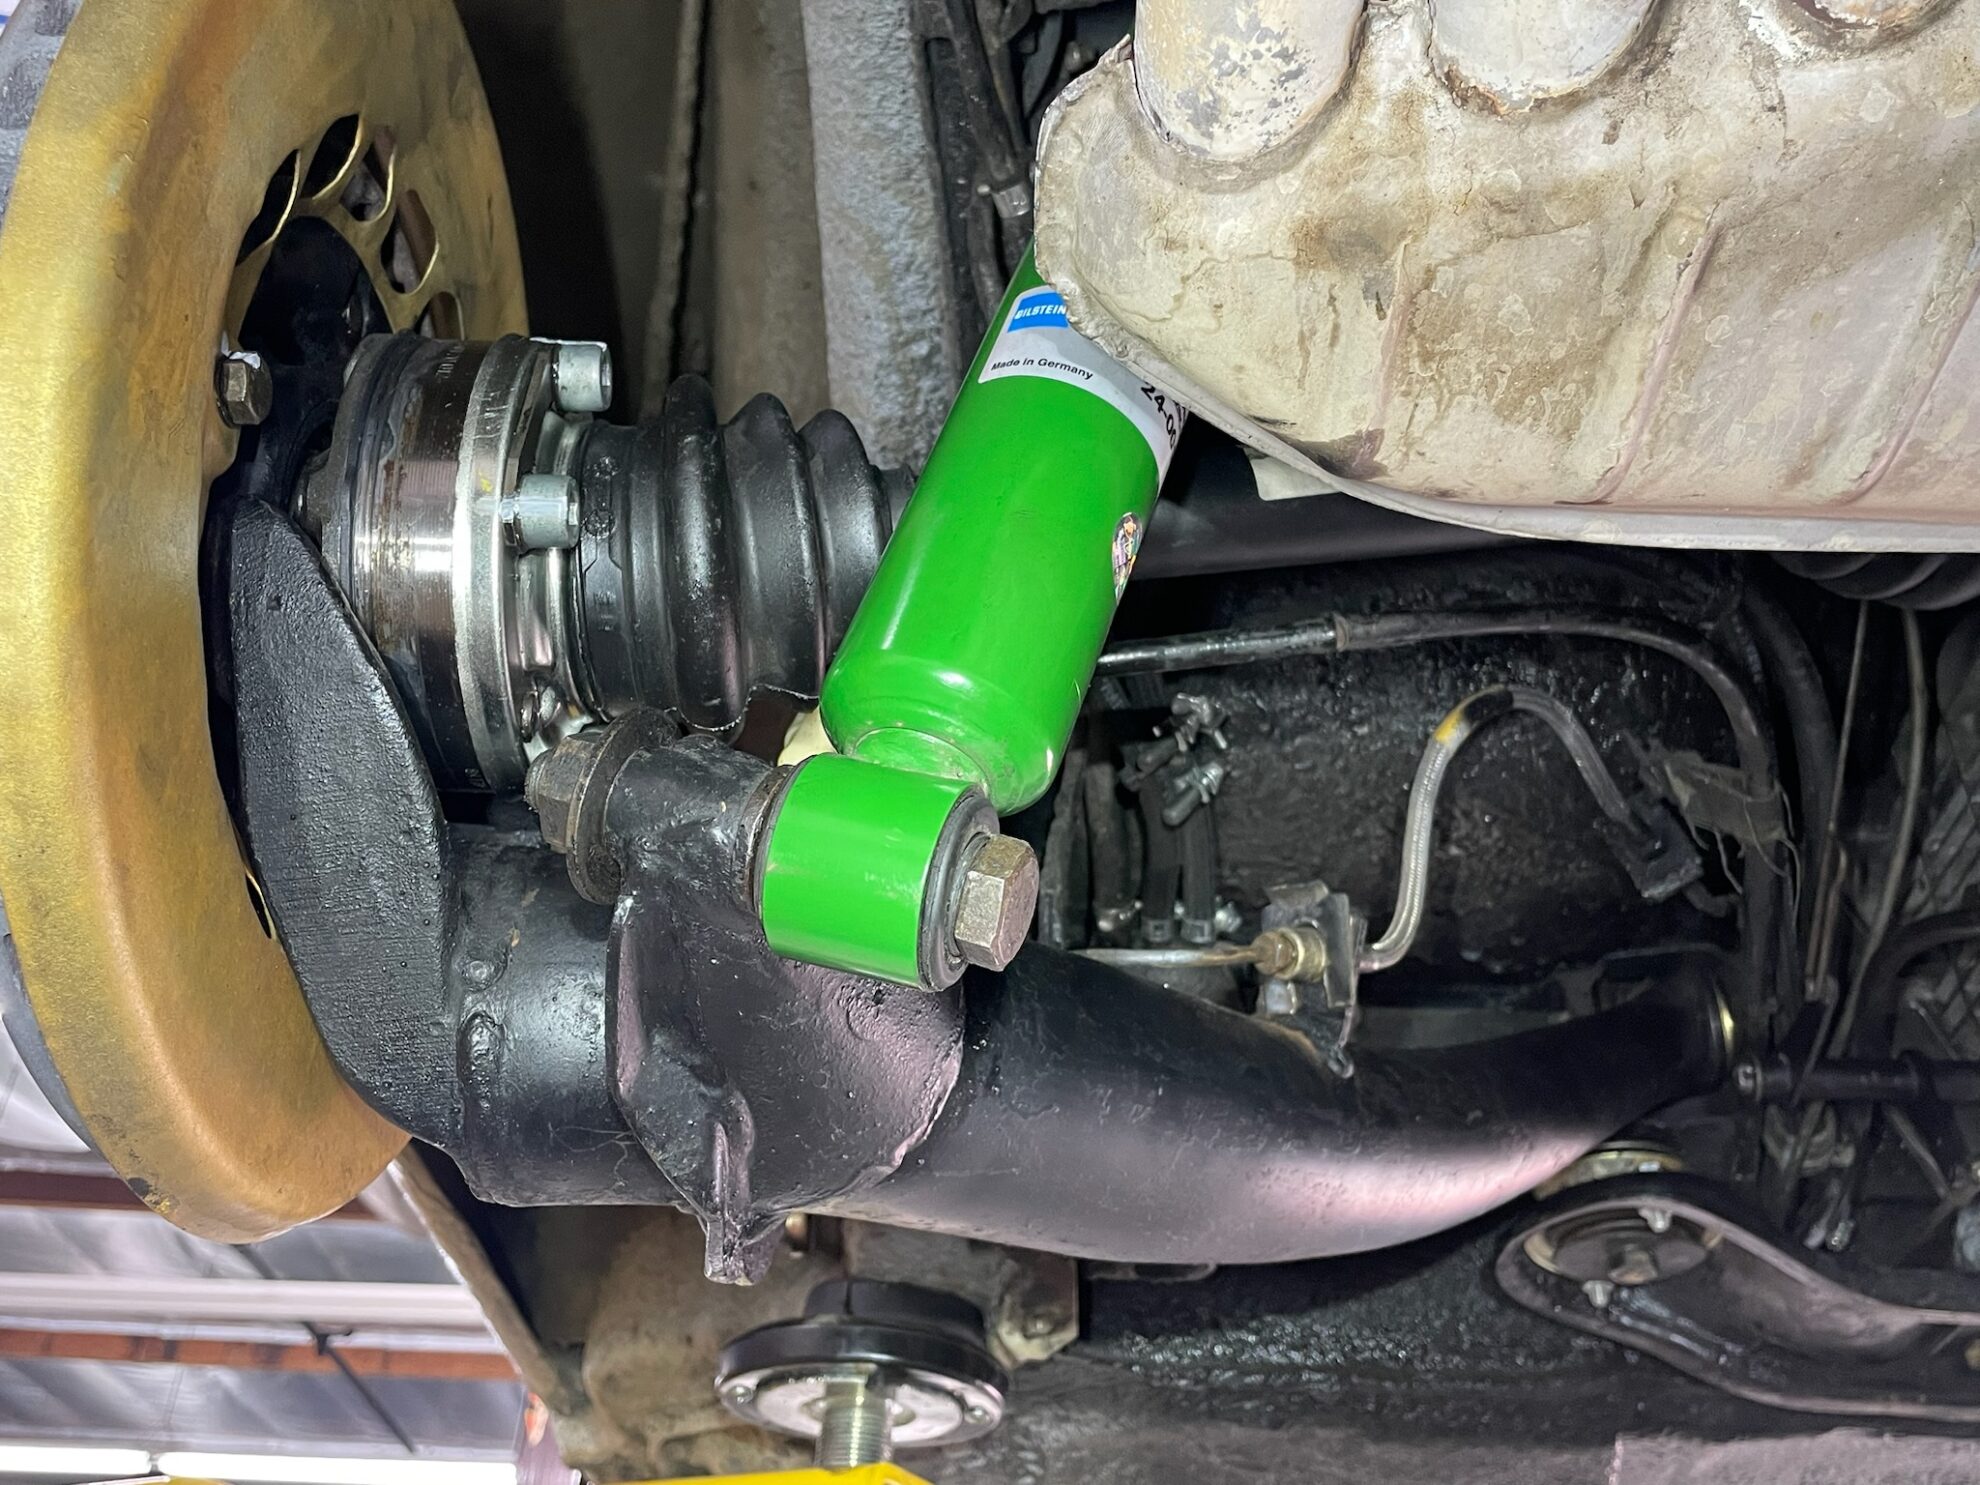
Putting all the rear suspension pieces together, along w the new rear Bilstein B6 shocks, and your rear suspension now looks like –
Body
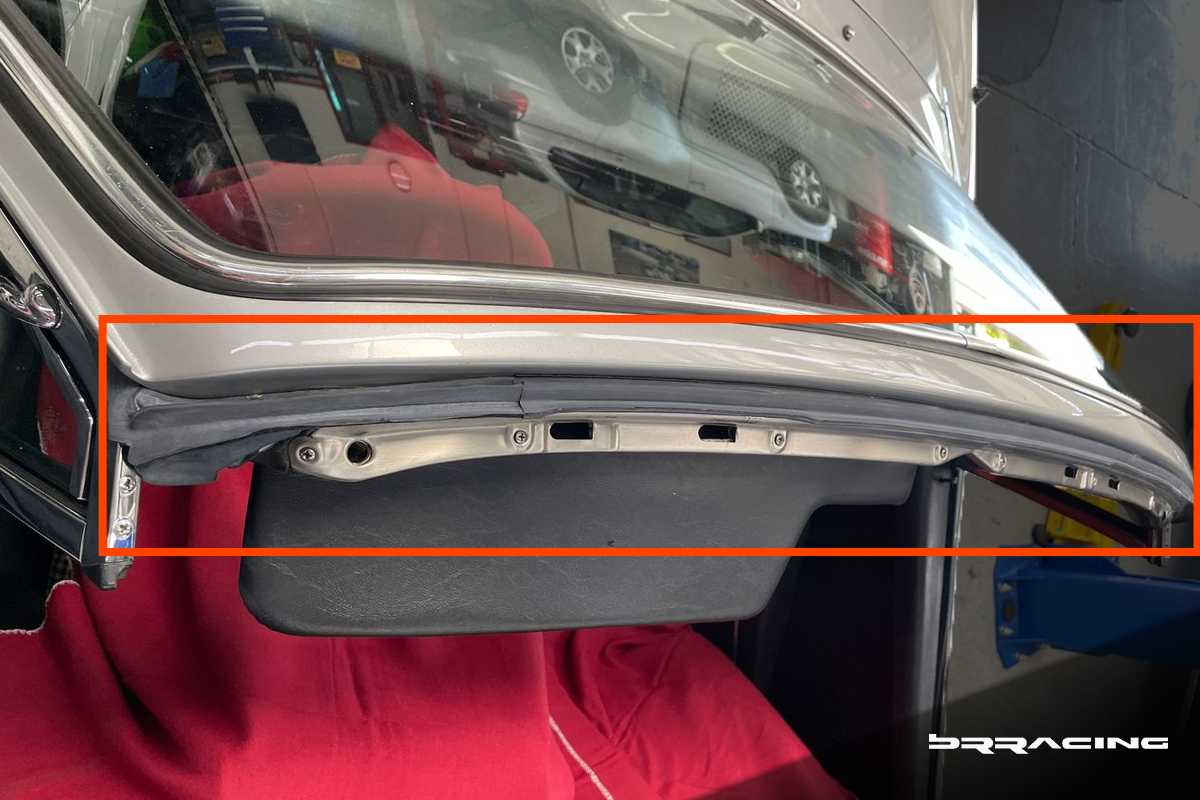
Targa Roof, Door Seals
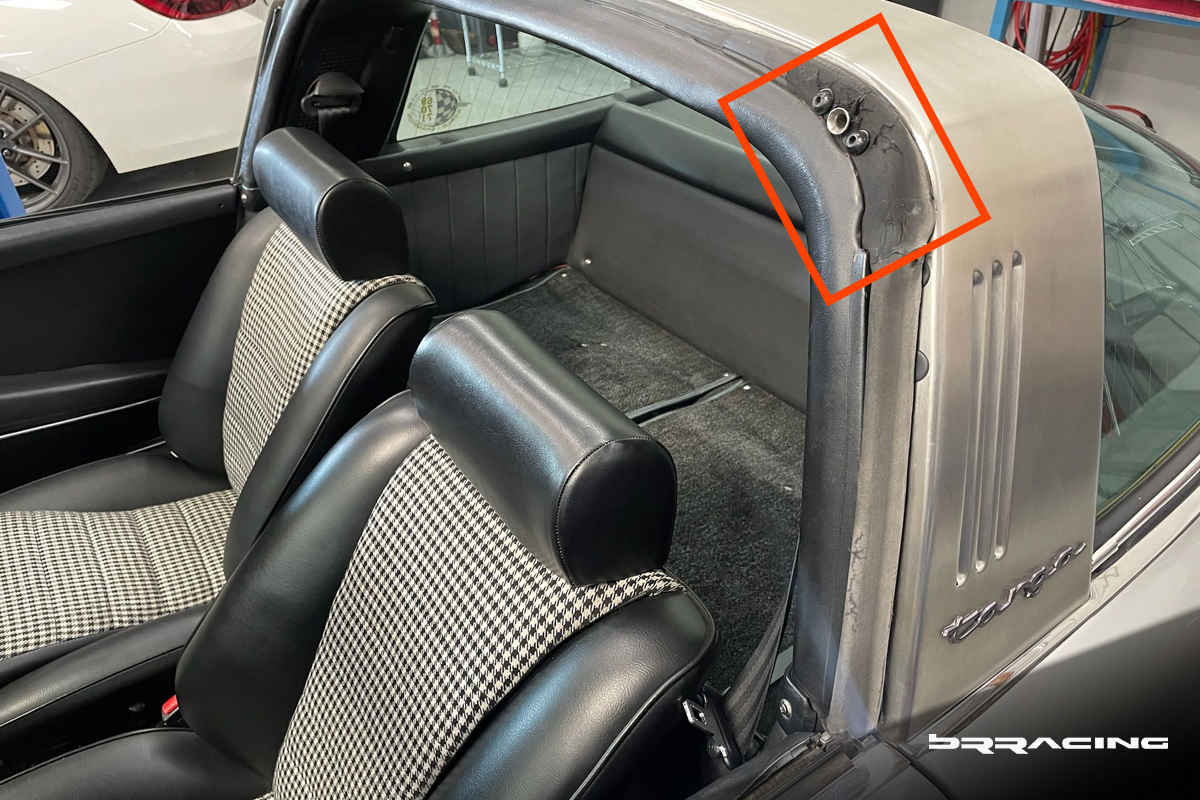
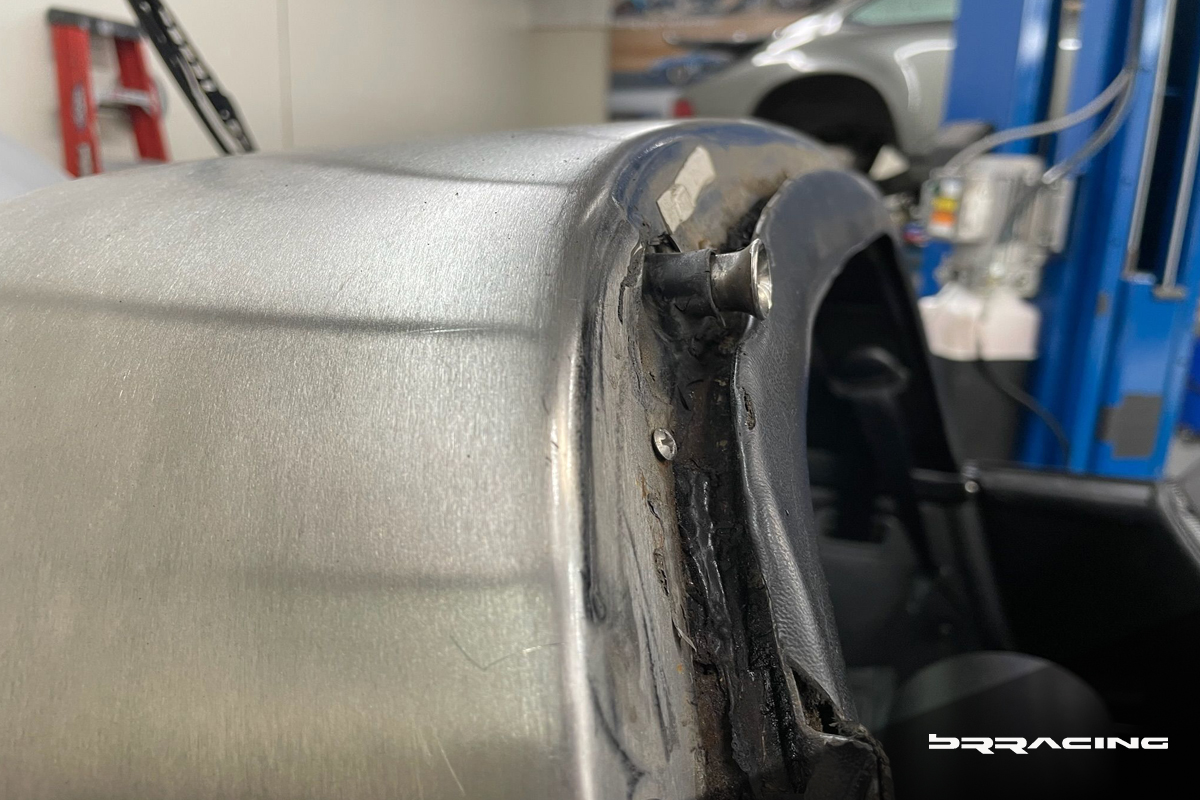
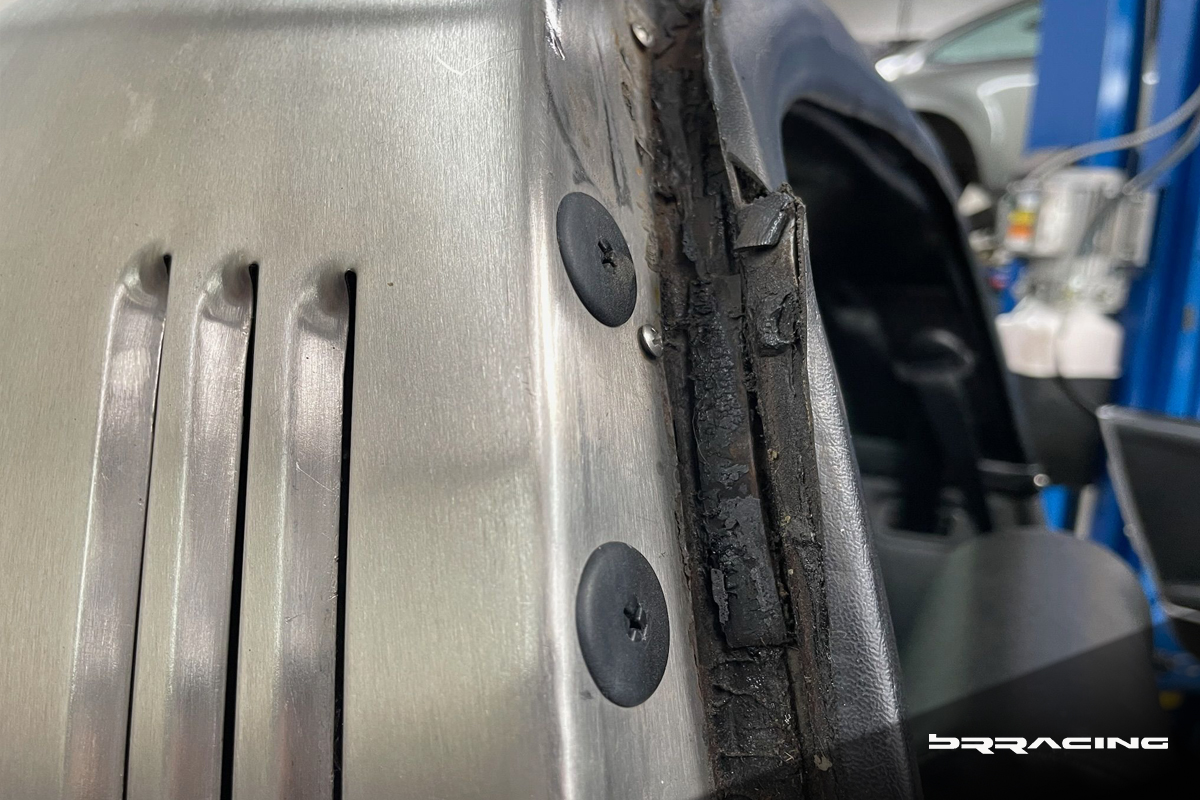
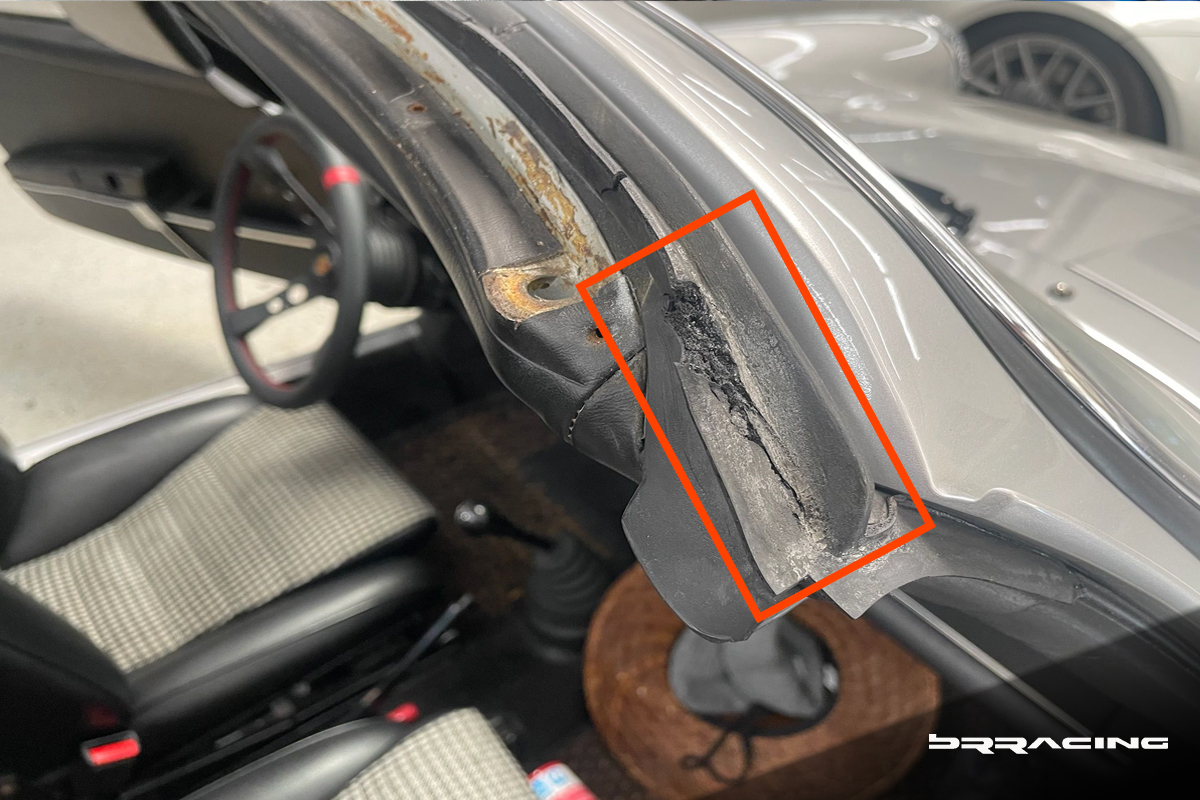
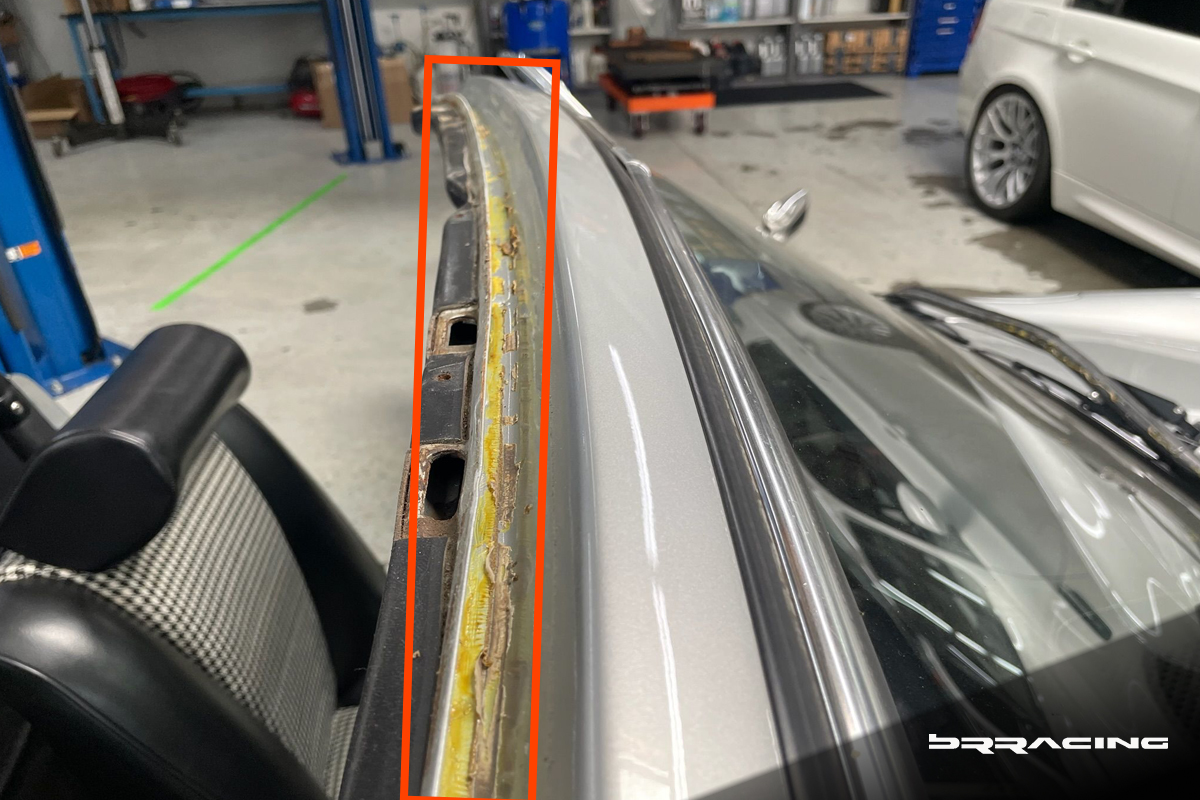
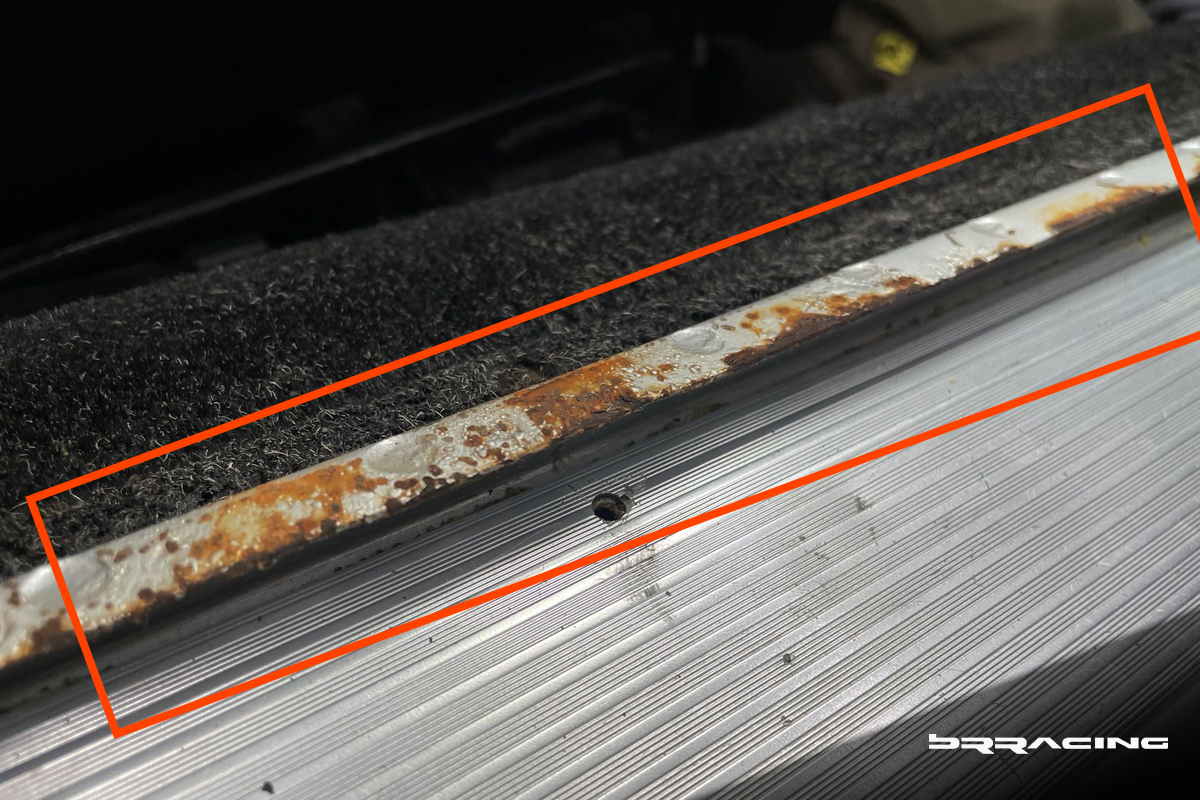
There’s good news and bad news when it comes to a TARGA roof on an older car. The fact that Porsche started making this iteration, with a removal roof section as early as the late 1960s is amazing. But, as with convertible cars, the lack of a one piece body structure lends itself to bending, twisting, and ultimately, making noise. Add in old seals, and the car will talk to you all the time. That was the case with this car..the Targa seals, door seals, were all dry, cracked, and coming apart.
This is not a fun part of the job. The old seals don’t want to come off. Once off, getting the old adhesive off, is yet another significant task. But, if you don’t put the effort into the preparation, the new seals won’t stick well, and the squeaking will soon return.
Interior, Carpets
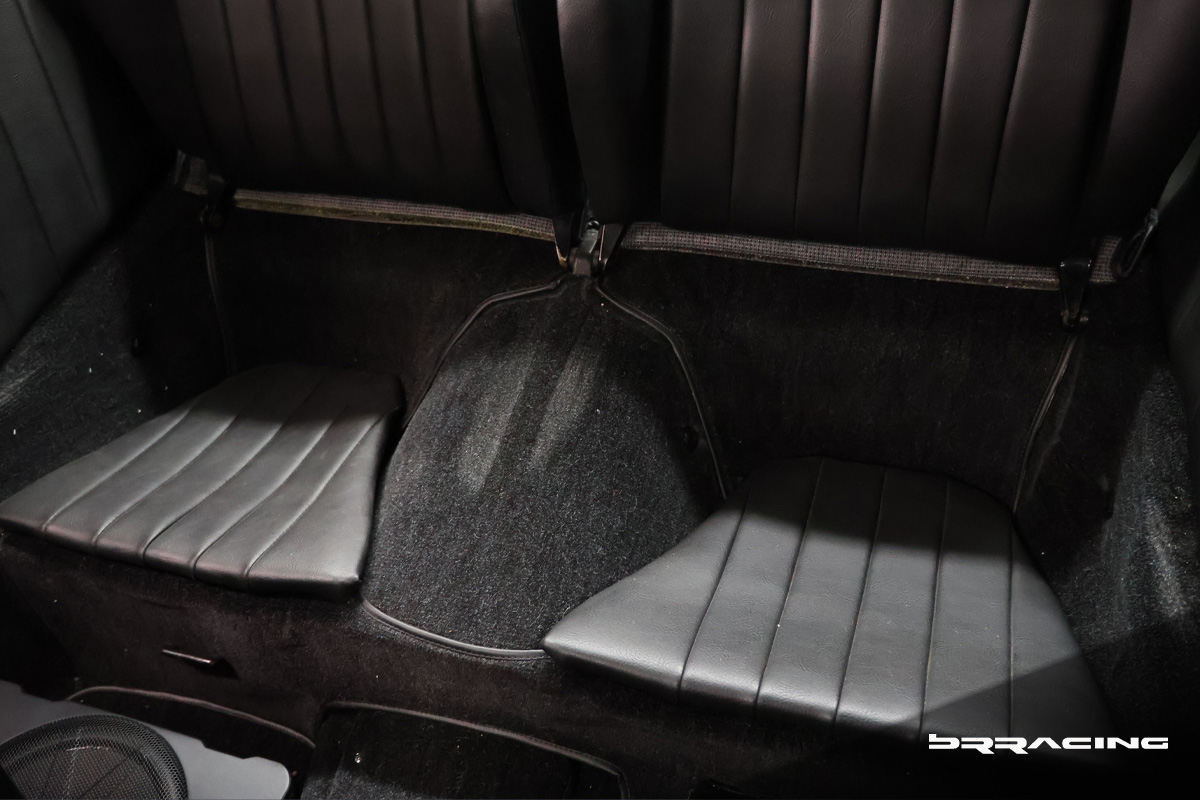
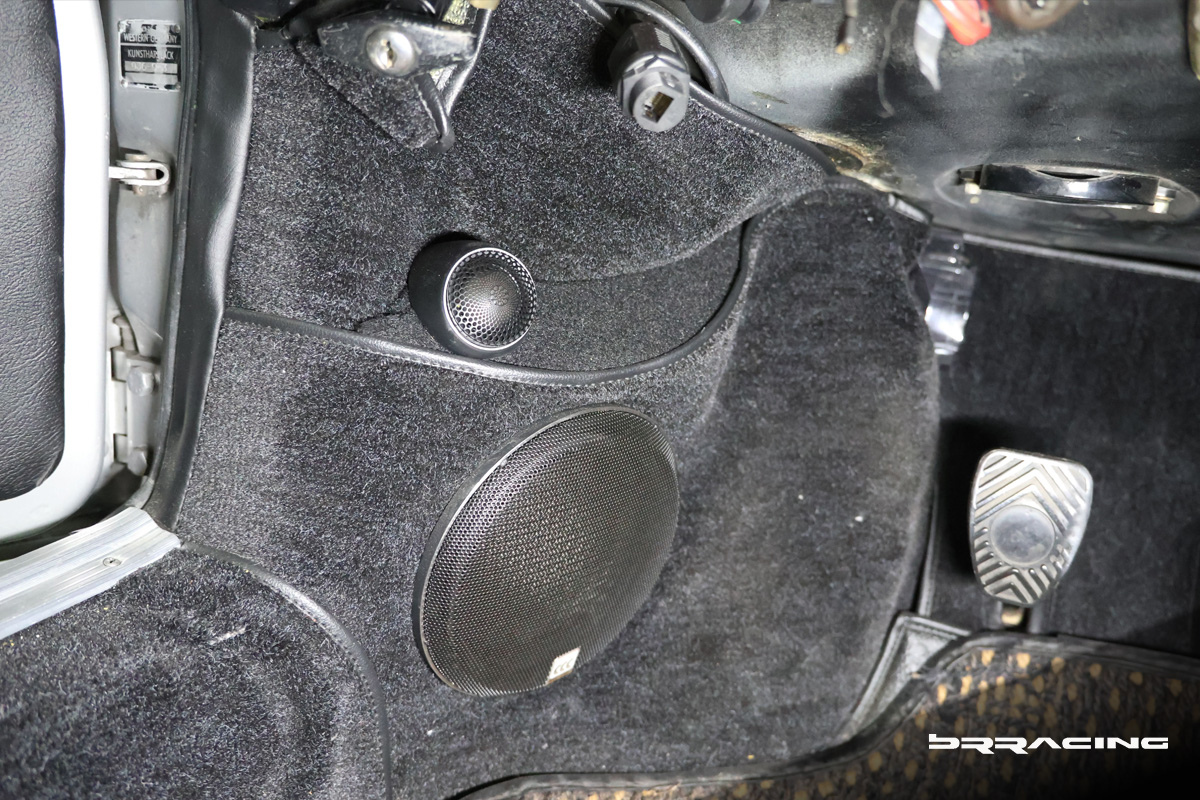
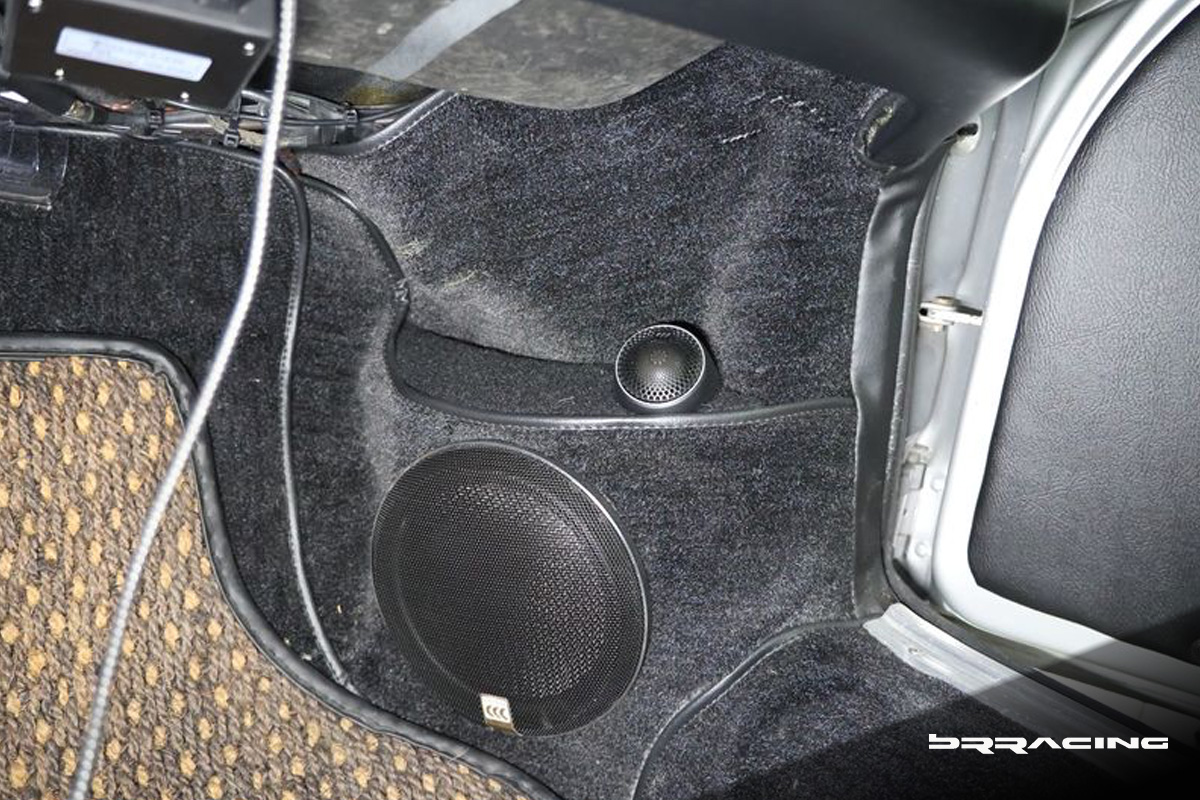
Old school carpet design was never intended to last 50+ years. And, this car bears that out. The carpet was too highly worn, coming apart, and certainly did not look the part of a refreshed car.
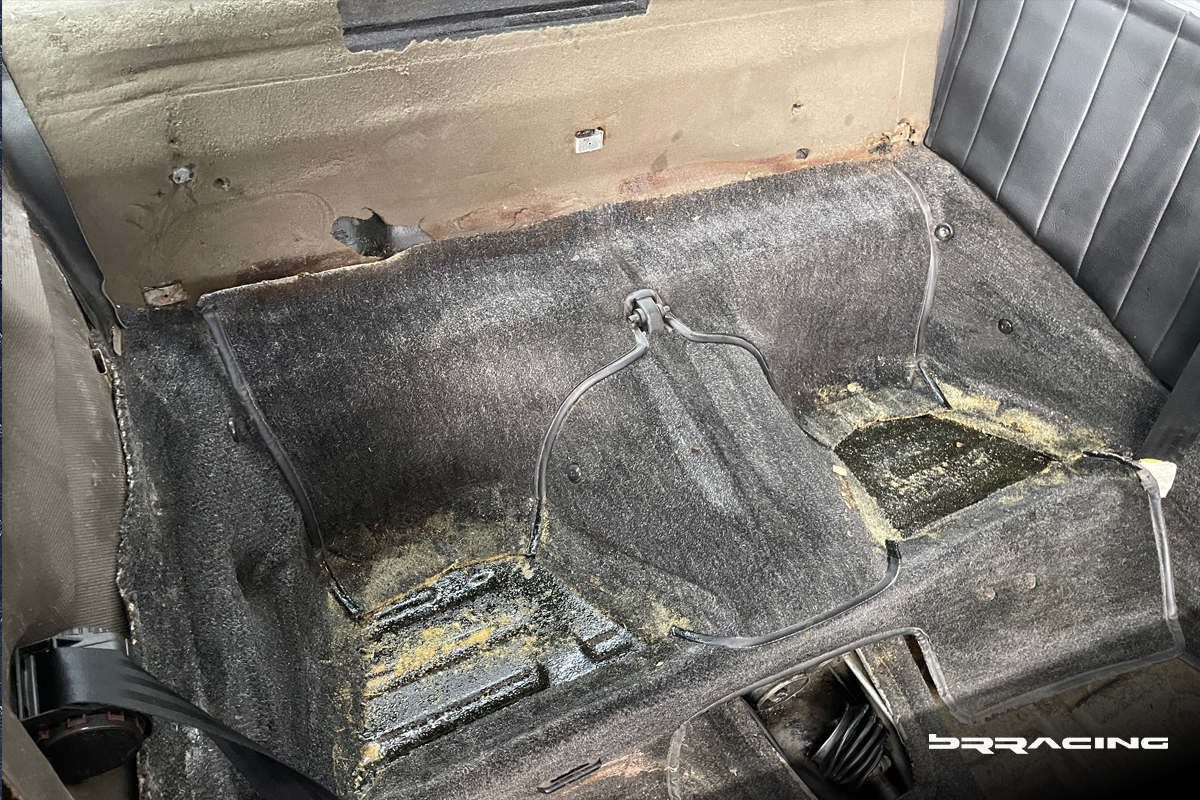
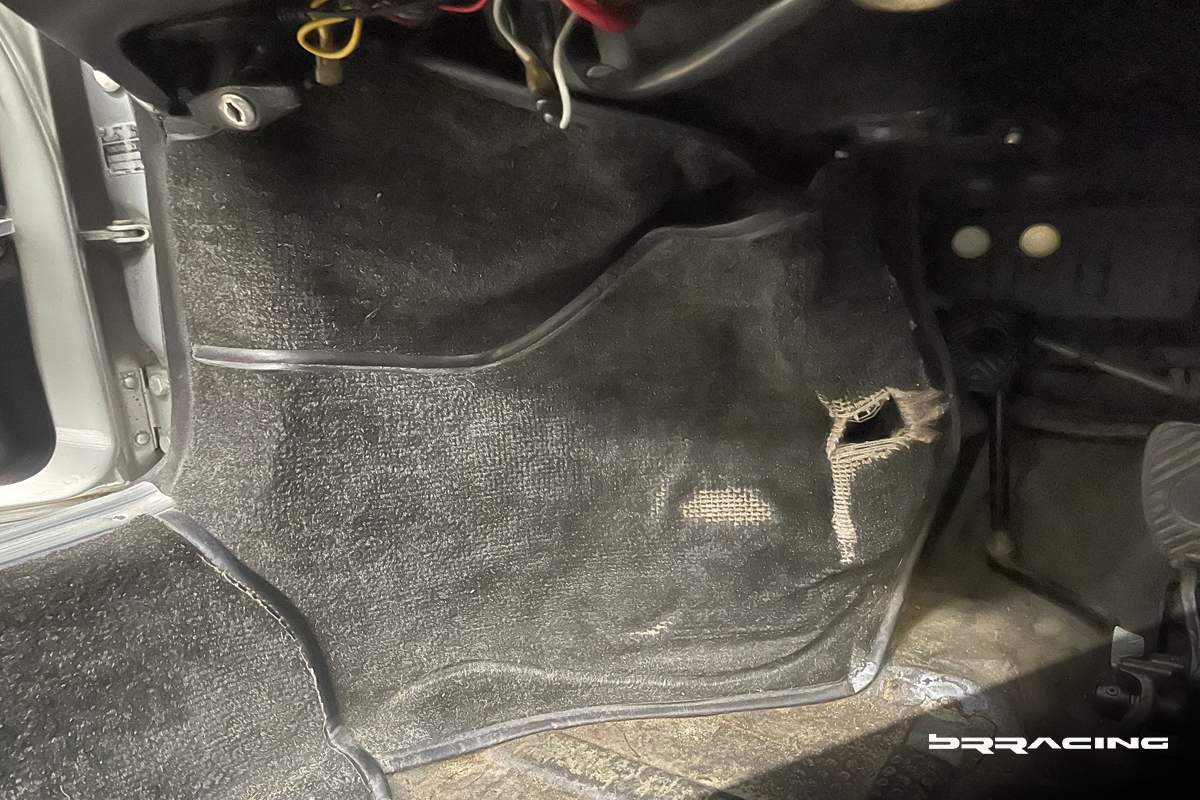
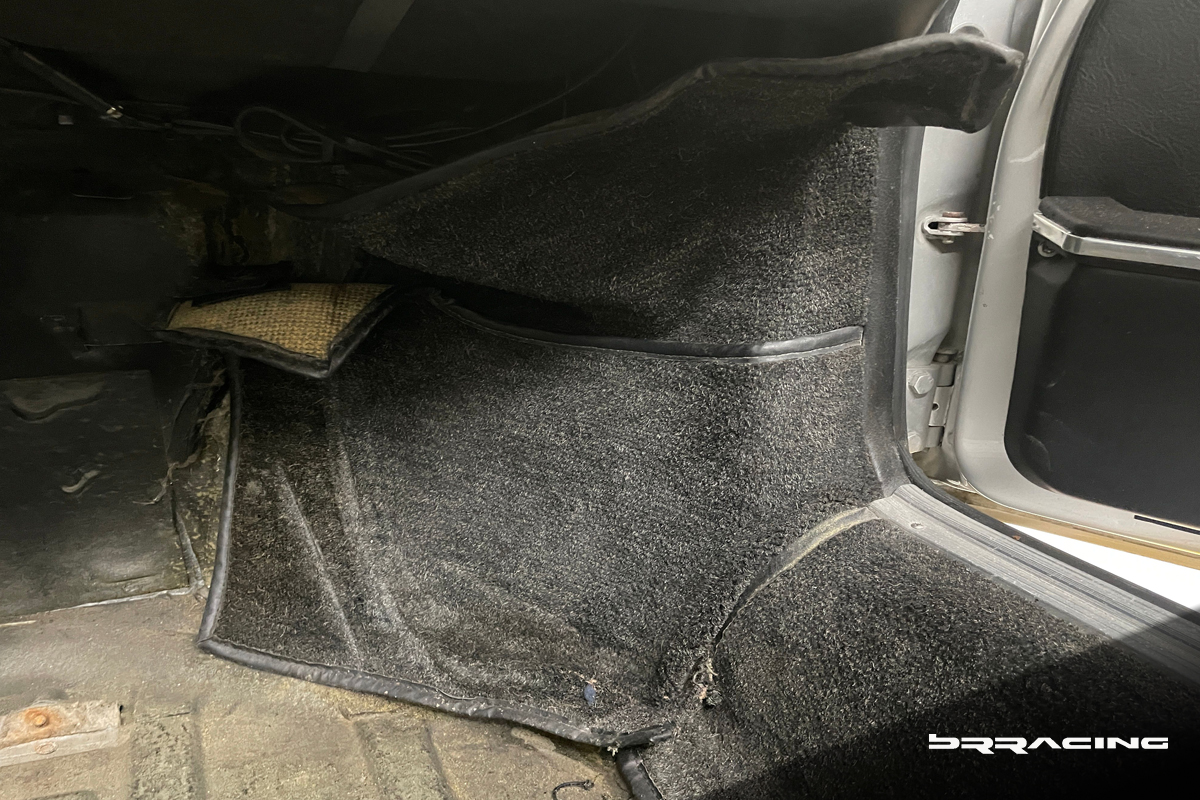
With the state of the carpets, the decision was made to pull the interior, and replace all the interior carpets. The seats, as can be seen in some of these images, were in great shape.
ENGINE
There will be two parts here to the engine evolution. The first part is the normal “refresh” of an old engine. Fixing gaskets, fixing leaks, replacing spark plug wires, distributors, timing chain, tensioners, cylinder bolts, refresh and cleaning of the heads.
But, somewhere along the line, as we struggled w the tweaking that is constantly needed w the older CIS mechanical fuel injection systems, we asked, “what if”? What if we moved away from the old school mechanical fuel injection system? What would the ideal engine upgrade be? How good could we make it? Where are there any limitations, and can we go beyond those even? YES was the answer.
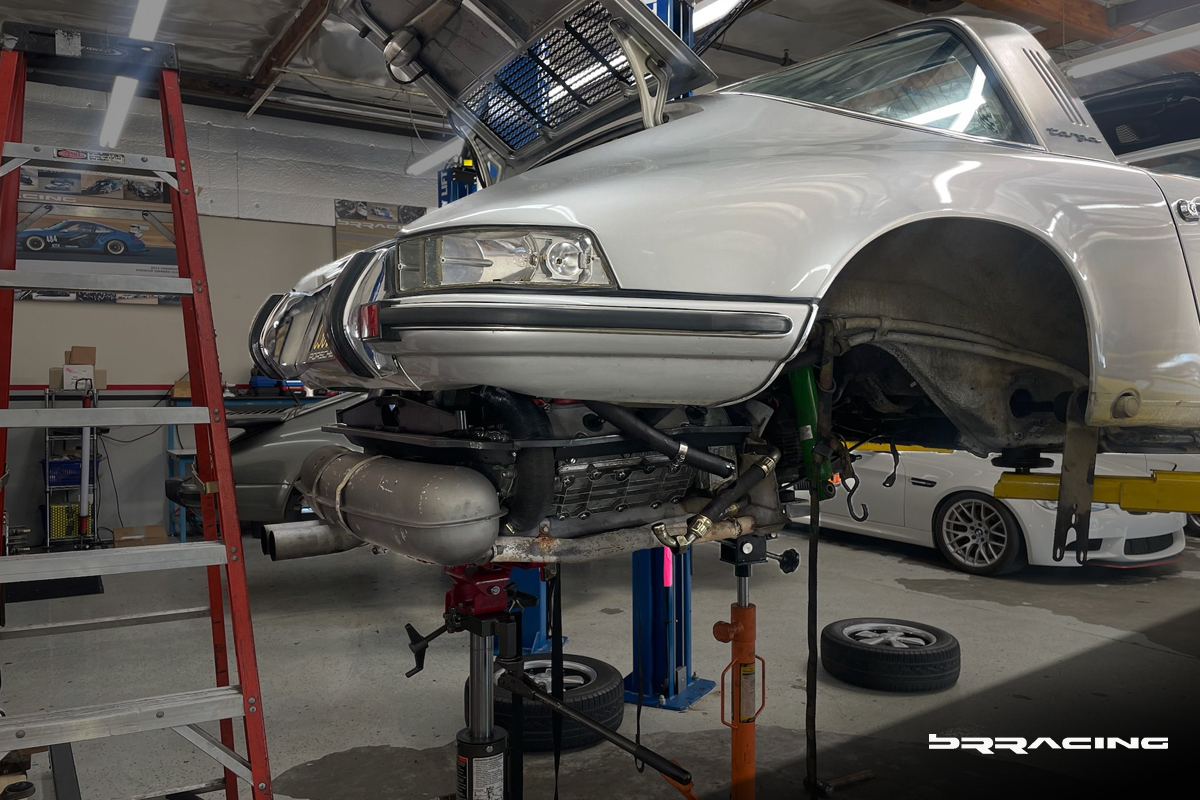
While on one hand, the older engines are very straightforward, but, there are many items that are almost “work-arounds” to deal w all the other regulations.
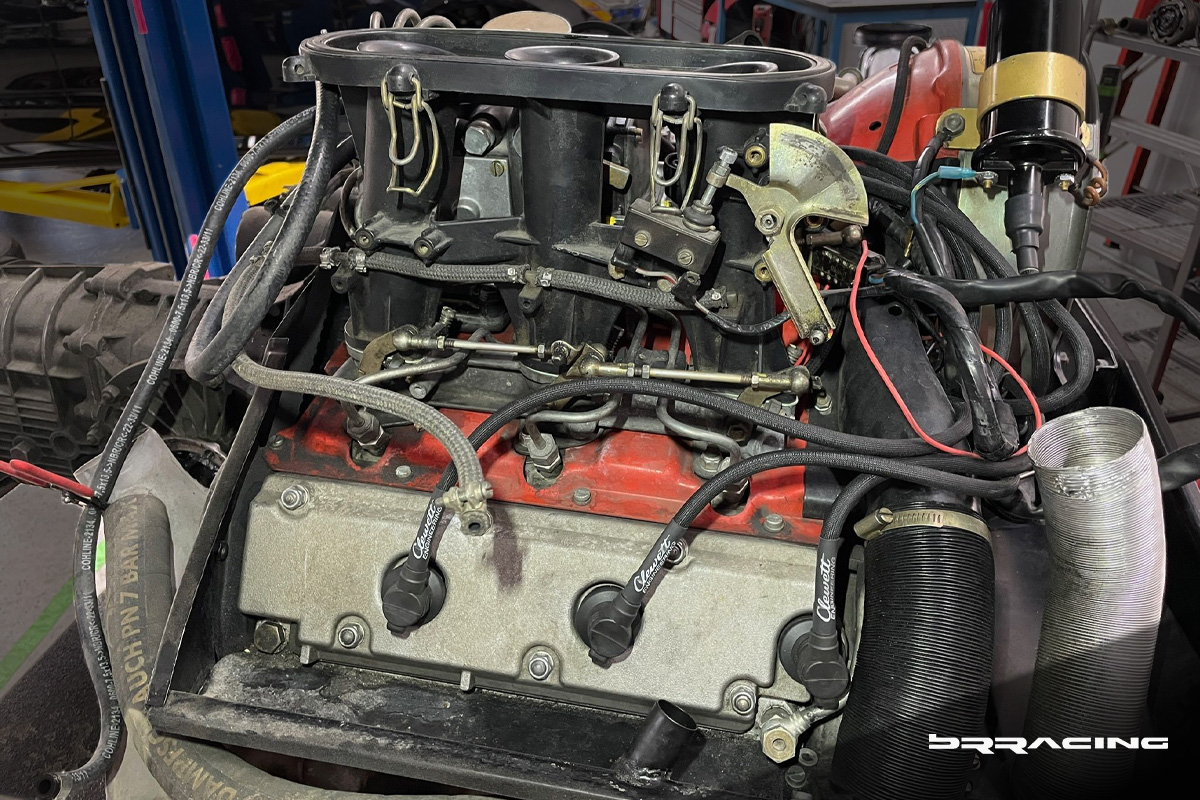
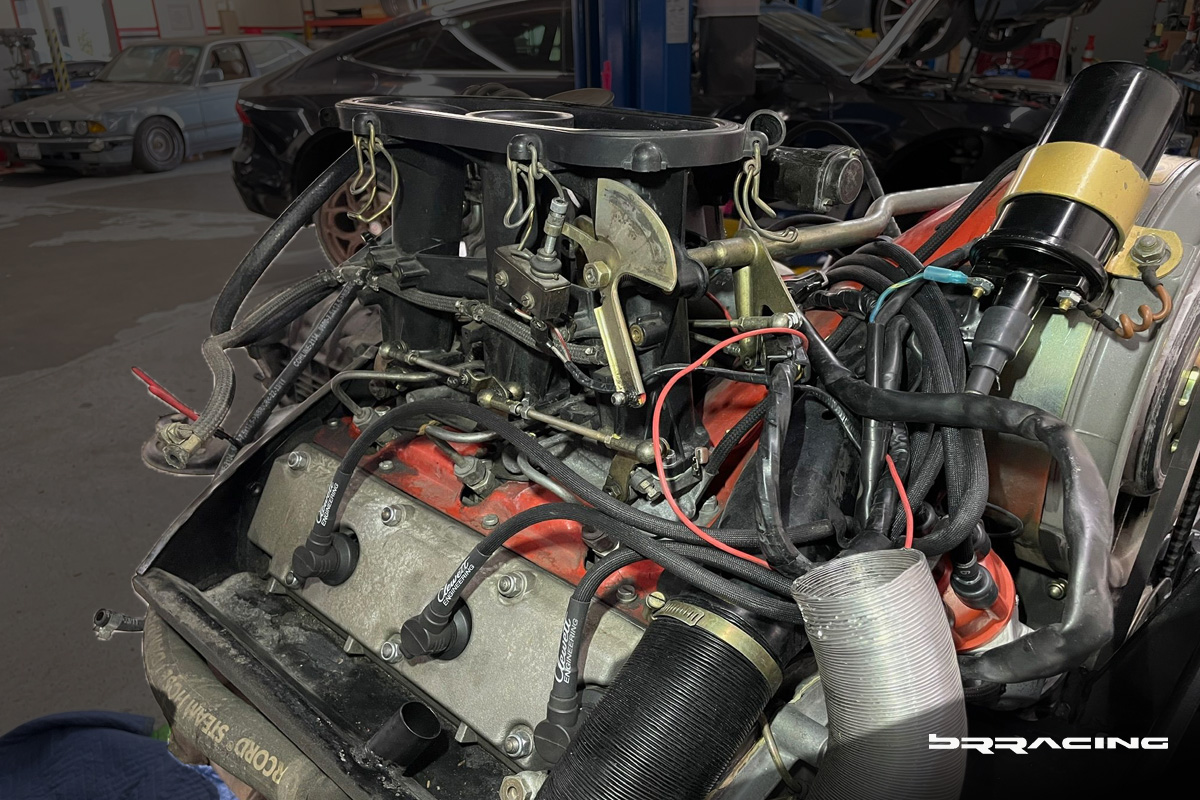
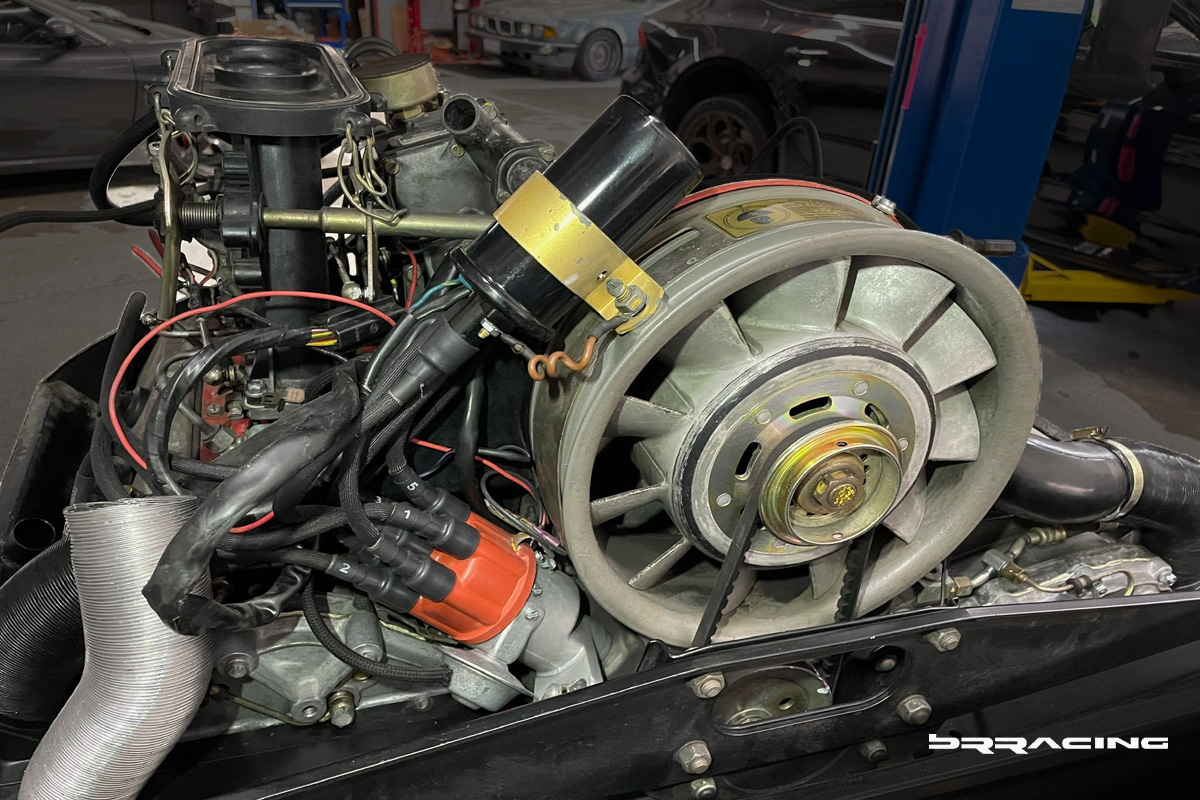
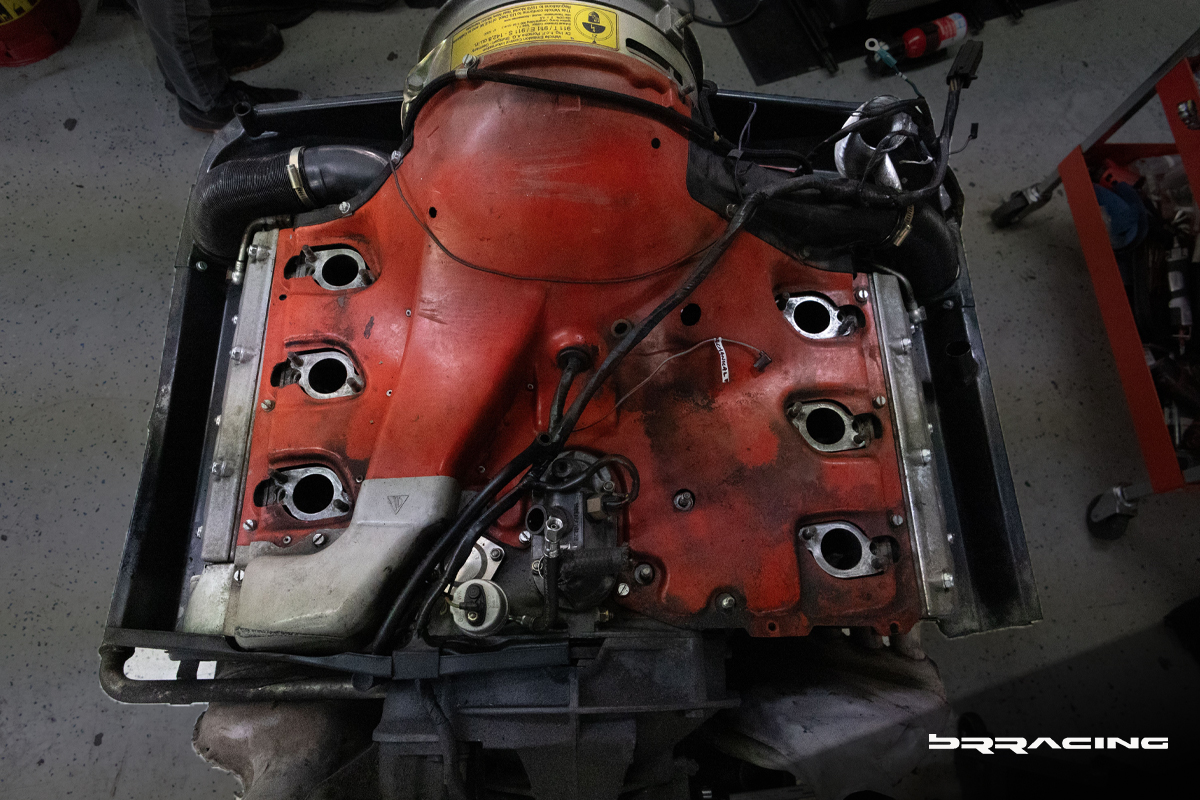
Stripping all the intake, fuel system away, you get down to the main block w the air shroud. Not clean and pretty…..YET.
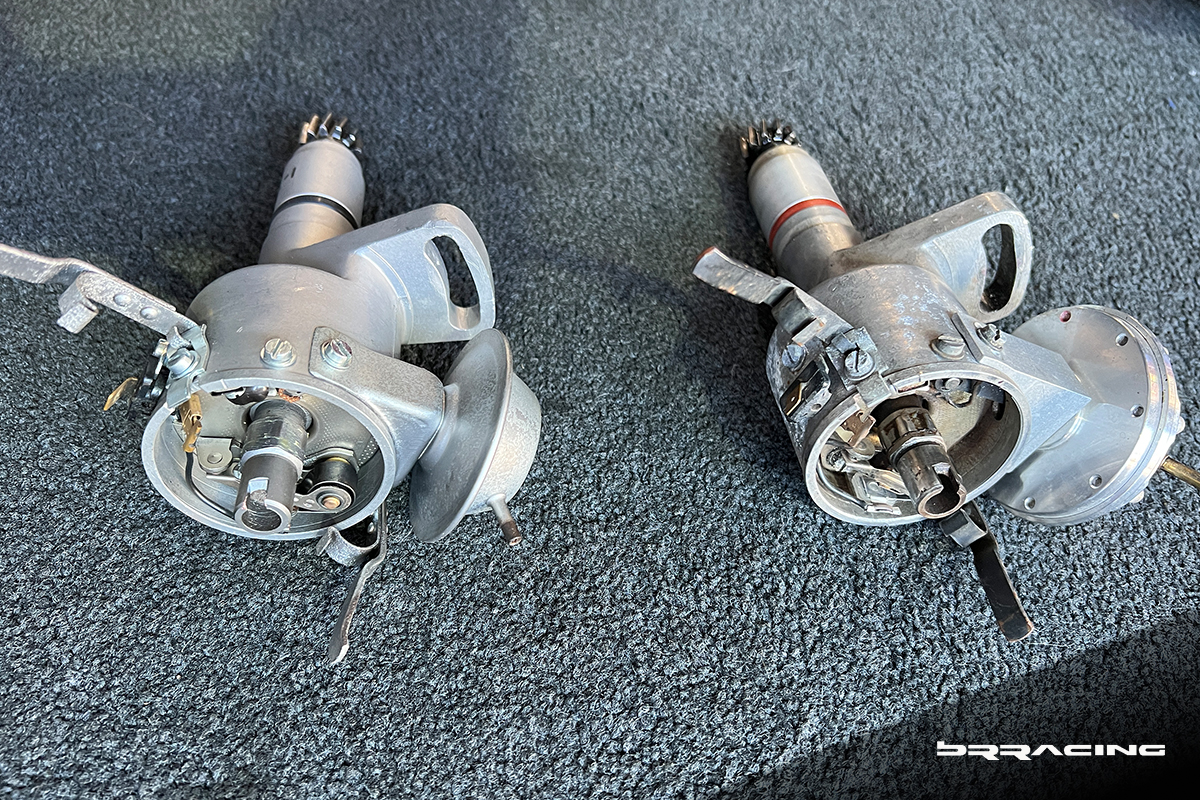
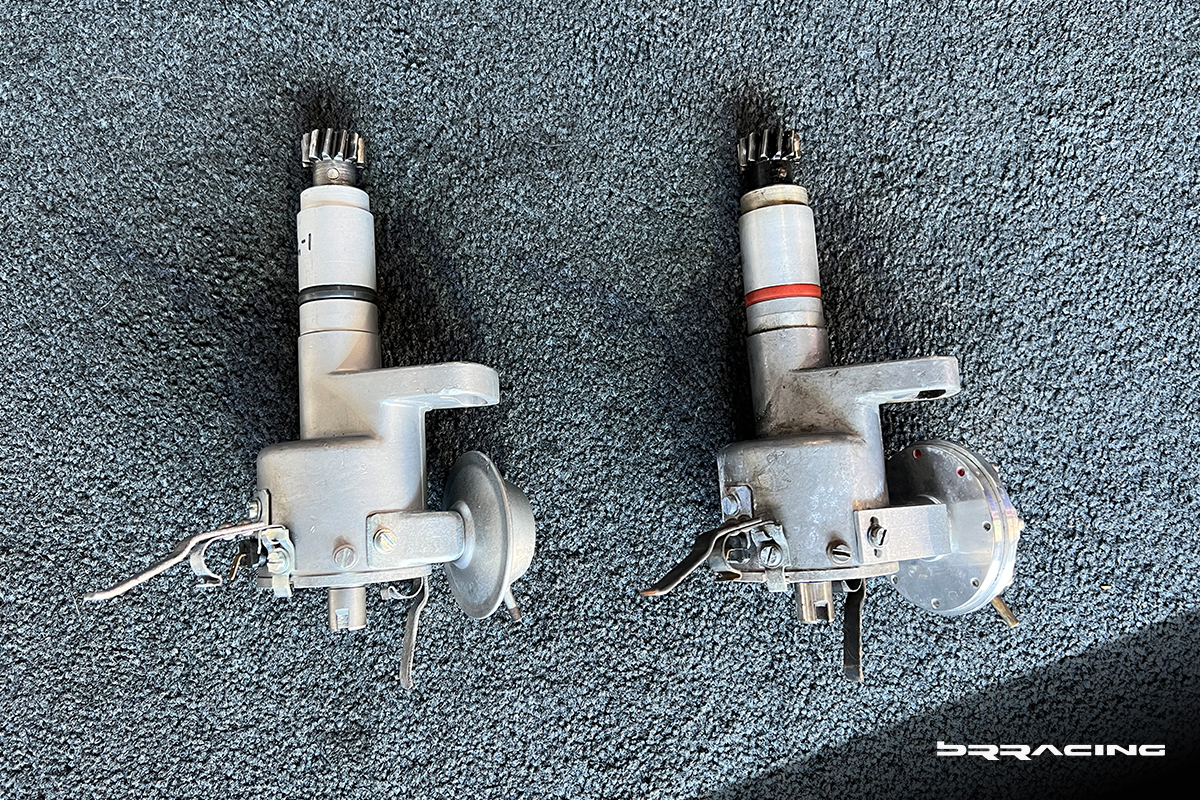
Distributors being replaced. New on the left below, old on the right. New assembly, new points (how many even know what points & condensor are??), new vacuum advance. Adjusting points for the correct lift. The slot in the housing is to allow for the adjustment of timing.
To tell the full story, we completed the full engine refresh. Assembled, installed, tested. Played w the CIS mechanical fuel injection A LOT. Had the mechanical fuel injection unit taken apart, assessed, re-assembled. Installed, played w the 2-speed internal transmission for the mechanical fuel injection. Car ran well..but we could not get the CIS system to be perfect, or to hold it’s adjustment for very long (like, needed re-adjustment every 3 months….it really all depends on how picky or finicky you are relative to how well it works. If 95% would be good enough, then we could have left it alone, but we didn’t like the 95%, we wanted 100%.
Therefore, you “imagine”…what if? What could it be, what could we do, what would be the “best” solution. Our imagination drew us to converting the engine from old school mechanical fuel injection to new school, new gen, electronic fuel injection. Easily said, not so easy in it’s implementation. Not meaning it’s hard, but the scope of what needs to be changed is quite large, with one of the big steps is that we would move away from the stock DME, to a new, standalone ECU (MOTEC).
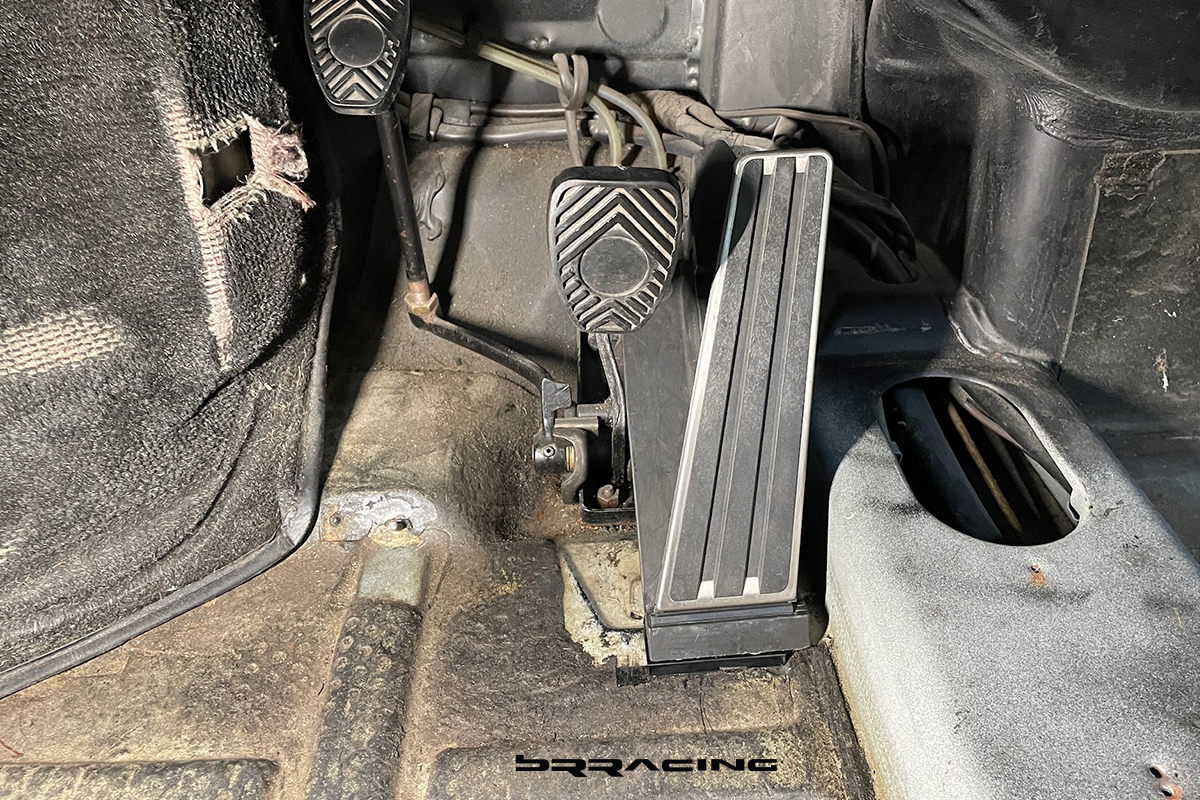
Sounds simple, just change from mechanical fuel injection to electronic fuel injection. Simple in concept, but not so in implementation. Just about everything needs to change other than the core block / cylinders. New intake manifolds, individual velocity stacks, the injectors, the fuel system to feed the injectors, the fuel pump to feed the injectors, the fuel supply and fuel filter, the fuel pressure regulator, the fuel pressure sensor, the wiring harness for the engine (what wiring harness??? – you have to build your own completely new, full engine wiring harness from beginning to end), air filter assemblies and hats, the electronic throttle pedal (how the new throttle bodies are accuatated is no longer by cable)
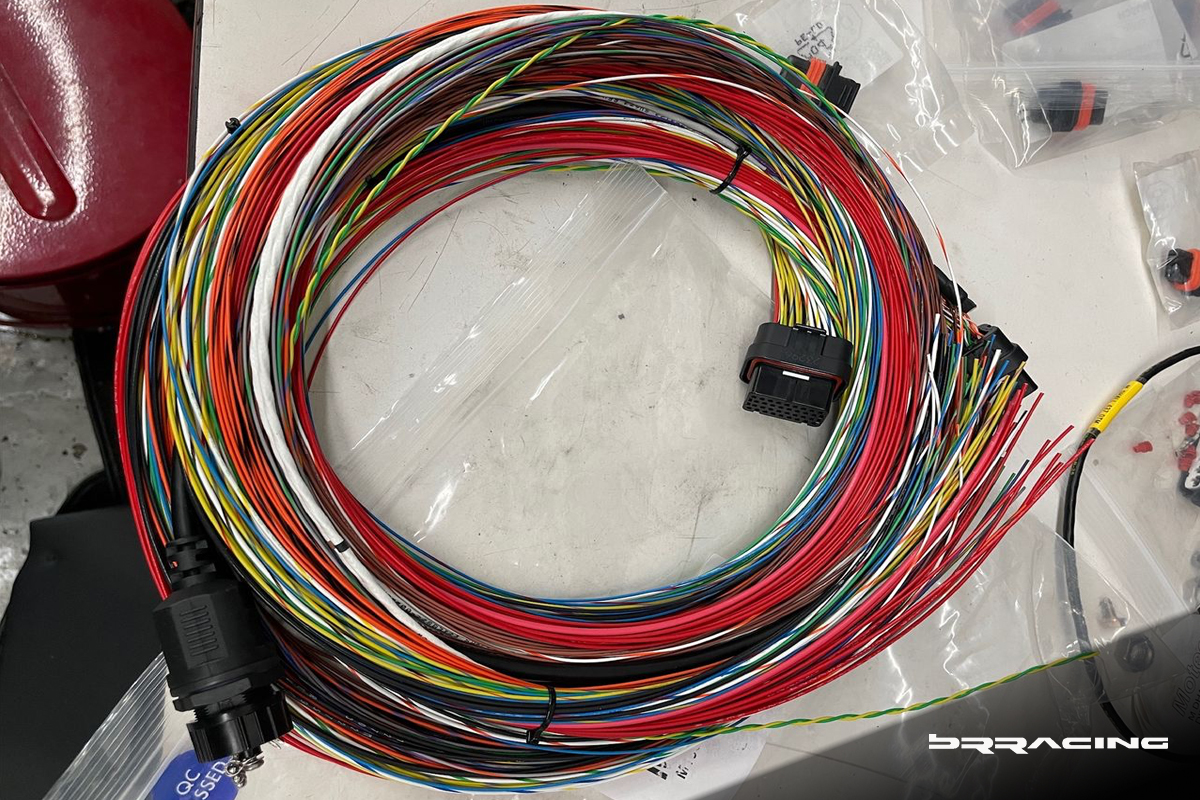
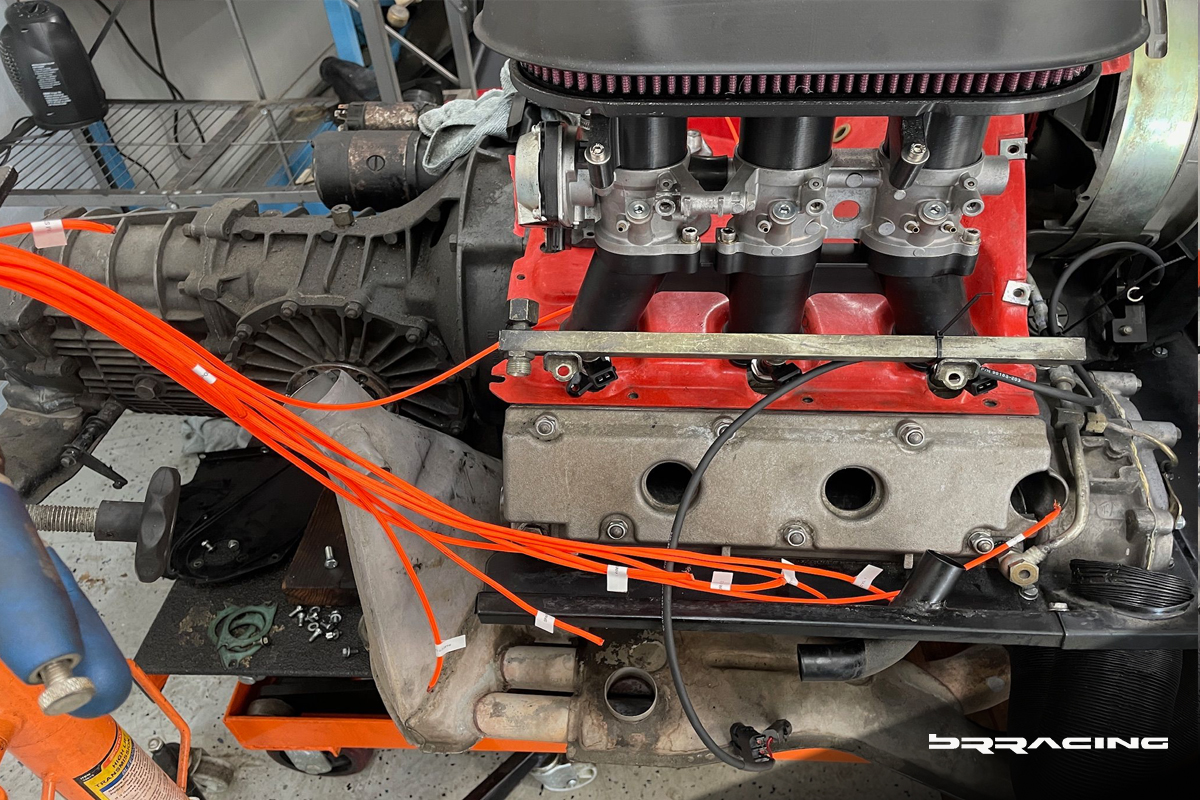
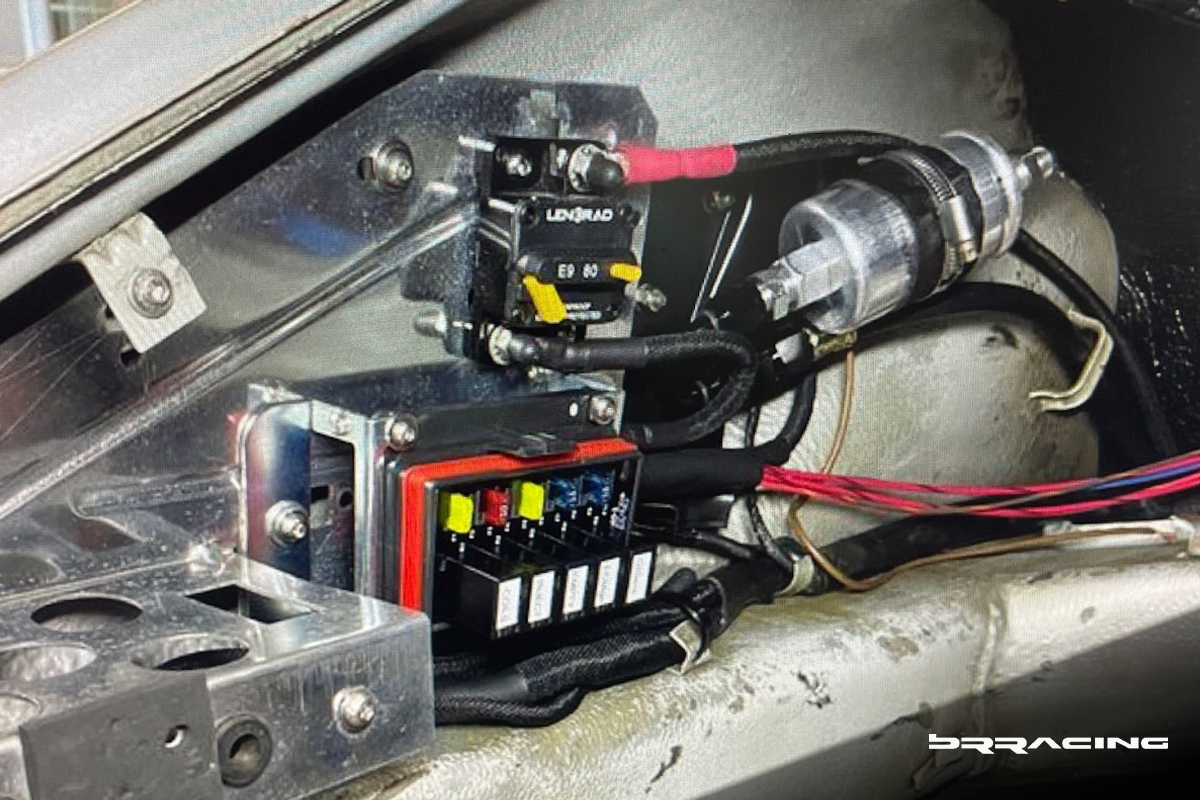
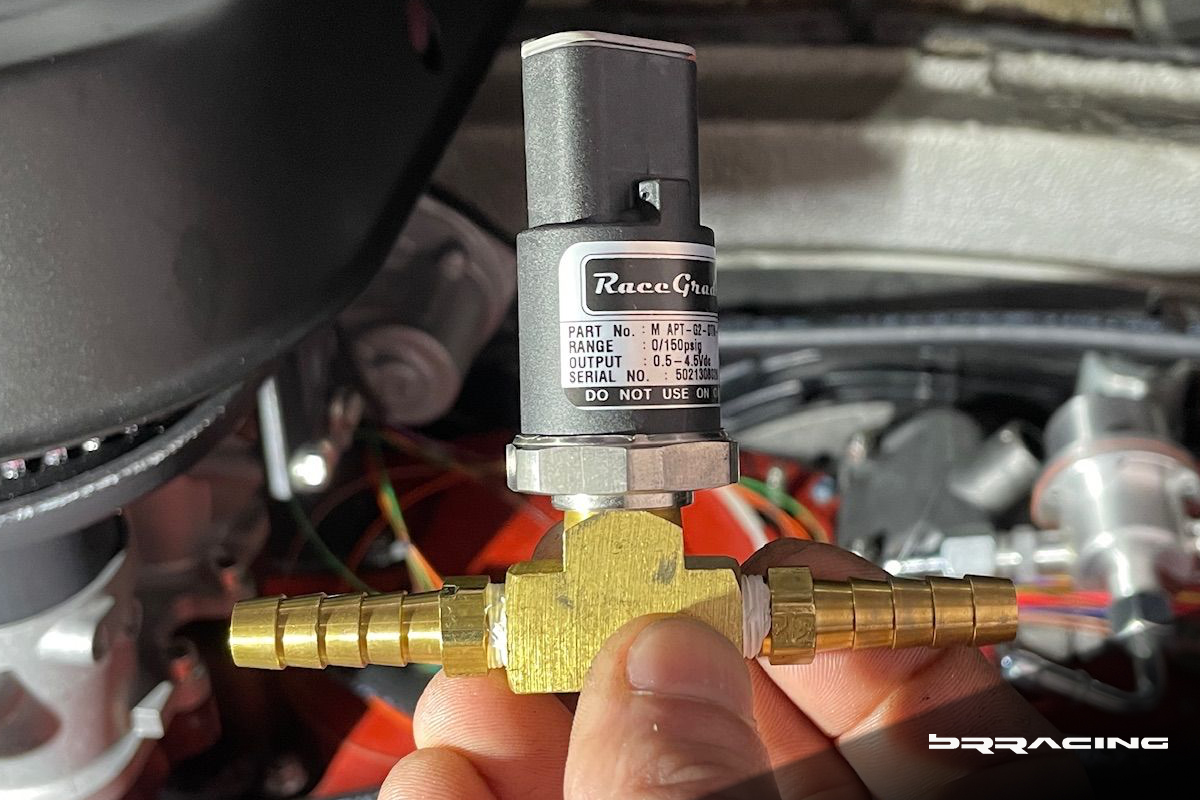
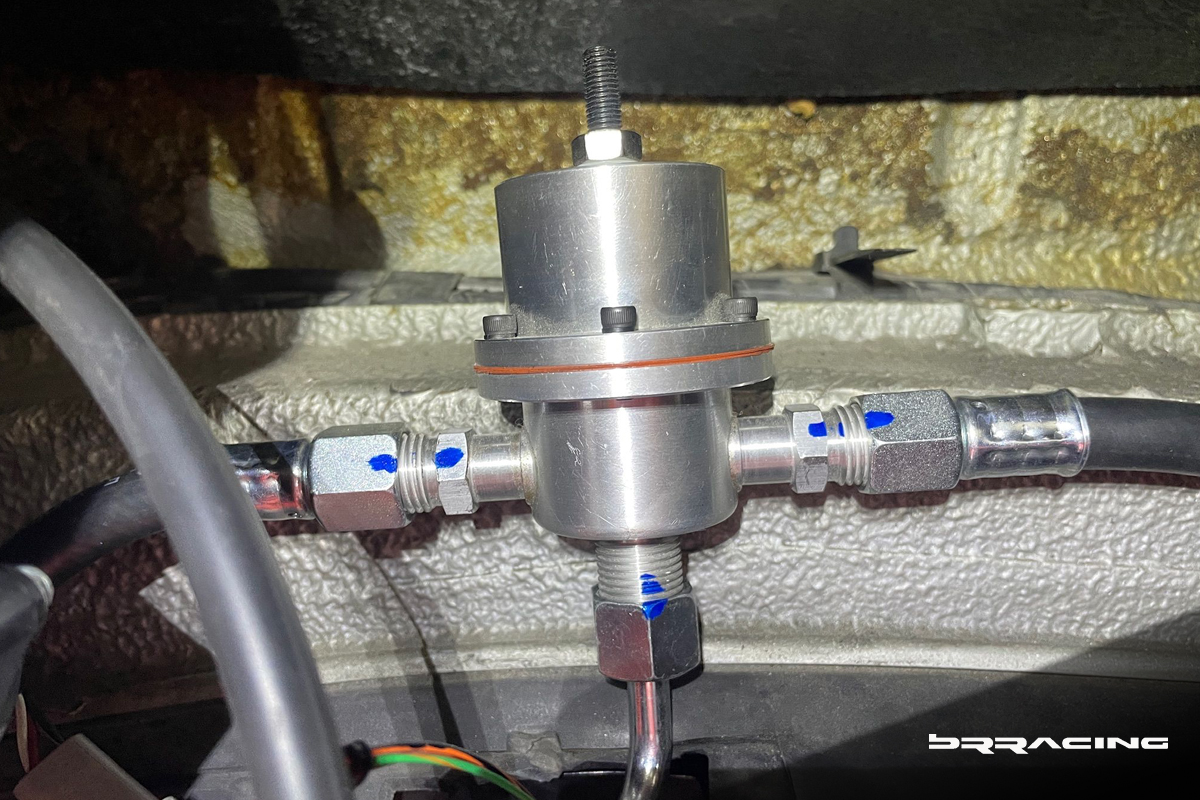
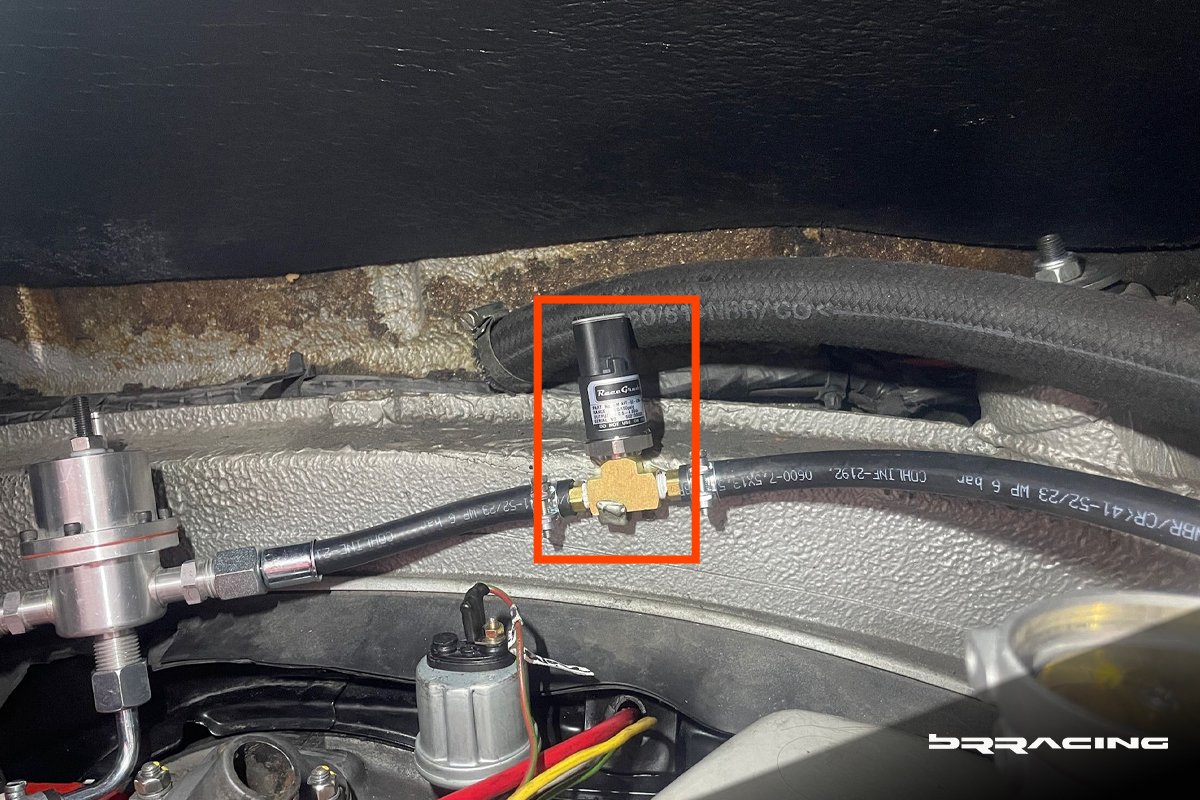
New electronic throttle pedal, and the associated new wiring harness to support it.
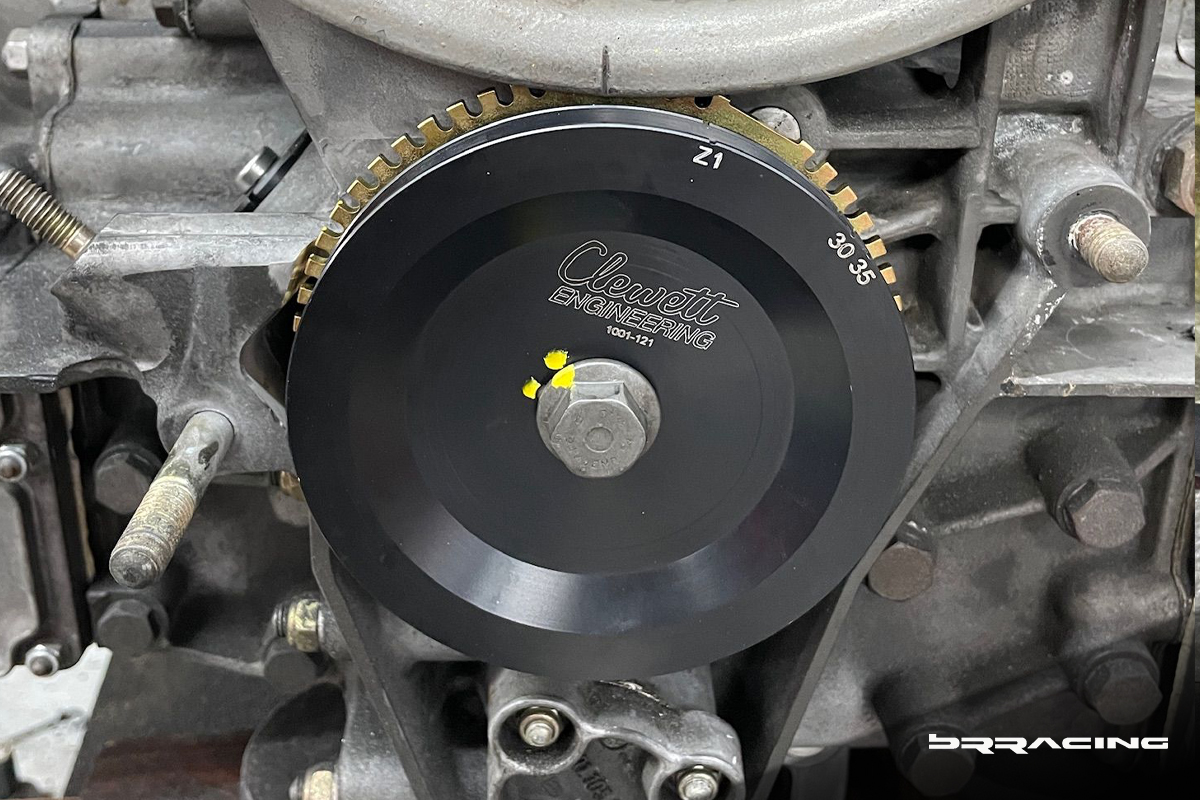
To support the new ECU / standalone ECU, a new crank pulley w reference needs to be installed.
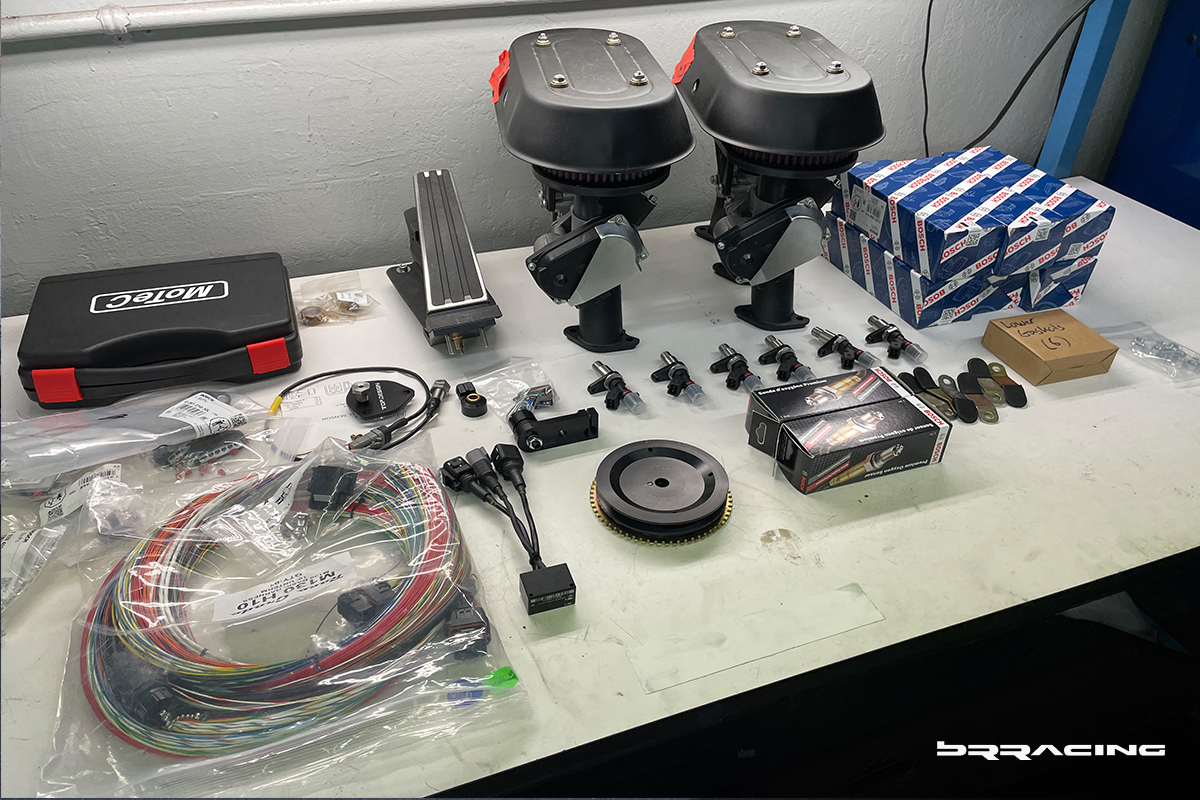
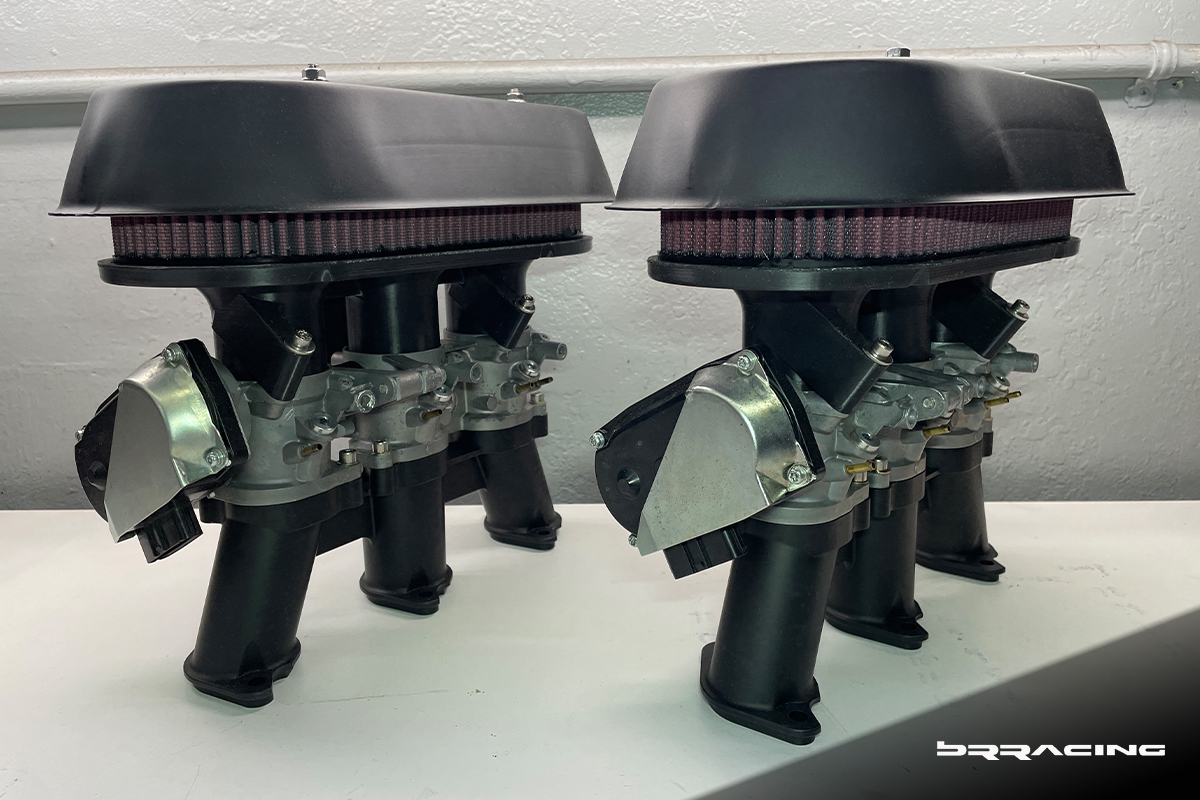
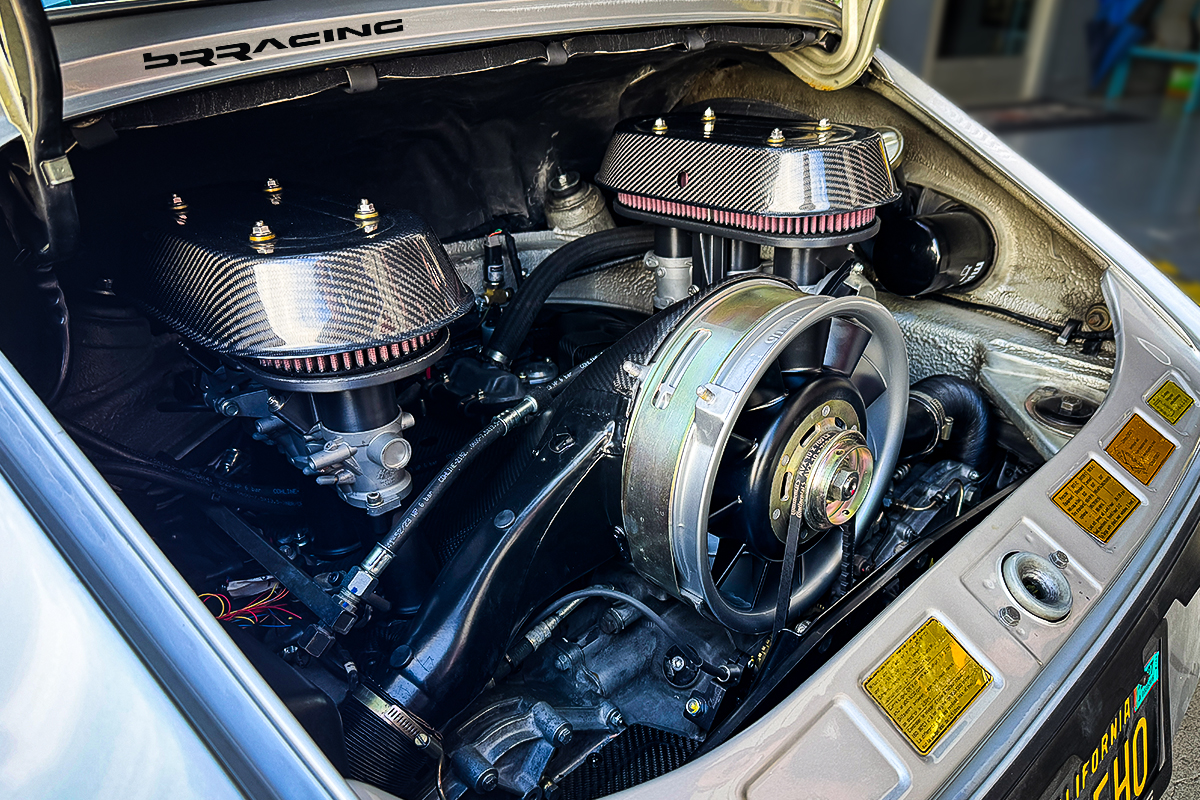
The sexy parts…new, individual throttle bodies w air cleaner / air filters / hats. We later replaced the air filter “hats” w carbon fiber units to match the rest of the engine carbon fiber pieces.
Engine Aesthetics – Adding the WOW factor
If you ever get the chance to hear this car go by, it will immediately catch your attention. You will be drawn to it, you want to know what makes this car sing. Therefore, you’re going to look under the hood. If we are “re-IMAGING” what this could look like, let’s make it look amazing.
So, what do you see first when you open the rear decklid / engine hood? The air cooled engine FAN. In the state that it was, not very becoming –
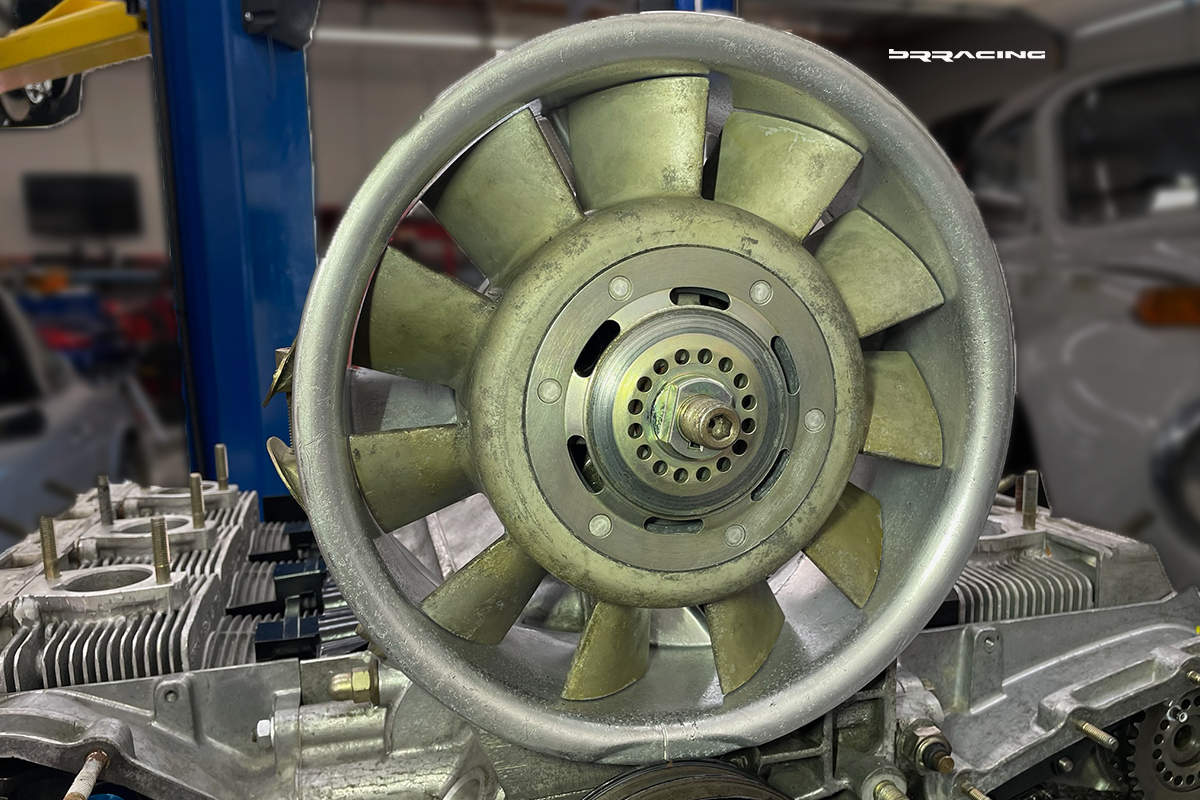
We can make it look better –
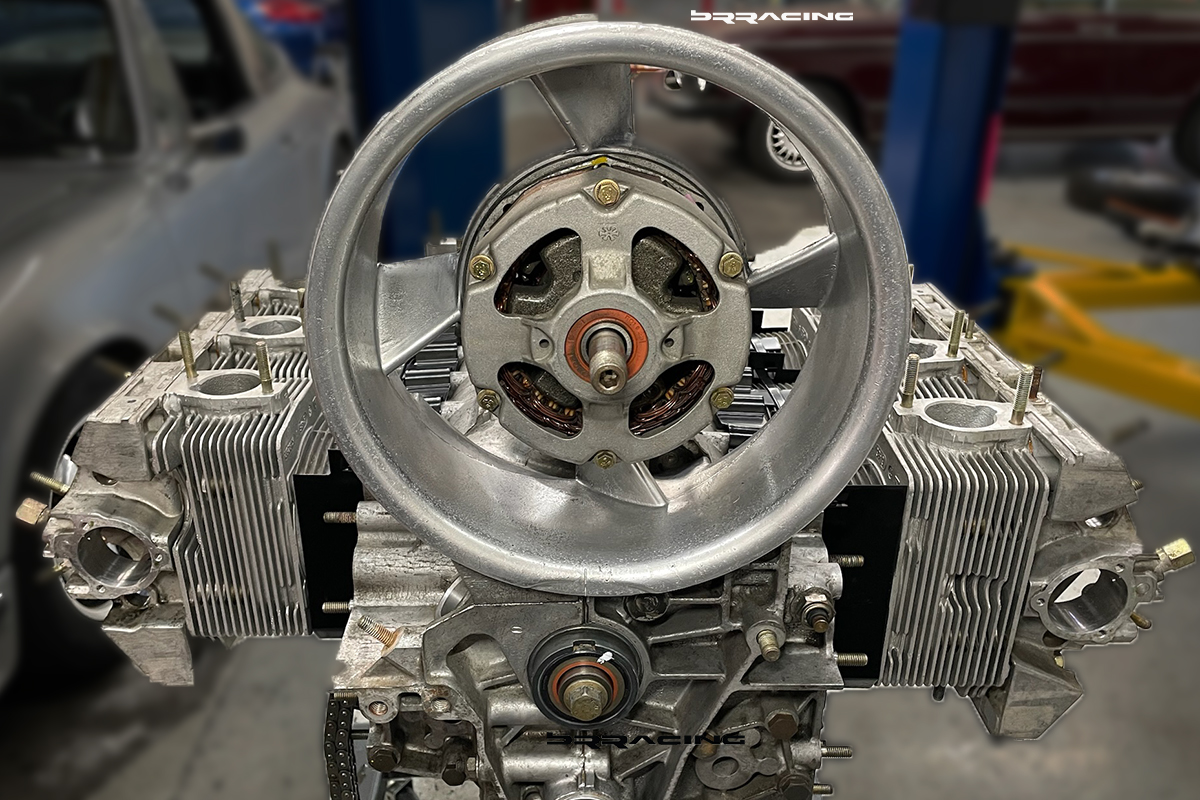
And, we can make the fan blade look better too…
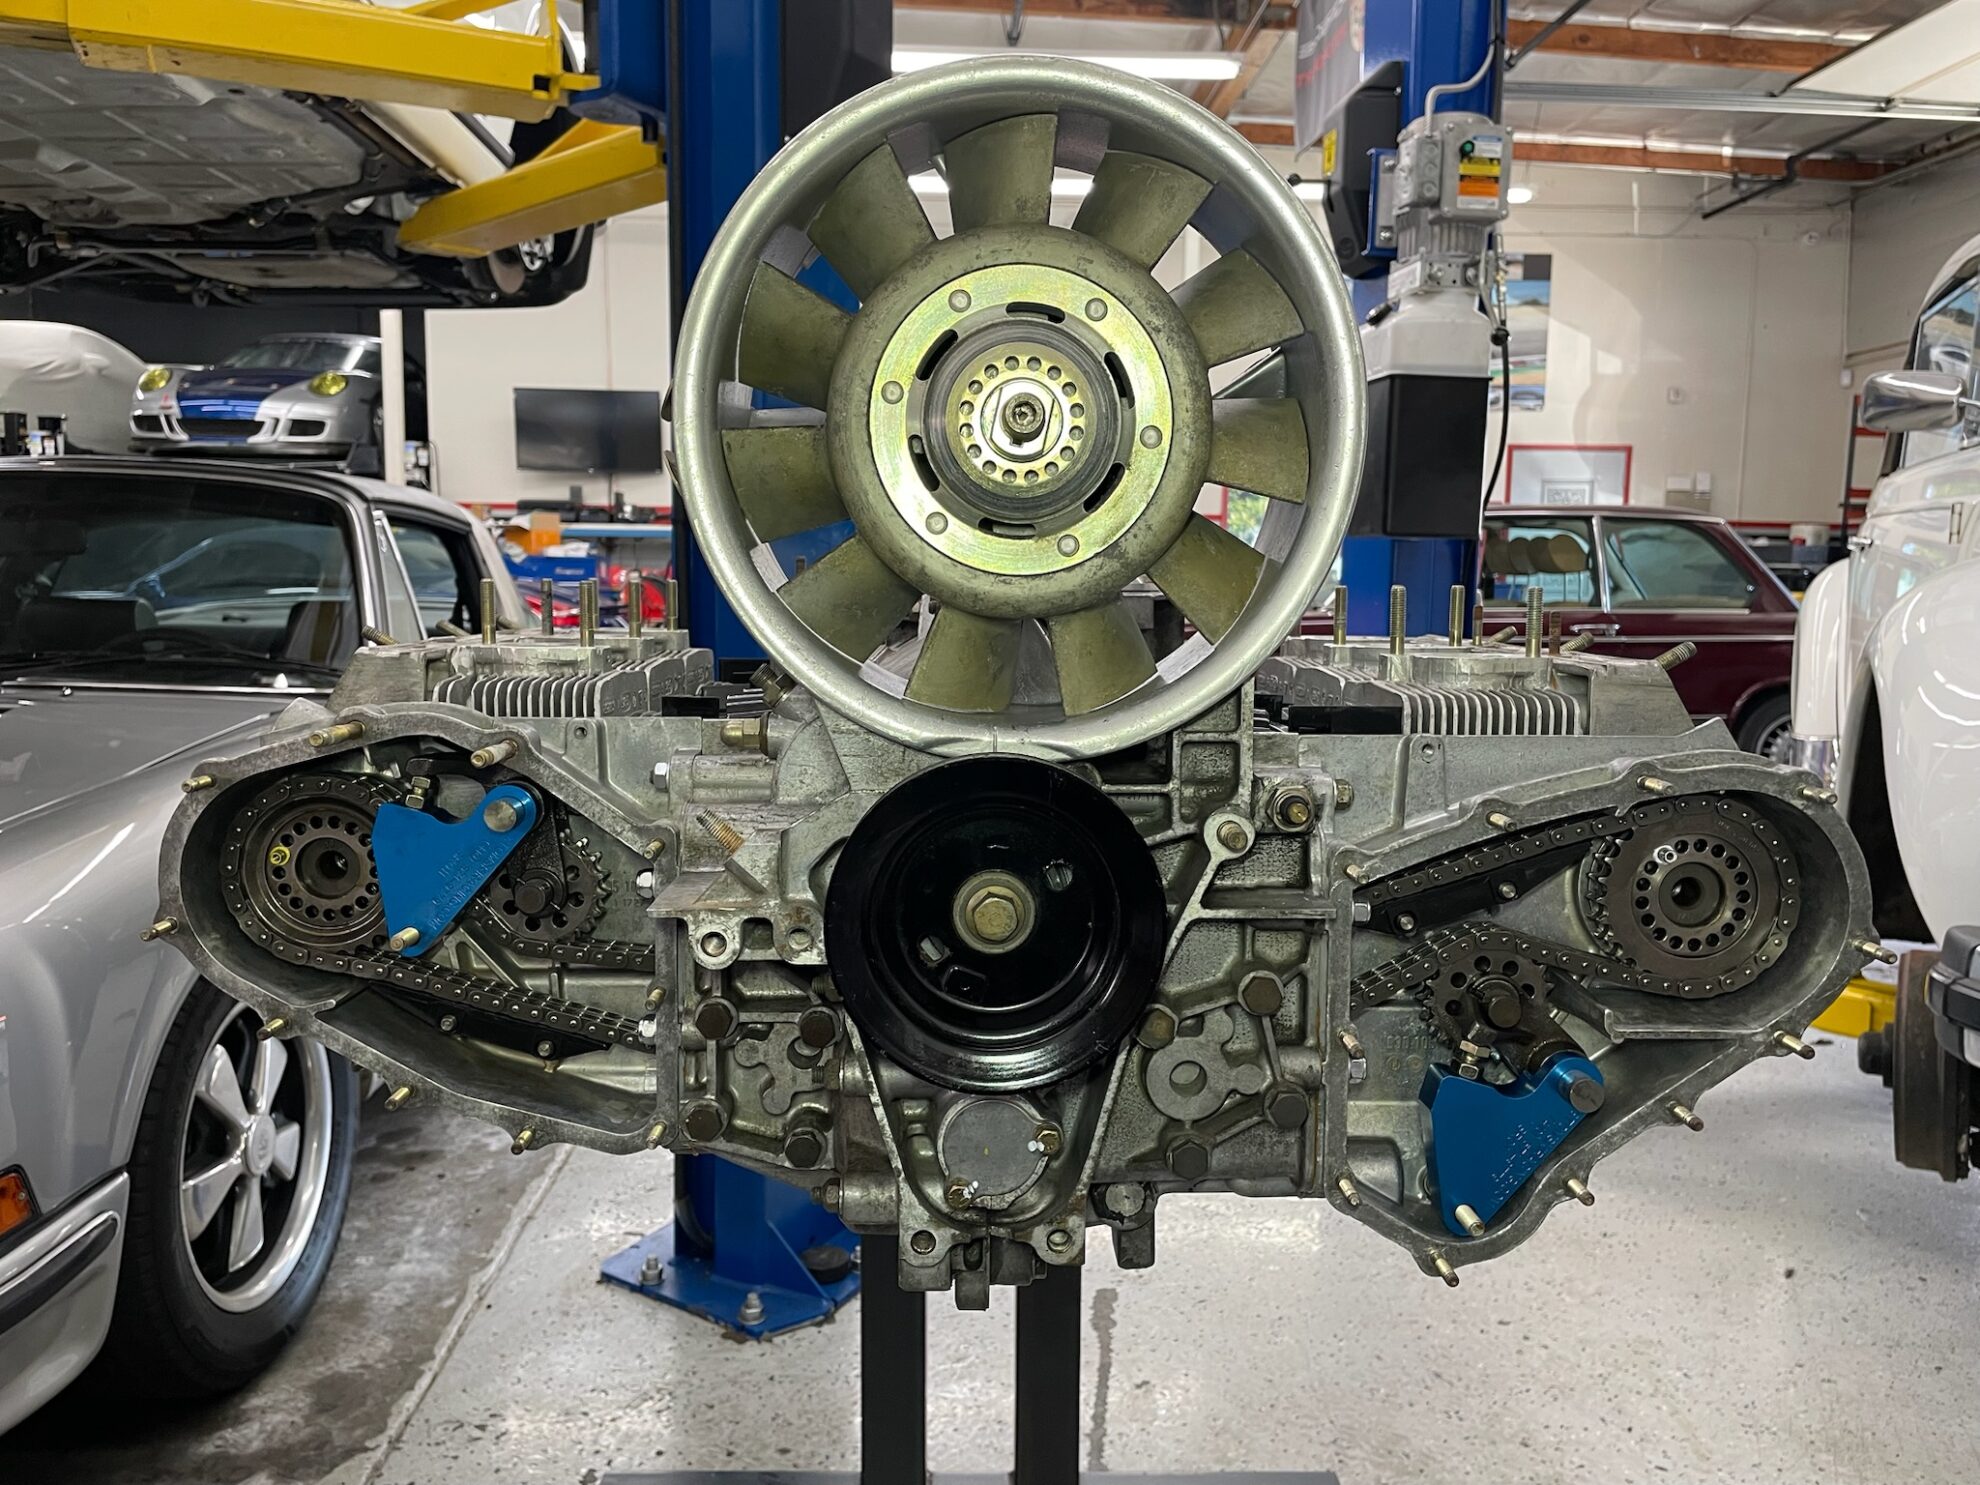
BUT…what would, or what COULD we make it look like? What would your imagination want to make it look like?
Well, we knew what that meant to us. First step, let’s make the fan and it’s surround look like new, and match the color of the car. We could make the fan any color, but w the classic Porsche racing silver exterior, we choose classic gloss black, with the fan surround powder coated in the seam classic Porsche racing silver.
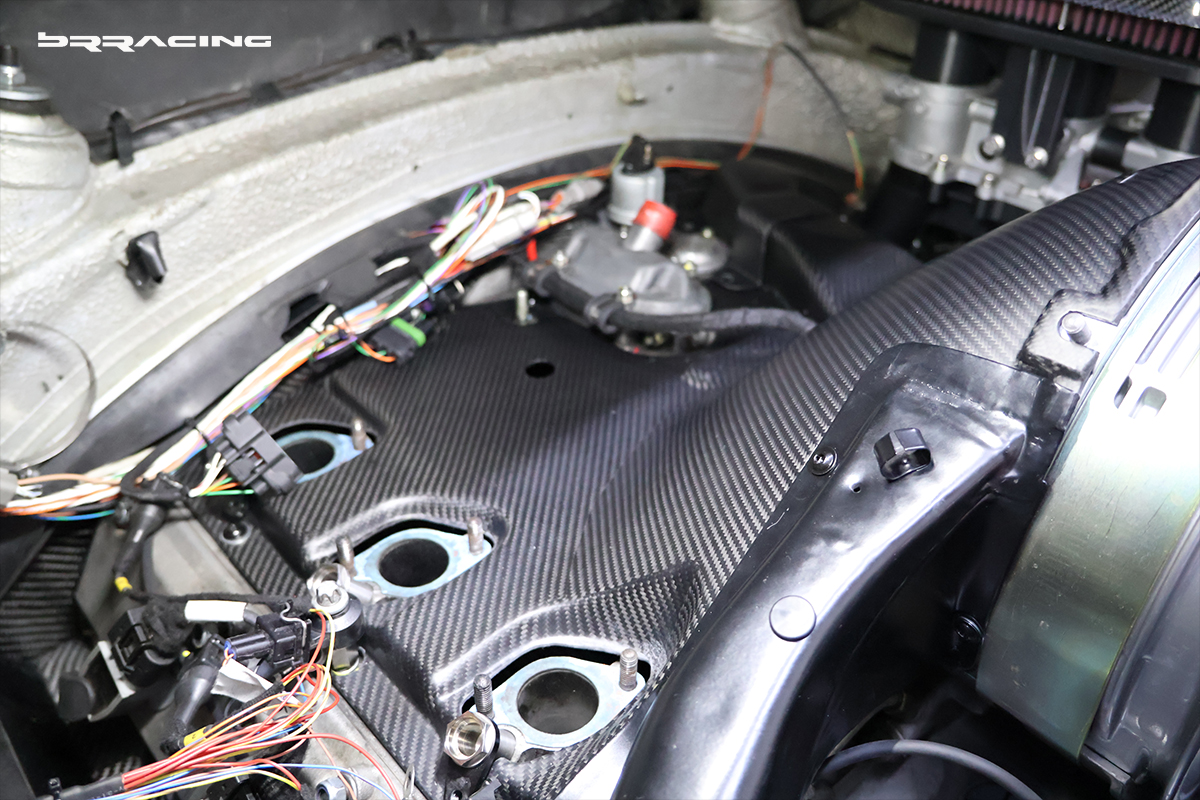
Then, replace all the engine “tin ware”, and replace it all with carbon fiber pieces. Completely, everywhere.
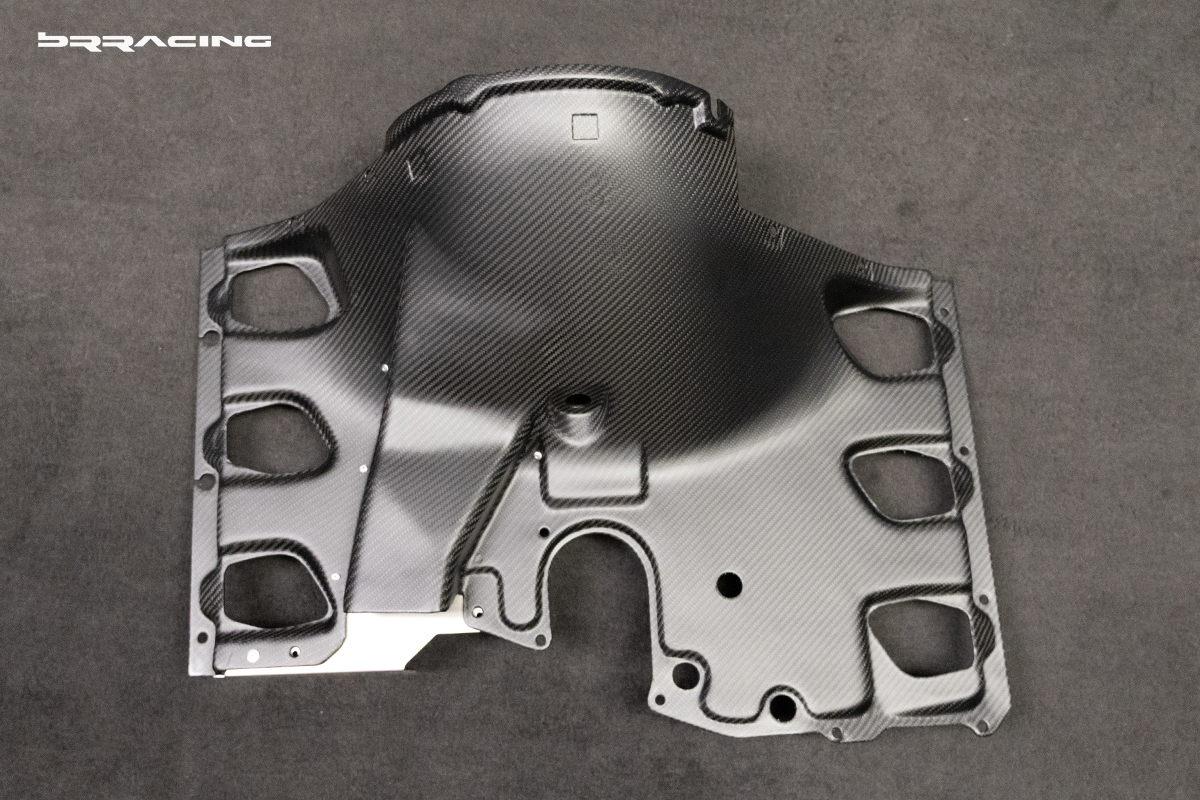
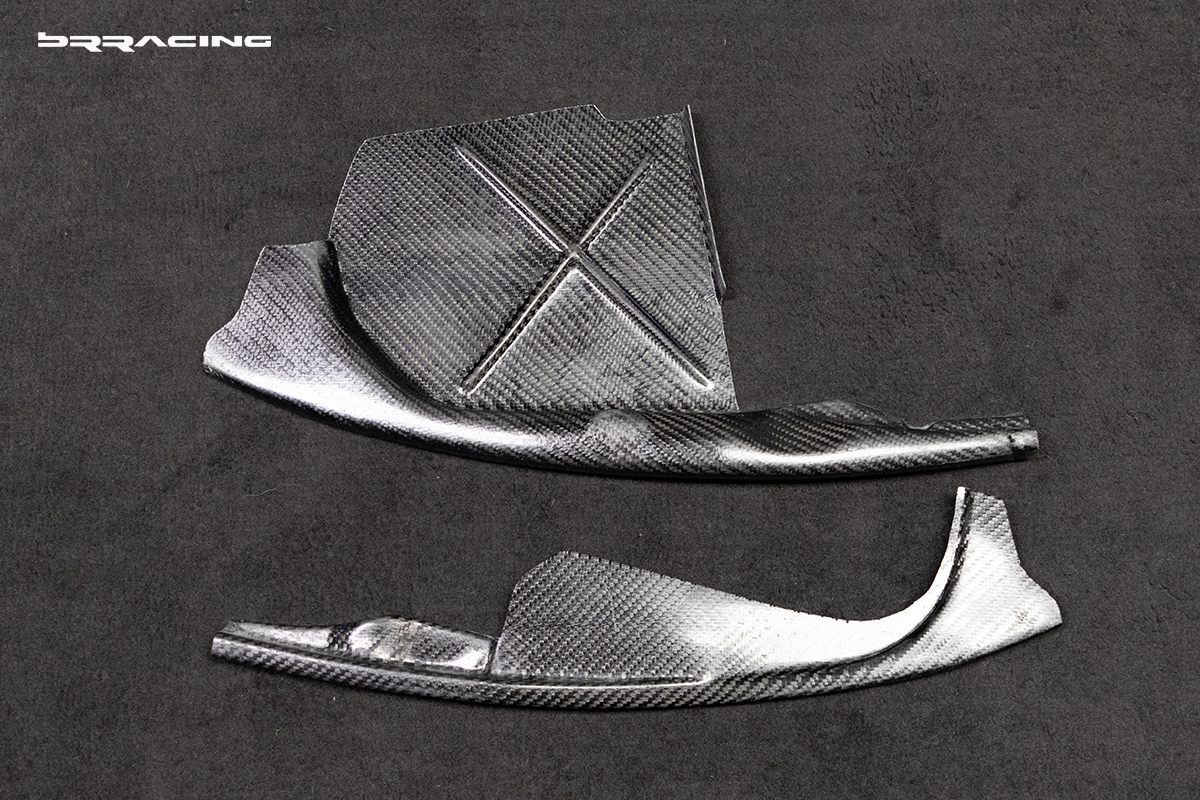
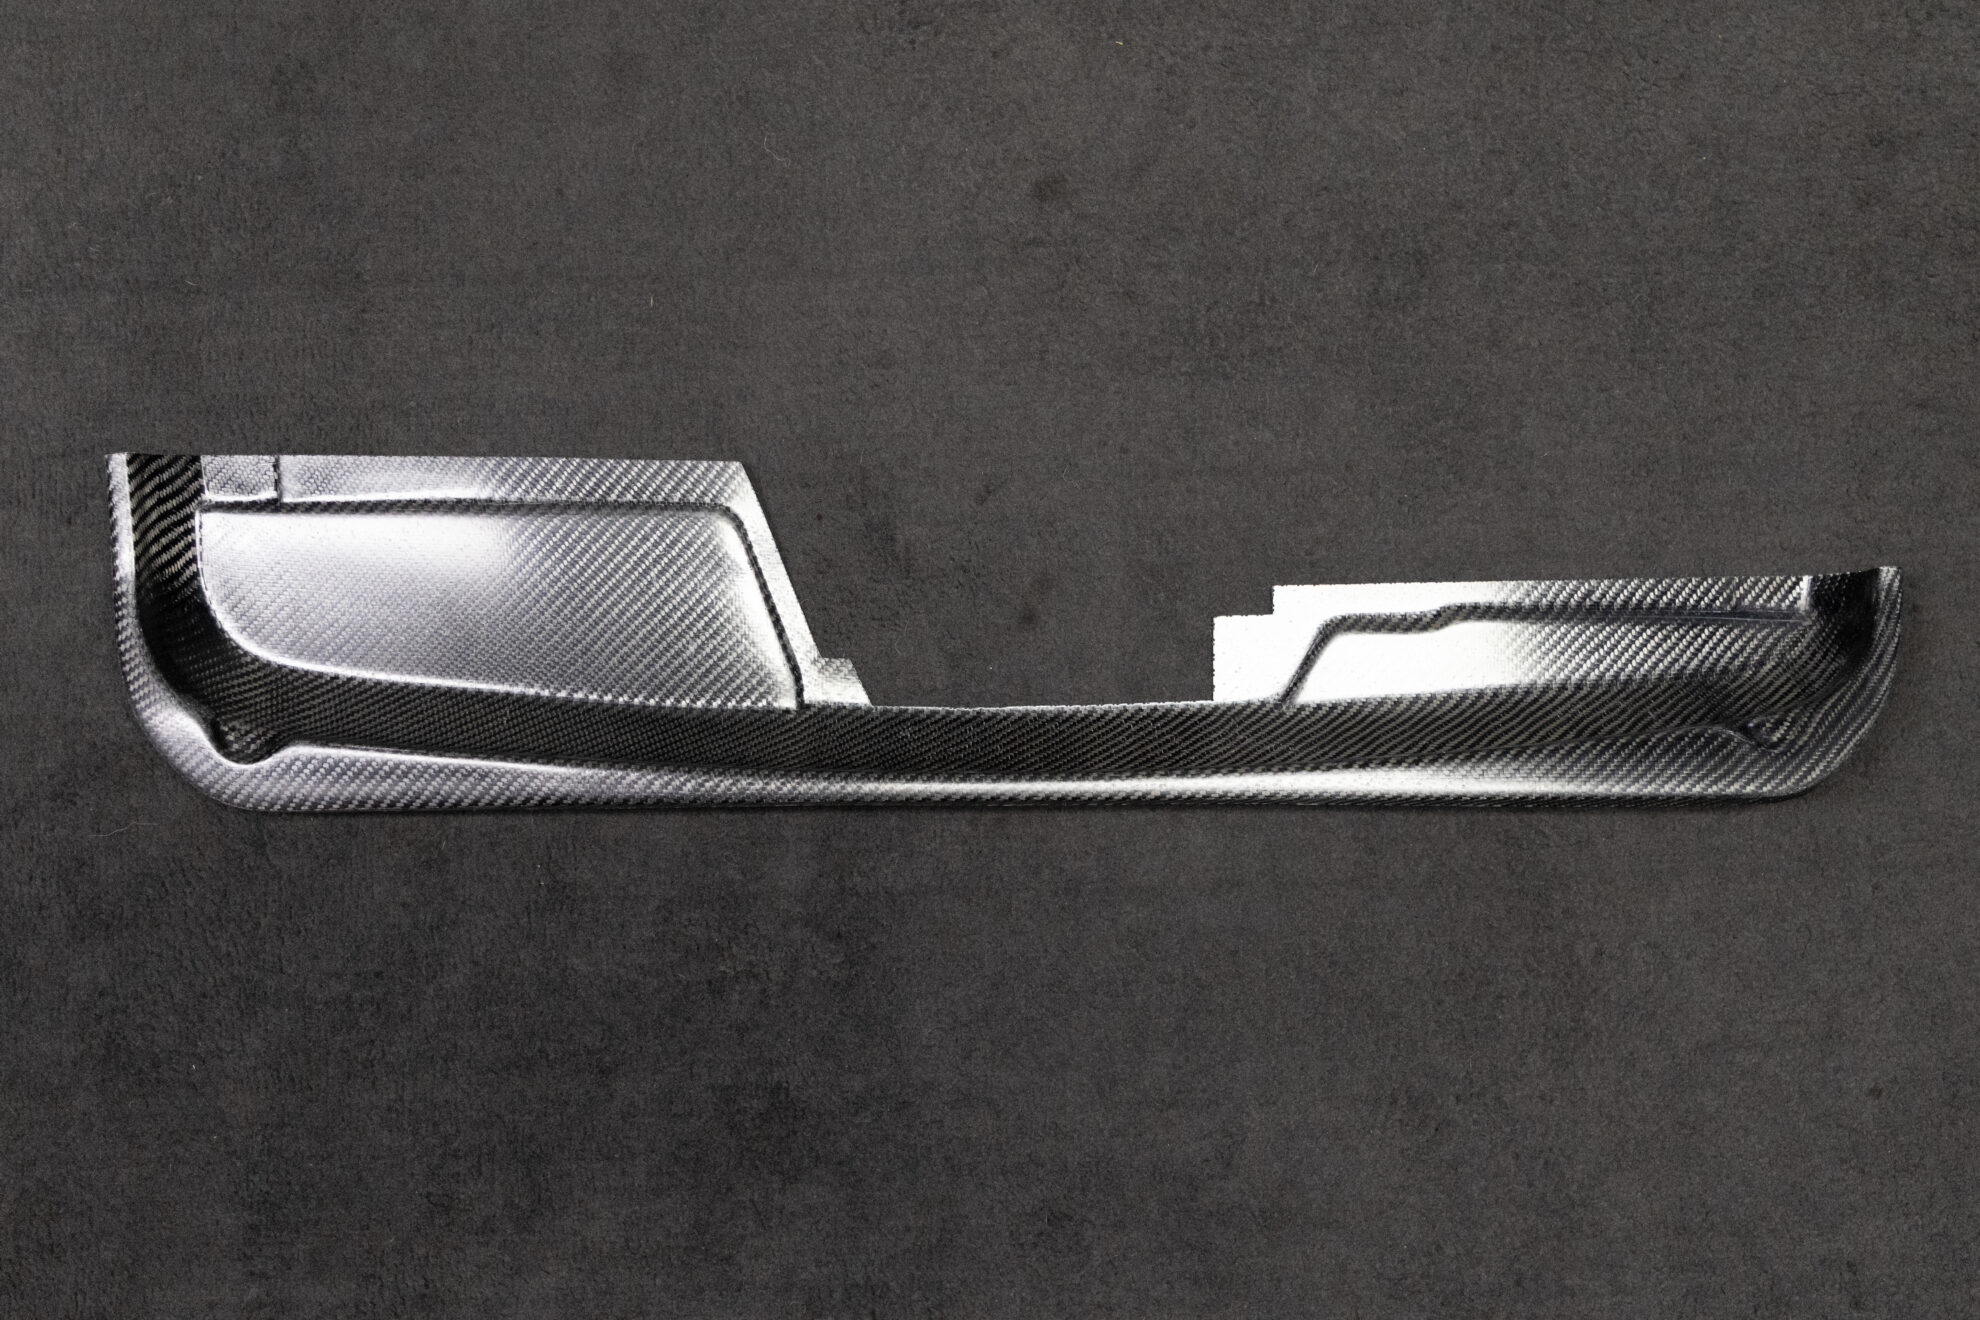
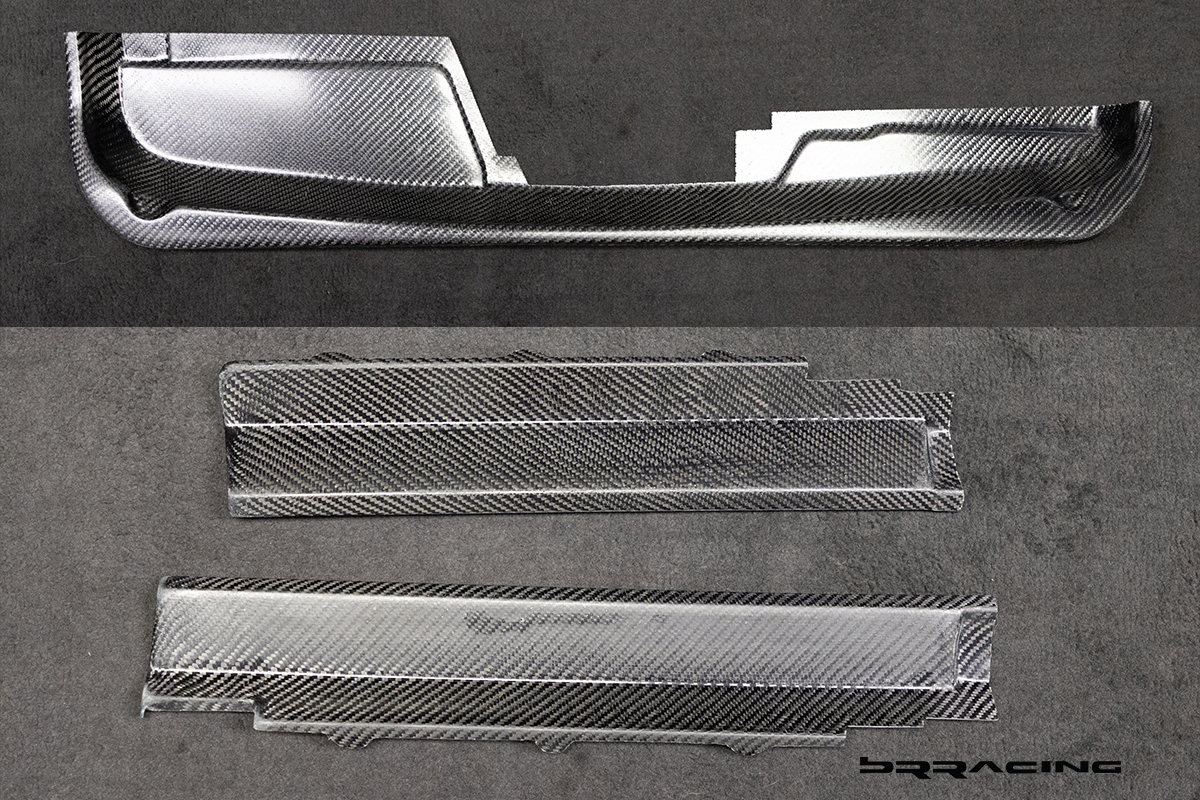
And now we have an engine bay that LOOKS as amazing as it works and sounds.
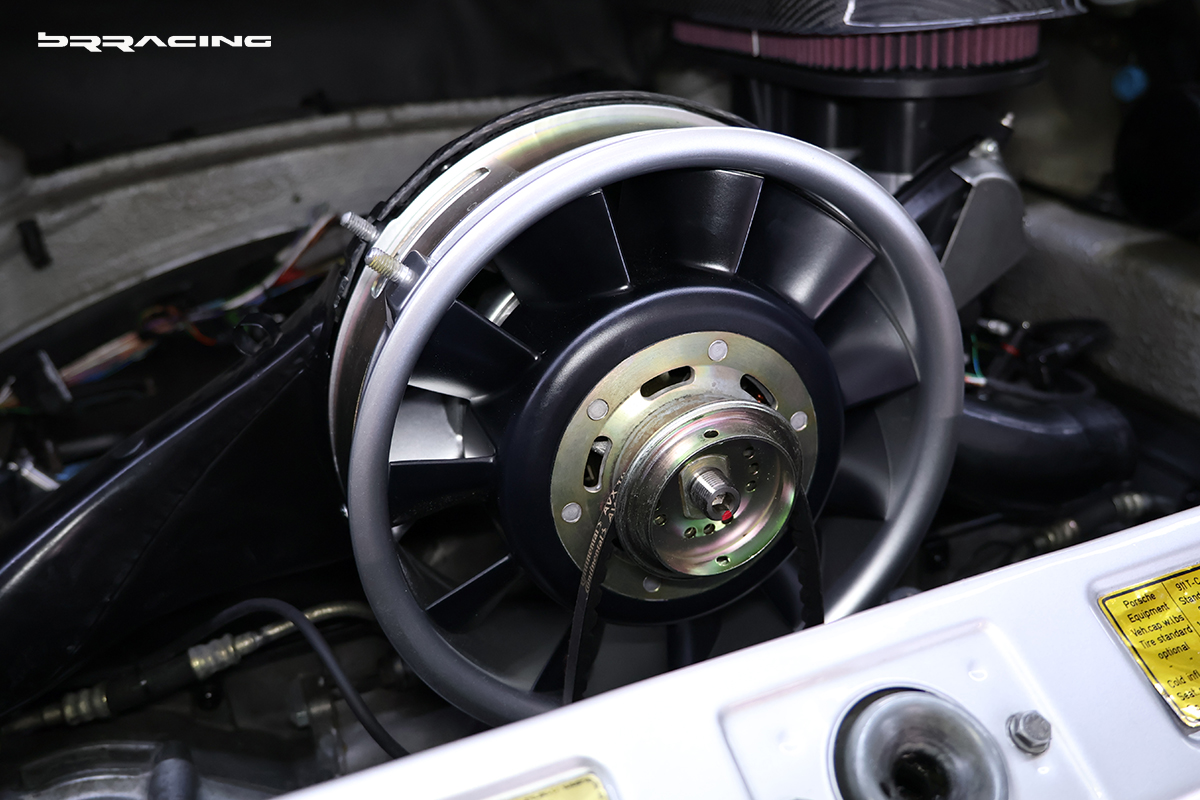
And, putting it all together, it now looks like this –
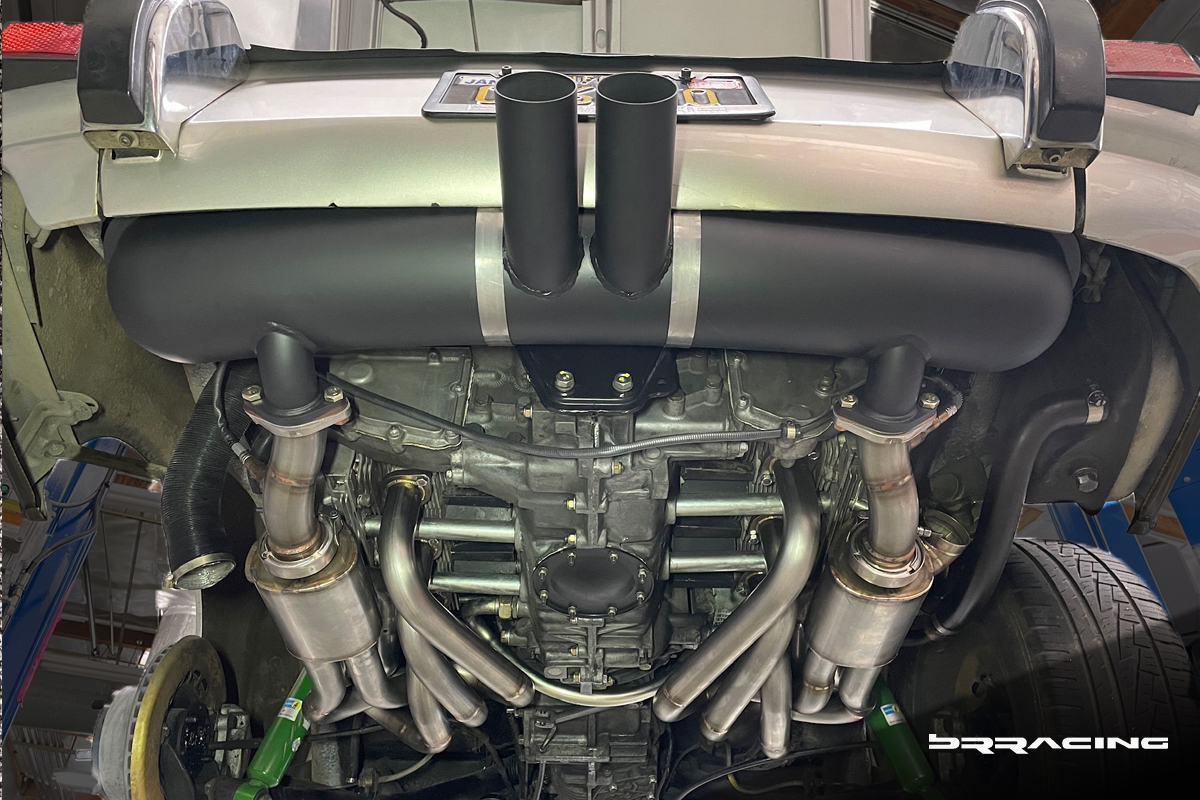
EXHAUST / Headers
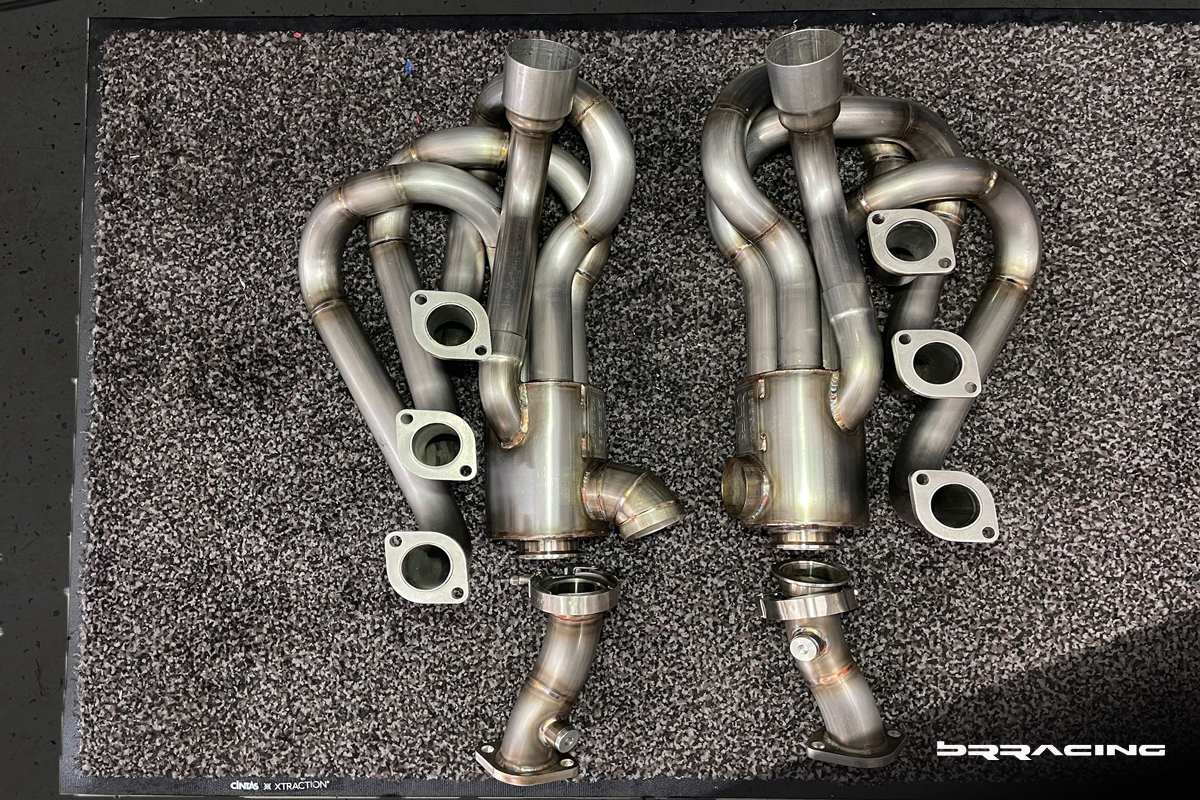
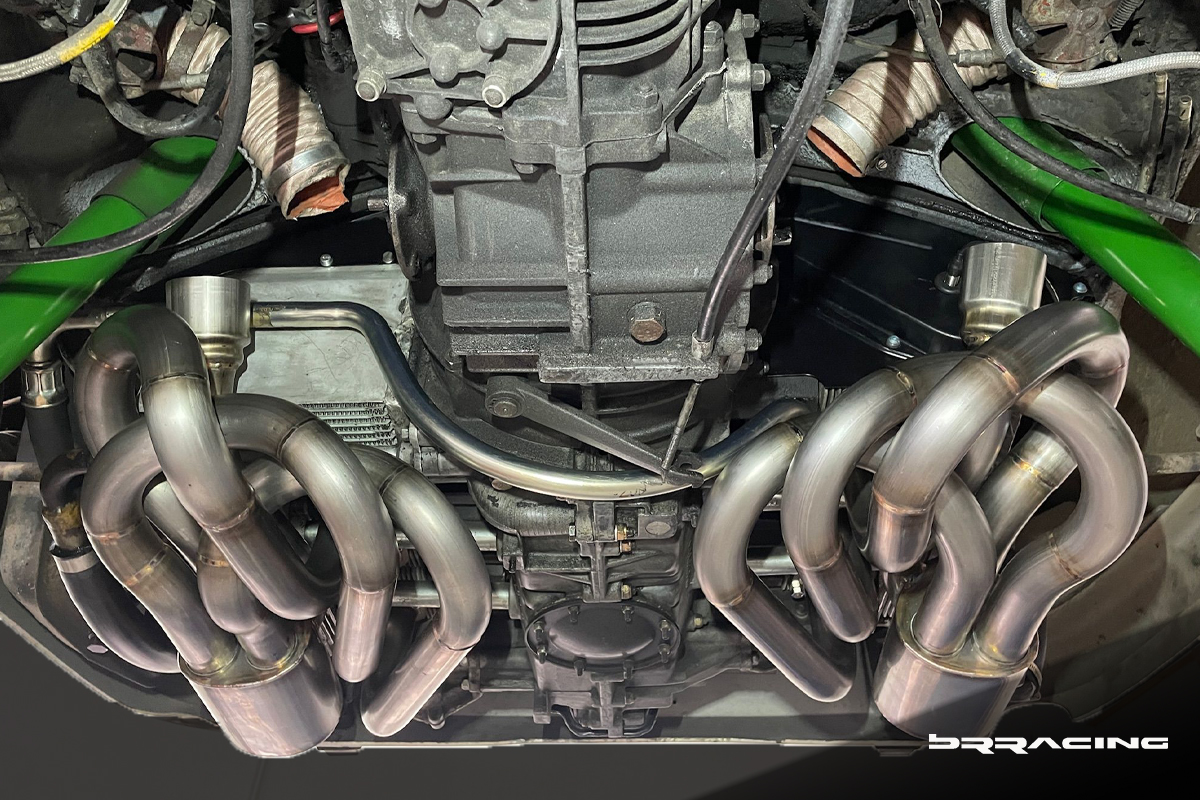
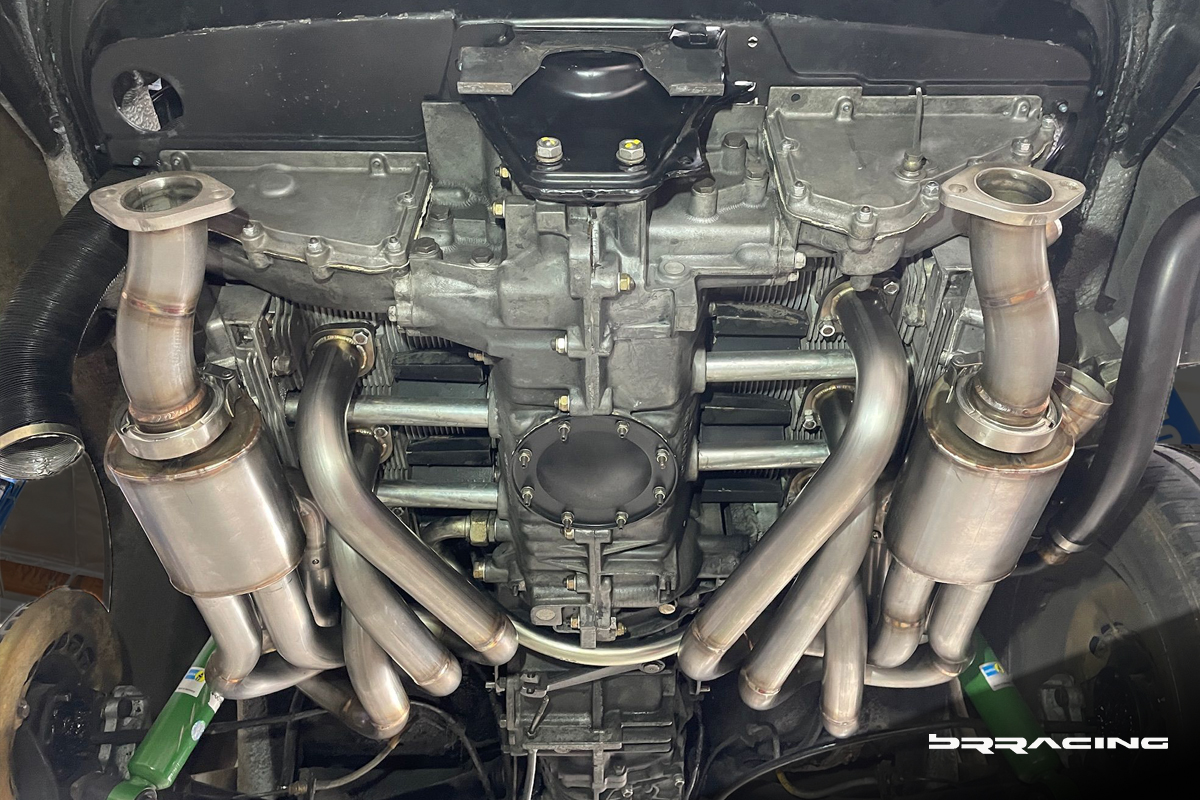
There is a real advantage to the year of this car. It’s a 1973. Why is that important? Well, here in CA, cars that are made before 1974 are smog exempt!!! That means we were free to explore…or imagine, WHAT IF? Well, we chased that opportunity, and came up with one of the best exhaust systems for a 1973 911. From the headers, to the collectors, to the main rear muffler.
New header system retained the heater adaptors for the car.
What an AMAZING sound from this engine. It just sings, at all RPM’s. You just want to get out and drive, just to listen to the magic here.
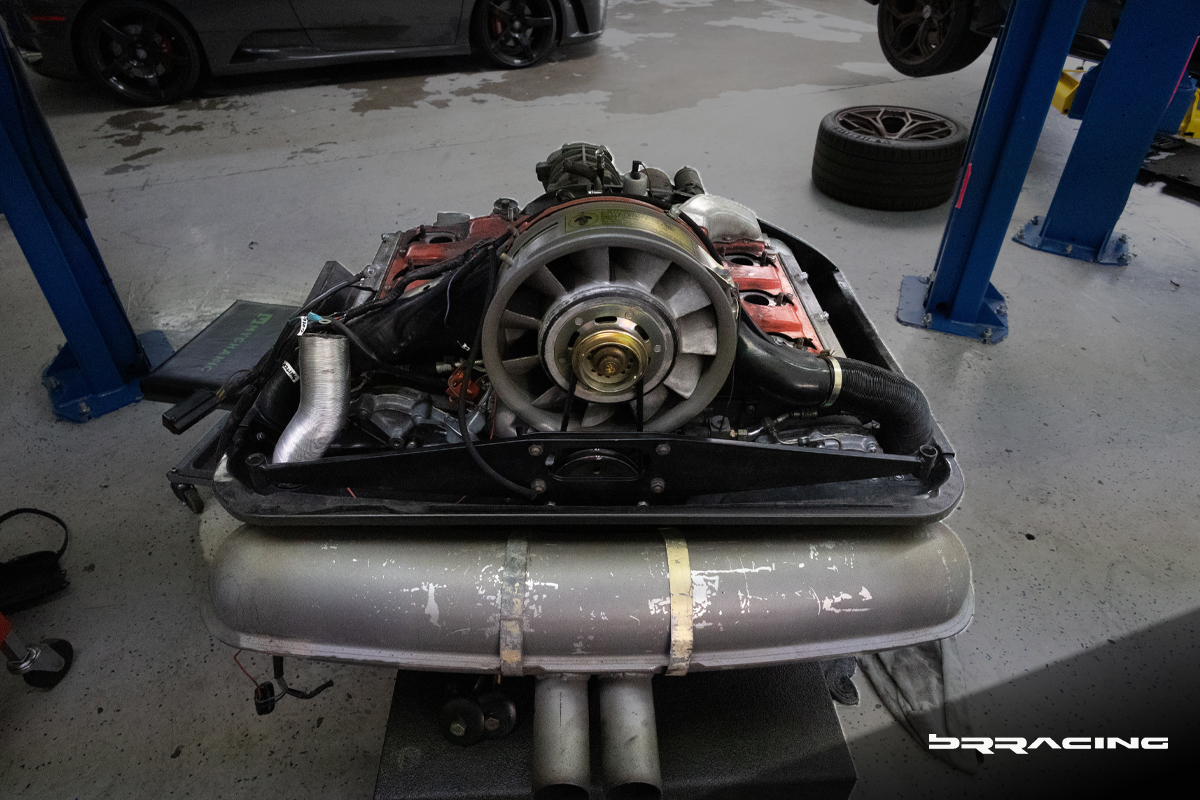
The stock exhaust muffler needed help in every way.
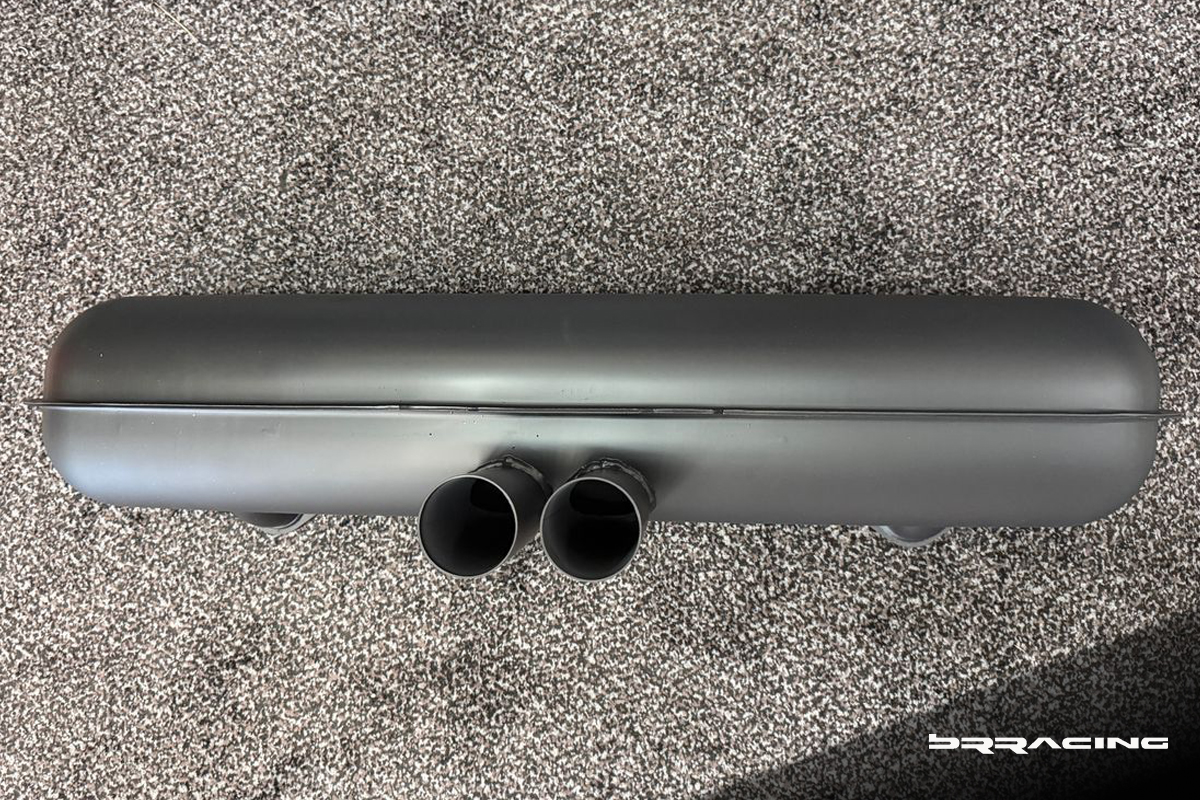
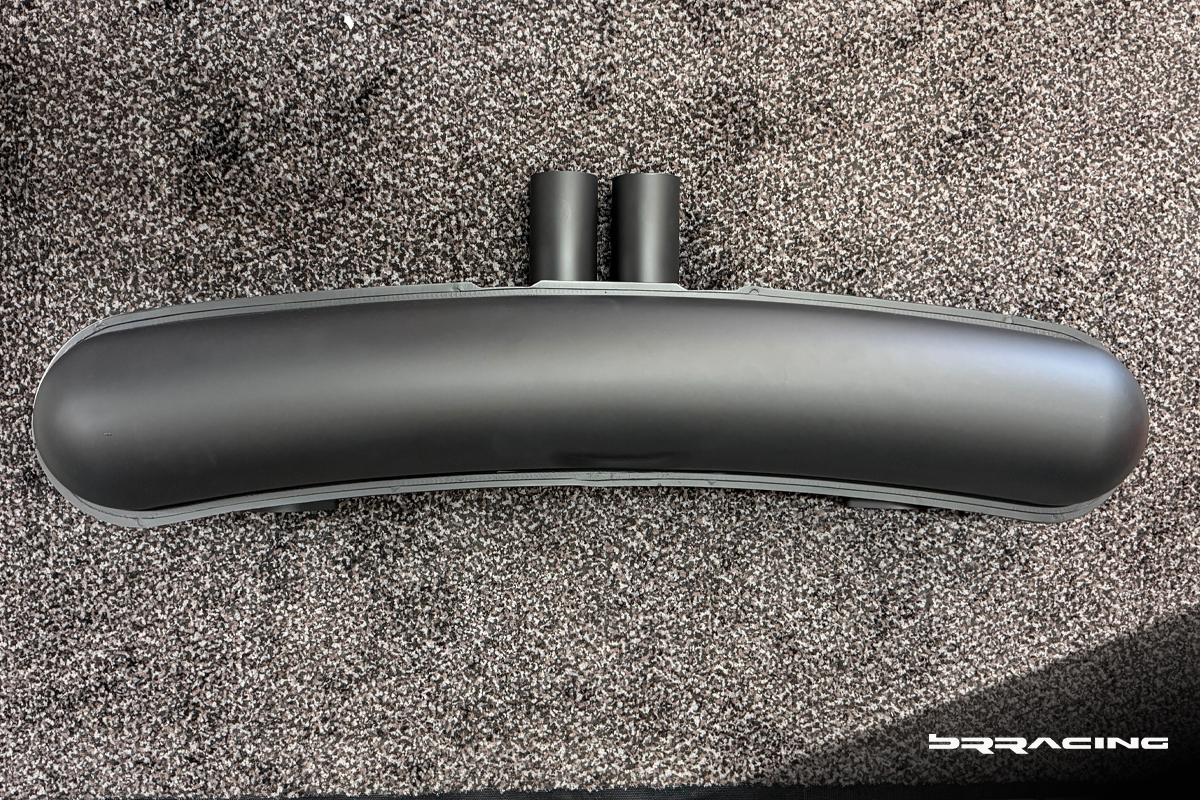
Fresh, new rear muffler, and with the right supporting tip exits. To make it even better, had the complete unit ceramic black coated.
Result
Just what you would dream of. A 1973 Porsche 911 Targa, but essentially, almost like new. Tight, clean, responsive, near perfect inside and out. But, OHHHH, the engine, and the exhaust, truly take this car to a complete different level. You squeeze the throttle, the engine immediately responds, you’re pushed back into the seat, you grip the steering wheel just a little tighter, and the car feels like an extension of your every desire and thought, and delivers on it. Gap in the traffic, it jumps to fill it, squeeze on the throttle at mid corner on the winding canyon roads, and it races for the exit. Oh, the purity of the experience. This is what driving is all about.
Talk to us about how to “re-imagine” your car.