MINI Cooper S R56 Project Upgrade
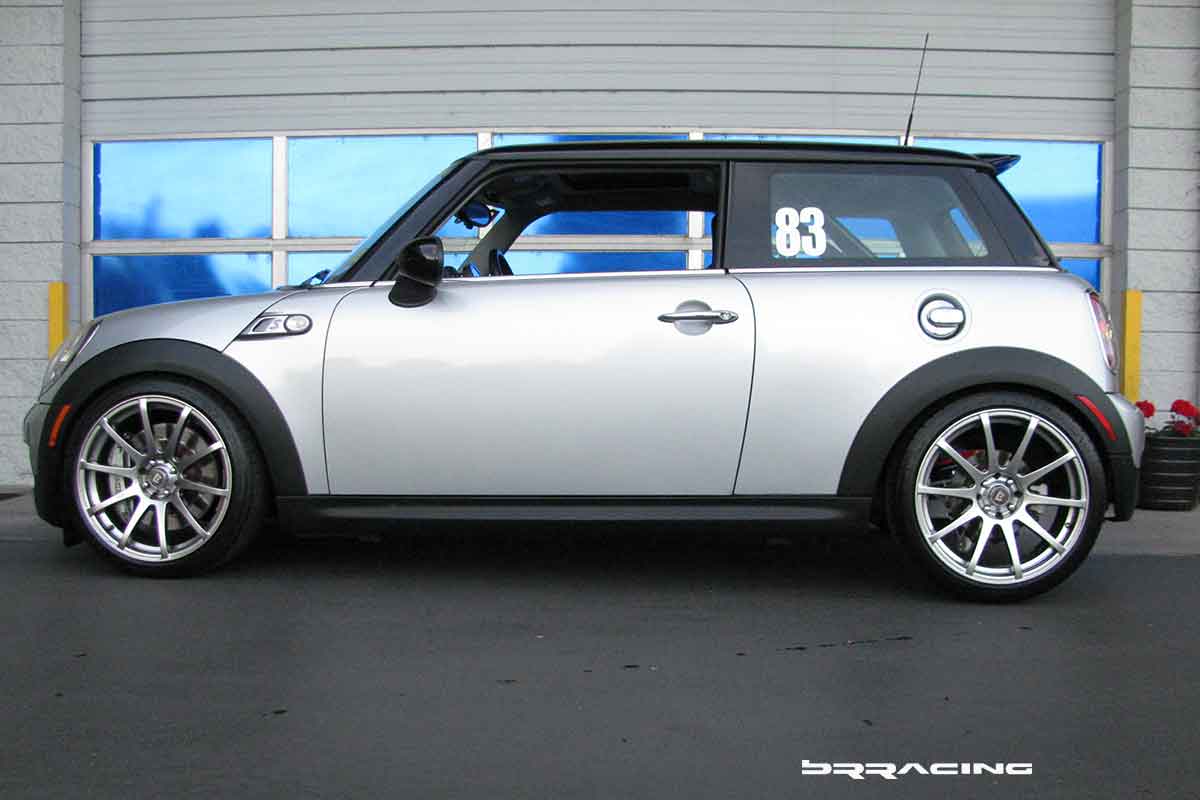
Due to the ease of driving a MINI, and ease of driving FAST, we have seen a flood of MINI’s come thru our shop to have track oriented upgrades installed as the customer progresses or evolves with their Driving Event (DE) habit. Track activity really is like a drug habit…but only w good results. Once you get this into your system, you just can’t get enough, and the smiles and memories last a lifetime.??? This is the story of one customers MINI Cooper S R56 2008 model as he started with a driving school (Hooked On Driving), and now is adding the enhancements to make his DE events safe and fun.
As most know, if you are going to regularly track a MINI (either the earlier generation R53 or the 2nd generation R56), the first area that needs to be attacked is the brakes. Doing minor upgrades on the MINI really won’t solve the core underlying problem…..the brakes suck. Due to the small size, and poor design for heat dissipation, under almost all track conditions, the brakes just won’t hold up….they will overheat and fade away. If we drive a MINI, we can’t last 2 laps without the brakes being completely gone. I’m not talking hard to stop, I’m talking OH MY GOSH I’M GOING TO FREAKIN FLY OFF THE TRACK as I have NO BRAKES!!! Try taking turn 10 at Thunderhill w no brakes…..not the kind of fun that we wanted.
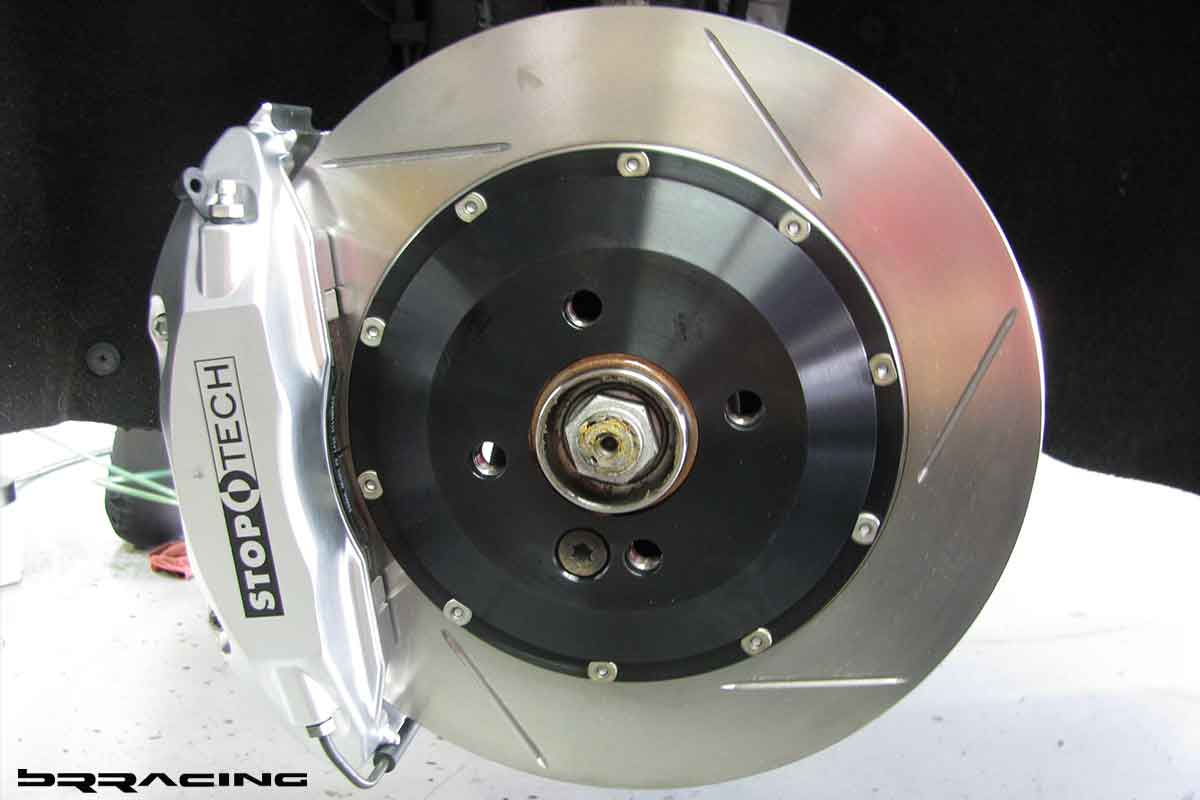
We normally suggest two levels of upgrades for the brakes for customer serious on DE events with their MINIs. A simple upgrade here just won’t do….pads, fluid, and ss lines won’t come close to doing what the car needs. Now, surprising, it doesn’t take a lot of brake upgrade, but it does take a different brake system. We would recommend that a customer consider brake upgrades in this order…both in terms of price and benefits. The least expensive is the JCW stock brakes. As mentioned, it doesn’t take a lot of brake upgrade, but it does take an upgrade. You can implement the JCW system either for the front only, or for the front and rear. The complete system is different from the stock MINI Cooper S. You get bigger rotors, vented rotors, bigger calipers, and better pads and stainless steel brake lines. The rear is not much of an upgrade, but the caliper is painted RED like the front JCW caliper, so it looks like a complete system. The core advantage of the JCW upgrade is cost, and that the caliper will fit inside a stock 17″ wheel. The next step up in the food chain of brake upgrades for the MINI is the StopTech BBK system. This is an awesome system….and will allow the user to put the MINI on its nose under hard braking, and can take all the abuse you care to dish out. The other major benefit of a true BBK like the StopTech system is the ability to have a wide array of pad choices. What good does upgrading the brakes if you are limited in the choice of pads?? The StopTech is a true BBK…floating rotors, massive size, big, strong caliper, larger pads, longer moment arm for the braking center of pressure (this is the real key to better braking or stopping power). The only downside to a BBK is that it requires a 18″ or larger wheel…and for a MINI, that really just means an 18″ wheel. So, the cost of the BBK upgrade is the braking system and complete new set of wheels and tires (but you want those anyway for track use….its really a win/win). The other attraction of the StopTech system in the world of BBK kits is the price…great value.
Finally, as most know, the top of the braking food chain is the Brembo system. Brembo makes a great braking system, and the one for the MINI (front only, and that is all your really need) fits well in a slighlty wider array of MINI 18″ wheel options. This system too is a complete BBK…floating 2 piece rotor, big, strong caliper, bigger pads, longer moment arm for center of pressure…everything you need in a BBK. Its just the price that is a little higher. Large selection of pads, from street/performance to full race options. This project MINI, due to the choice of wheels and the desire for the best braking system, received the StopTech BBK upgrade. To make most wheels fit (these wheels have an offset of ET40, will require a 5mm spacer). Awesome system (this MINI gets the StopTech ST40 front BBK kit) –
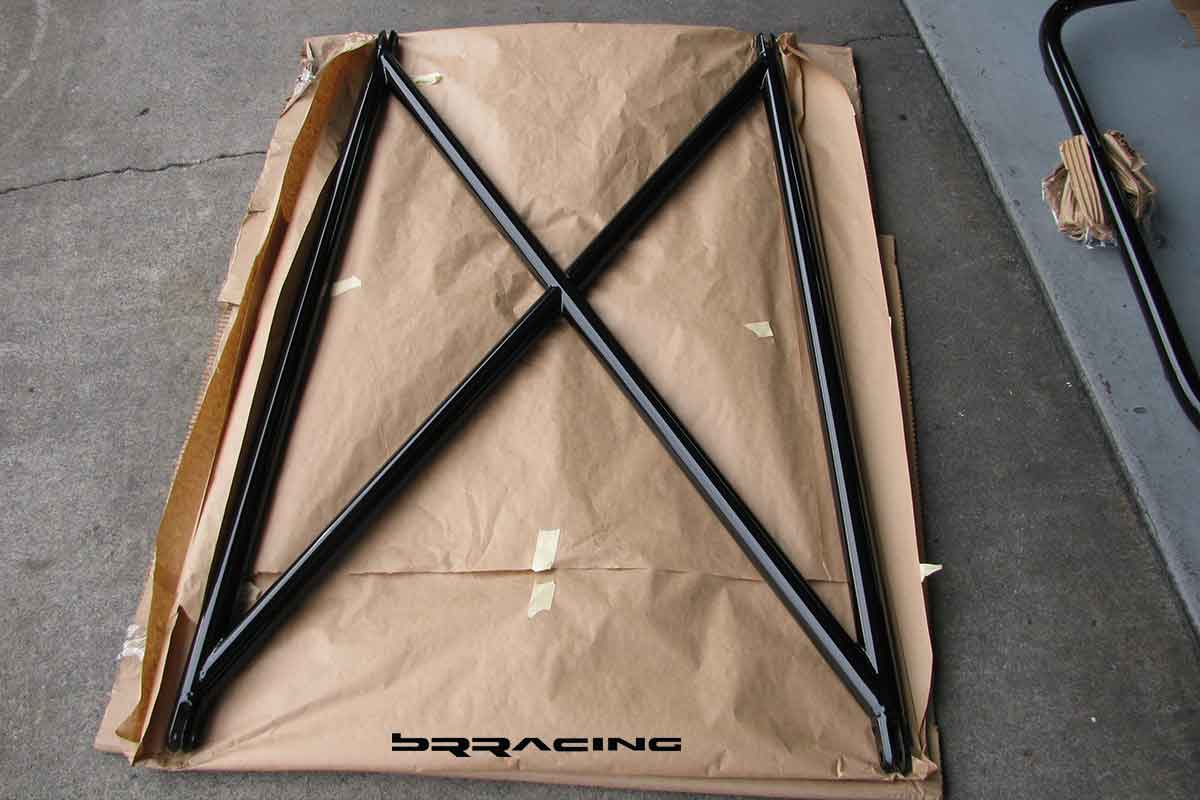
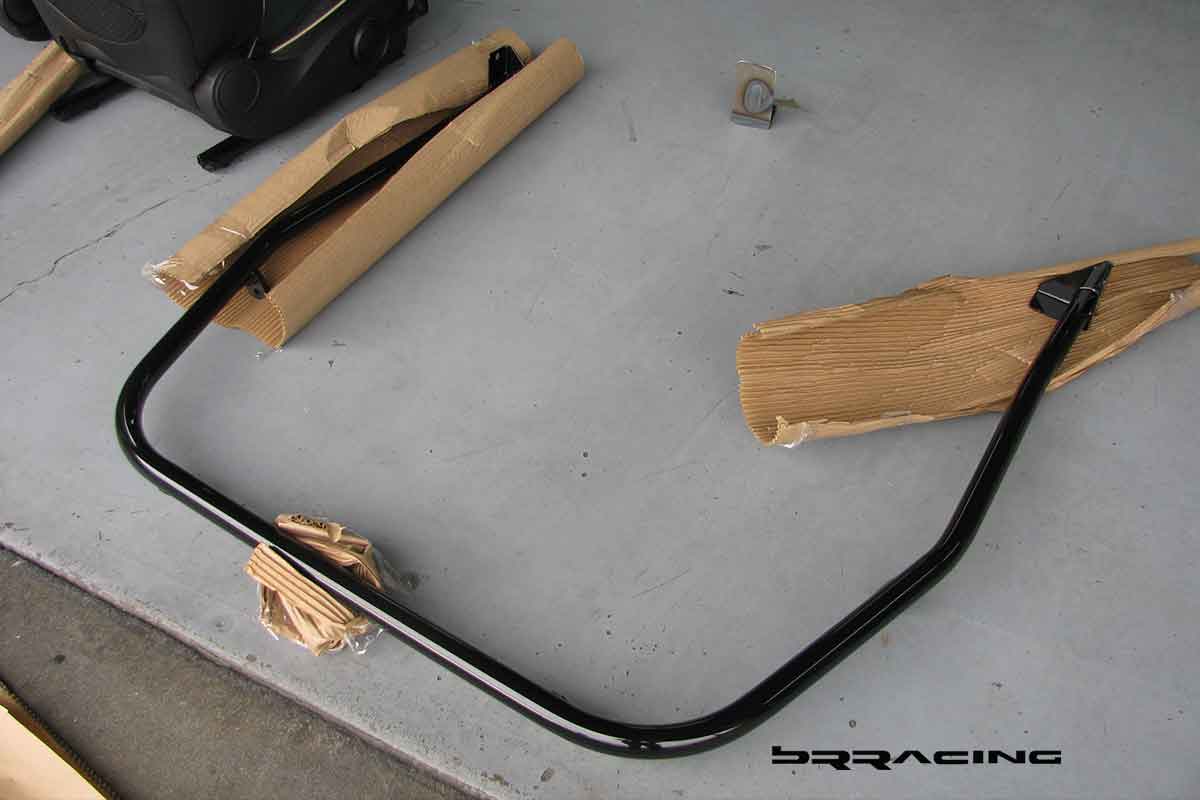
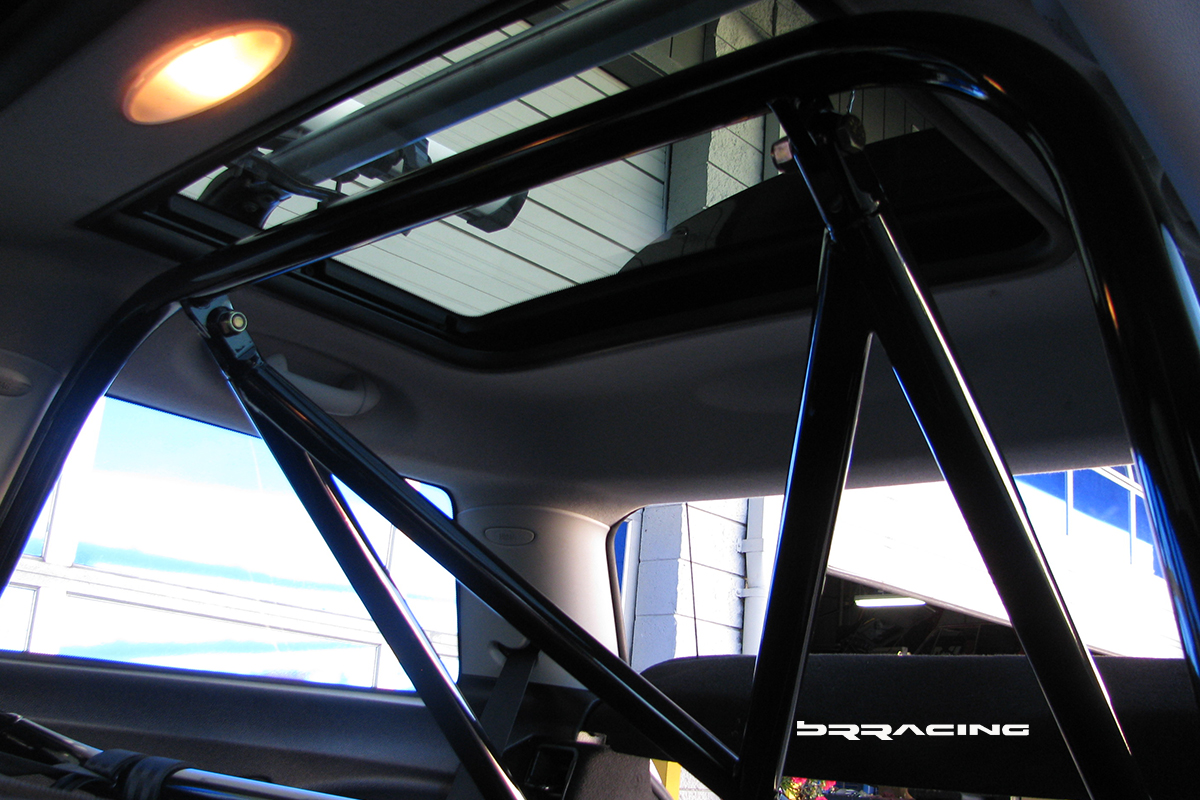
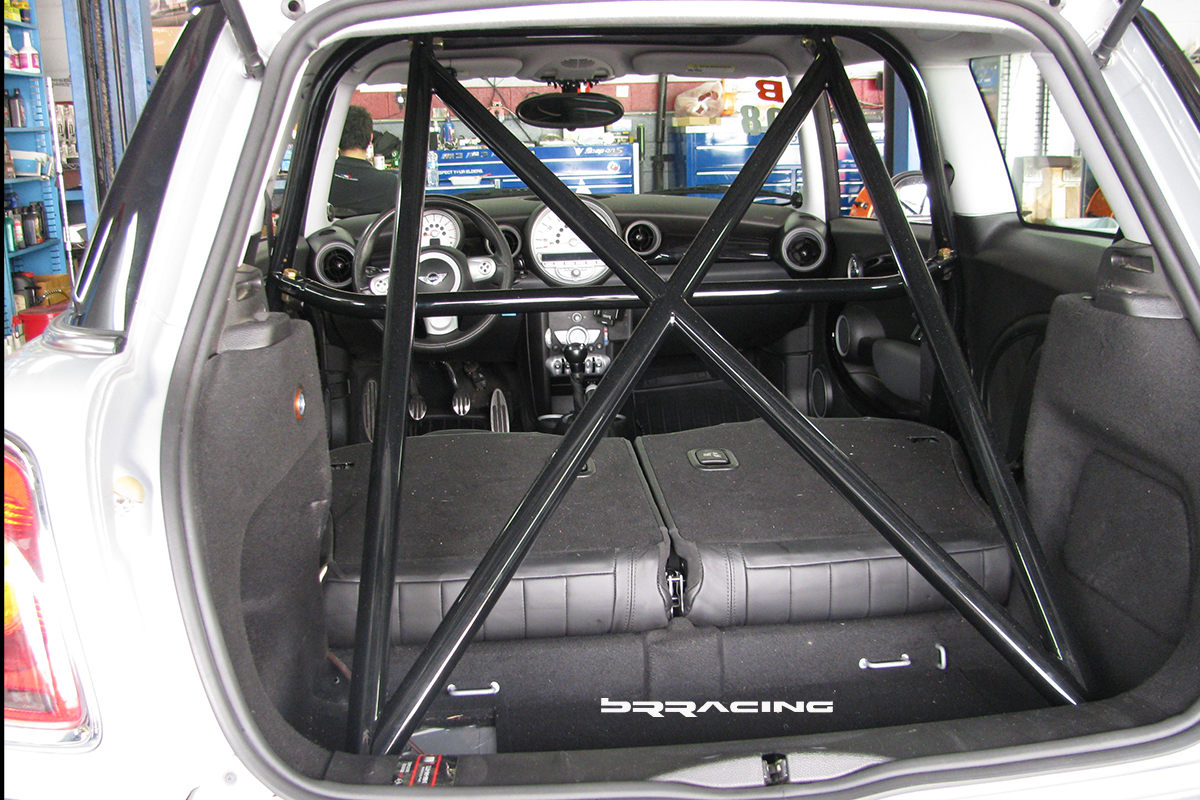
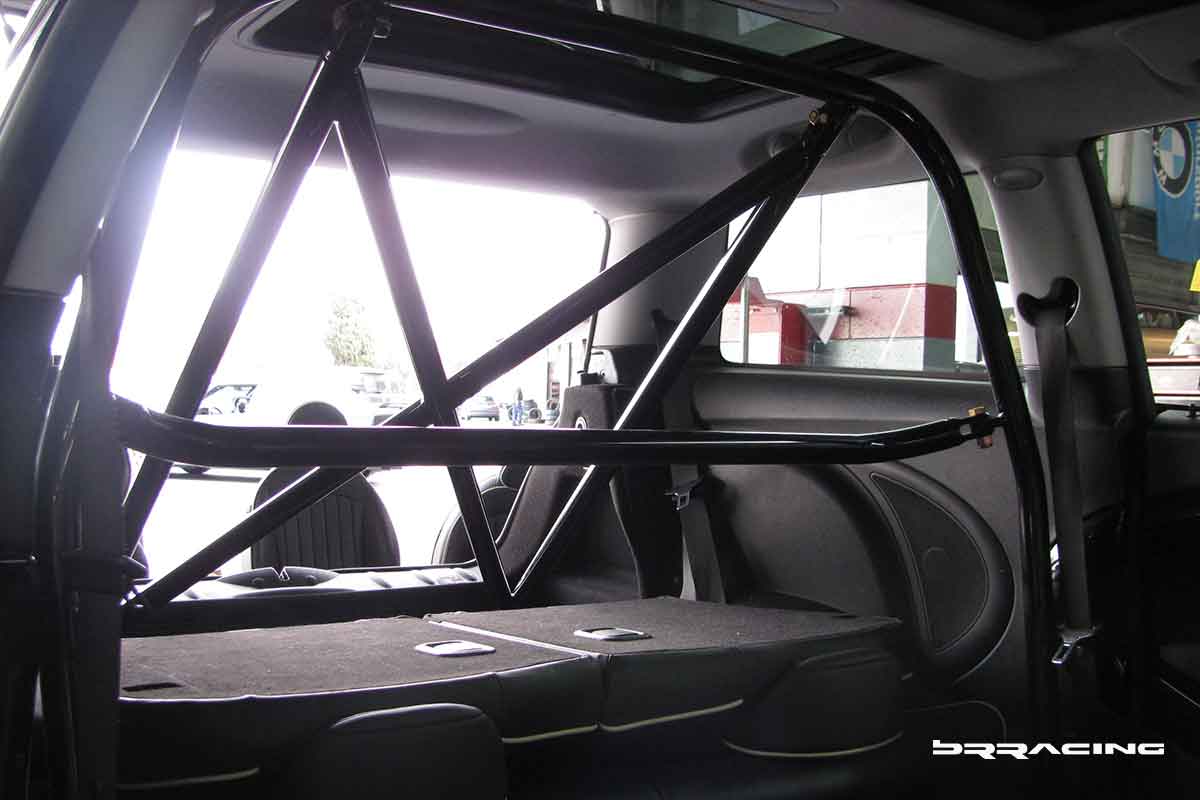
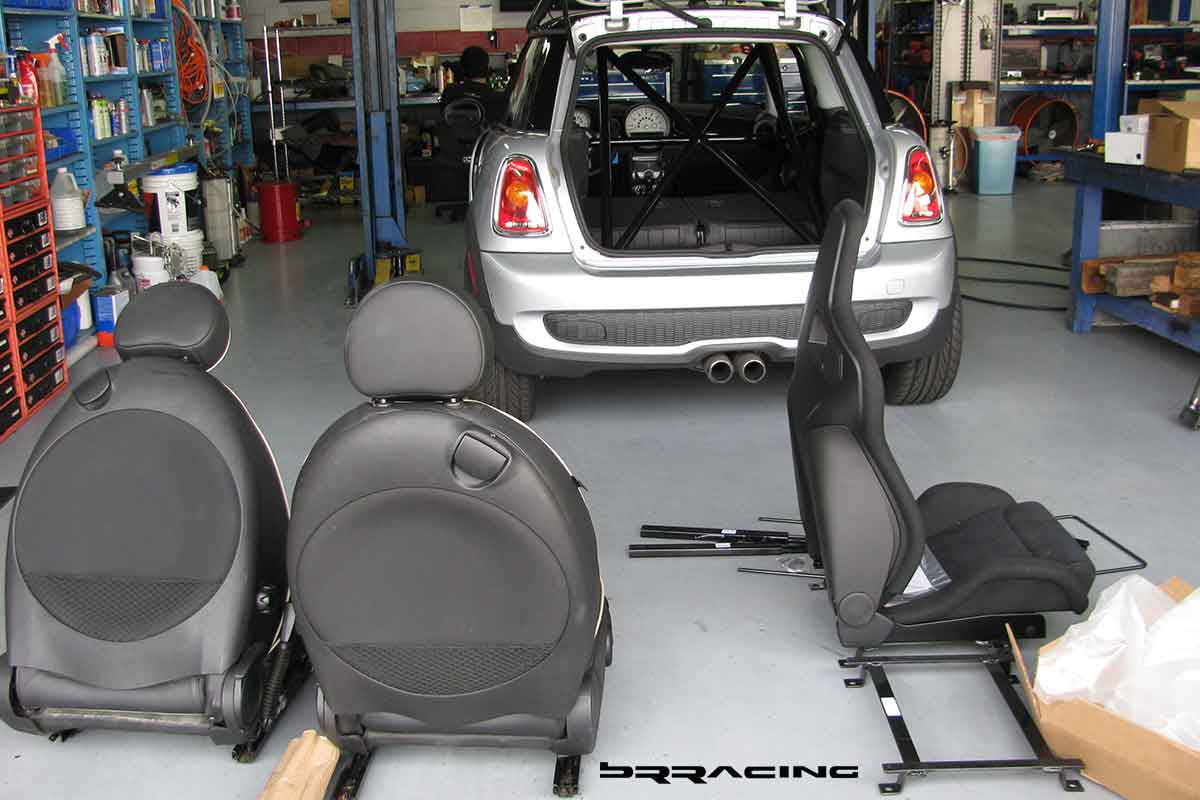
Now, if we can get the car to stand on its nose under braking….we need some way to keep us planted in our seats or we will become like the bug, and a smear on the front windshield. There are SO MANY reasons to deal with seats, harnesses, and a harness bar. SAFETY is the number 1 reason, but there are many more. We find that in every track upgrade…when we upgrade the seats and harnesses, and can keep the driver focused on driving, and not holding themselves into position while trying to corner or turn…that their lap times drop by about 2 seconds or more. Most customers think of so many other things first to get their car to go faster…when they need to focus on themselves, and getting them into an environment that allows them to go faster. They are more comfortable, planted, relaxed, and they can focus and enjoy the whole driving experience. Most cars without these upgrades, have drivers who come home from a DE event with bruises on their knees and legs, and find their arms hurting from the strain. Not what we want at all. And….if we’re going to put those safety features in, we need a proper way to secure the whole system…and this is where the harness bar / roll bar come into play. The main reason for this is SAFETY….you can NOT cheap out on SAFETY….if you are going to do DE events, then this is the NUMBER 1 priority. PERIOD…no questions, no maybe. You have to invest here. This car and owner did, and purchased the BRracing complete harness / roll bar solution. Just like any well designed system, there are many benefits. Safety, added strength and rigidity for the car, proper harness attachment. Our system also allows the horizontal harness bar and rear down / X brace to be removed so that if the car needs use of the rear seats, you can. Our system also attaches to all OEM attachment points, so that no new holes or welding points or fabrication is needed. Here is the bar in the stages of installation.
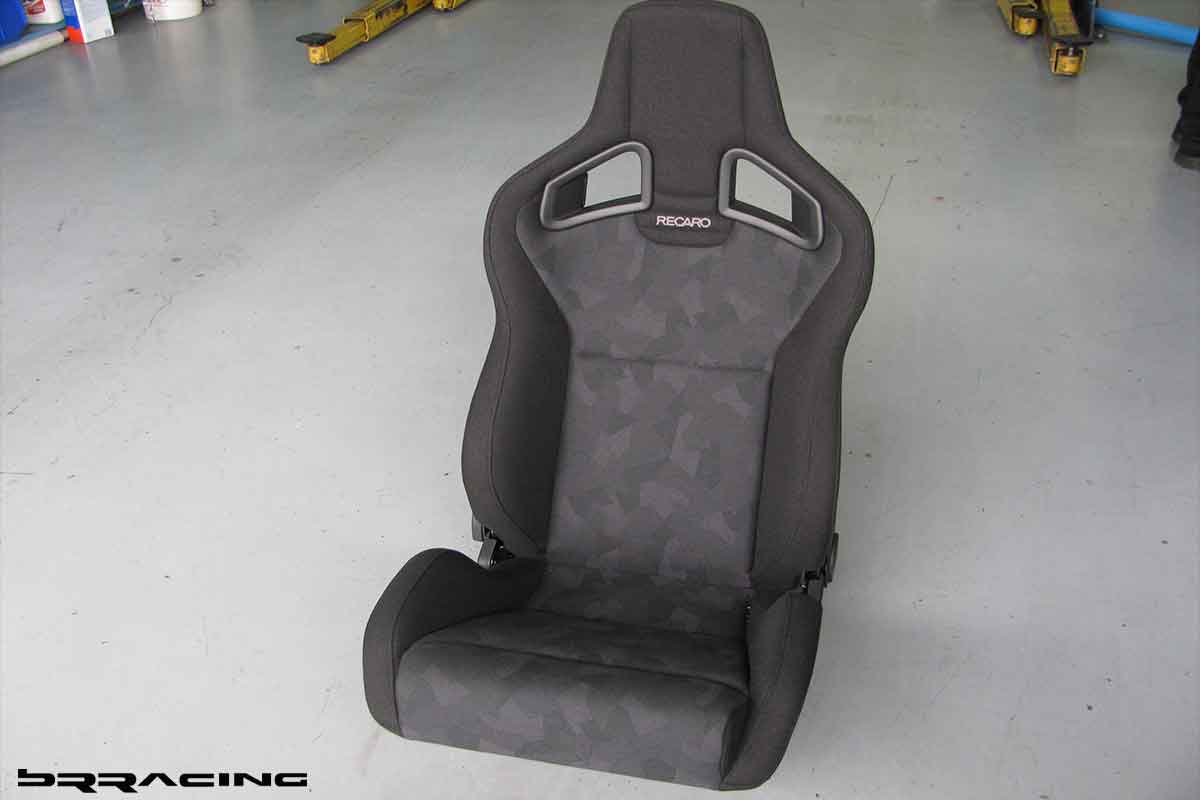
Next…now we have the base for the harnesses, but what seats??? There are two major decisions to be made here…..if you want OEM like fitment and functionality, then there is really only one choice – the Recaro Sportster CS. The reason for this is fitment….the Recaro is a split back seat, so it will tilt forward and allow access to the rear area of the car or rear seats. But, that’s not the major advantage, the major reason is the size of the butterfly wings on the sides of the seats for your shoulders. Almost all other seats have broader wings…and these will interfere with the upper door panels, making it impossible to install and then close the doors. Believe us…we have tried many many seats…and most do NOT fit. But the Recaro does. The seat also comes w great fabric to hold you and plant you in the seat, is very comfortable, and has the necessary harness openings, even for a complete 6-point system. We can also accommodate all the attachment points. Fabrication will be needed for the submarine belt…but no big deal. The other direction to go w a seat is a true, fixed back, racing seat. If we were doing that for this project, we would have used a Sparco Evo 2 seat….great seat, comes in several sizes, but it is a racing seat. Not necessarily the best choice for a car that sees dual duty. (Note..for those considering a race seat, the seat itself is fairly reasonably priced, but most forget to include all the other pieces – seat base, slider, and side mounts).
Now…just installing a replacement seat is no big deal. But, to replace an OEM seat, and replicate OEM features takes a little bit more thought and work. The original seats had side airbags, and the passenger seat has a seat occupancy sensor. If you just throw in new seats, you will have an AIRBAG light on the dash all the time, and you will have a SEAT BELT light on the dash all the time as well. So, what are we to do?? There are not parts that you can buy to solve these. Nope, but you can make them work.
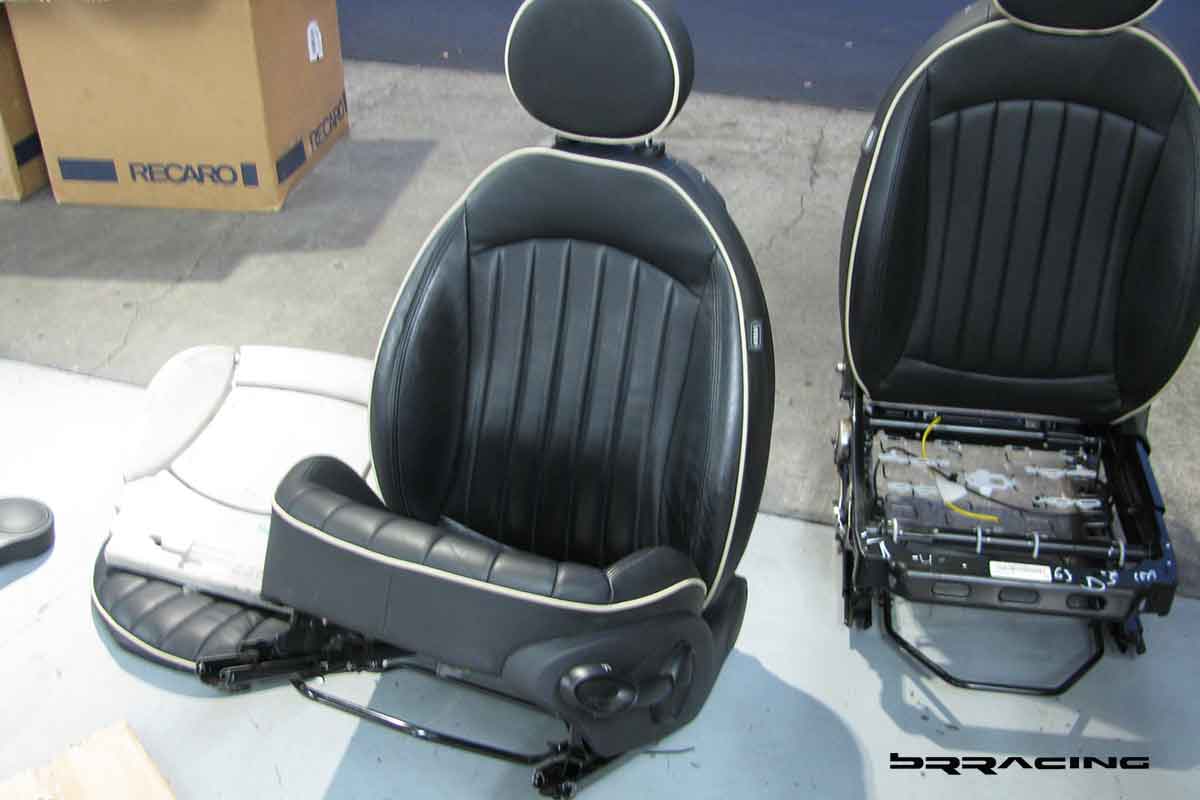
For the seat occupancy sensor….you need to take the old seat, the OEM seat, completely apart. With the seat out of the car, you can then remove the lower seat cushion. Once the the cushion is out, you can then take it apart, and remove the outer leather covering from the base cushion. When you get this off, you will then have access to the electronic seat occupancy sensor and wiring harness. Take the sensor and harness out. Take the new Recaro seat, and take it apart in the same manner. Take the lower seat cushion off the seat frame, take the fabric covering off the lower seat cushion, and install the OEM seat occupancy sensor. Re-install the fabric covering on the cushion, install the cushion into the seat frame, and now the seat is ready for installation into the car. Simple….right???? Test the voltage and resistance drop of the seat sensor before installing, and you are good to go.
In the pic below, you can see the lower cushion removed from the passenger seat, and the cover off the seat cushion to gain access to the seat occupancy sensor.
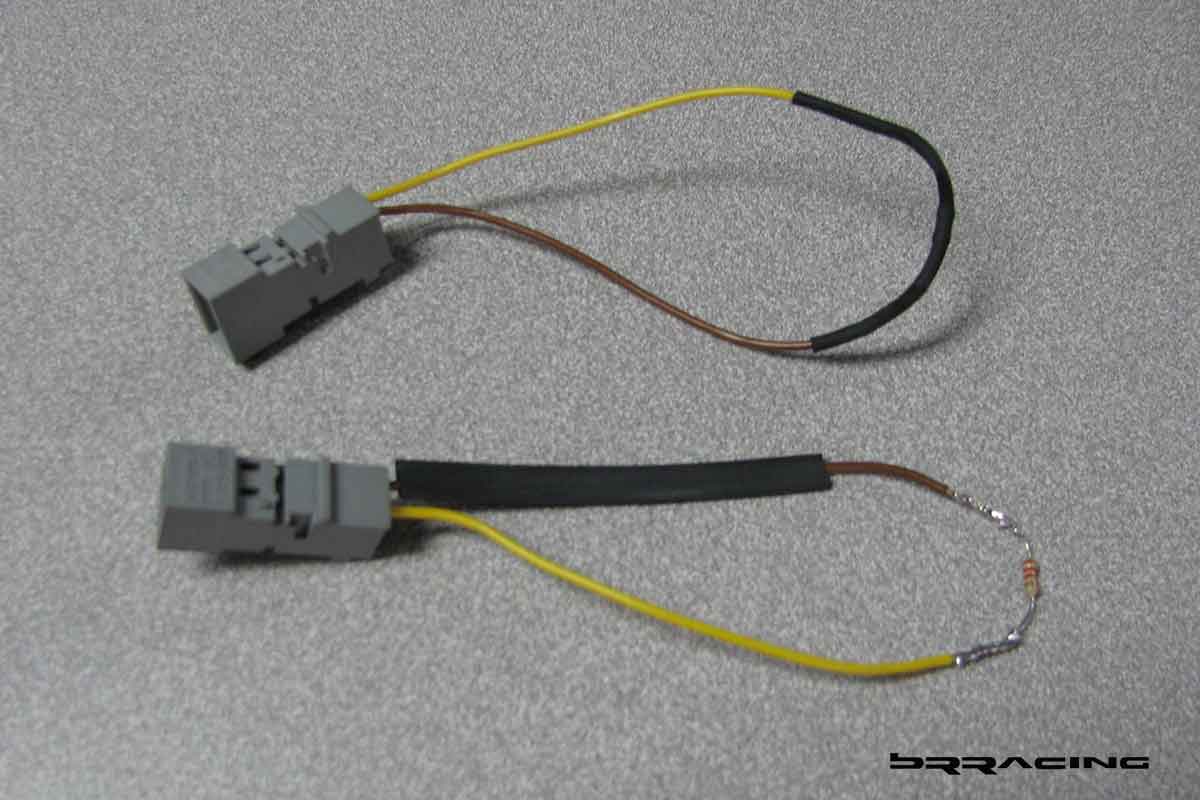
Next…the airbag. Now, we can’t install the side cushion airbags from the OEM seat into the new seat, but we can make the car think they are there. All we need to do is make a new wiring harness that duplicates the OEM airbag harness and electrical equation. Once you know the values of the voltage and resistance drop under the various operating and start-up conditions, you can make your own wiring harness. One piece of the harness BRracing made is seen here.
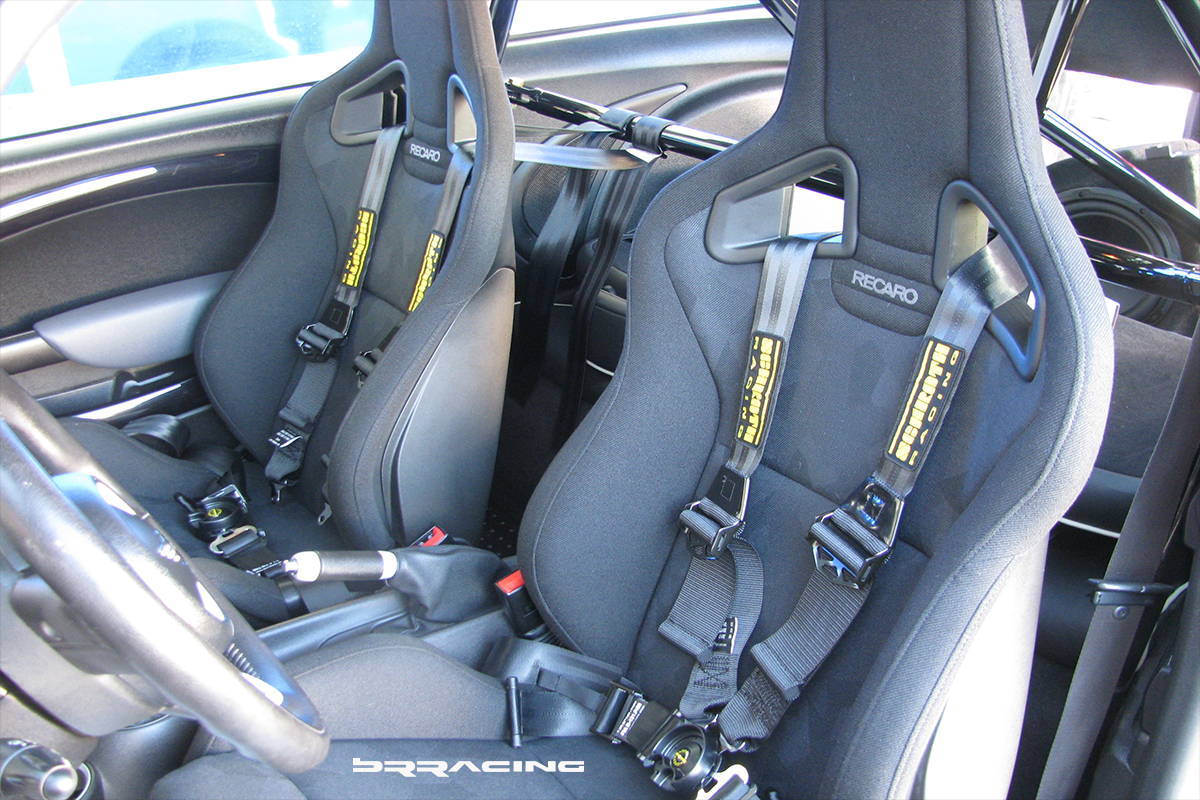
With the normal seat occupancy sensor installed, and the new airbag wiring harness done for both sides, the seats are ready for installation.
With the new seats, we have both harness or seat belt options. We can use the normal seat belts for daily driving, as the harness bar and seat solution retain all normal seat belt attachments and functions (including the seat belt receiver and wiring harness for that), along w the new 6-point harness for track use. Complete dual duty solution, with no down sides, no lights on the dash even w passengers, no loss of features, and great fitment. Since we duplicated the system on both sides, you also meet the DE event instructor requirement where they have to have the same safety equipment as the driver when out on course.
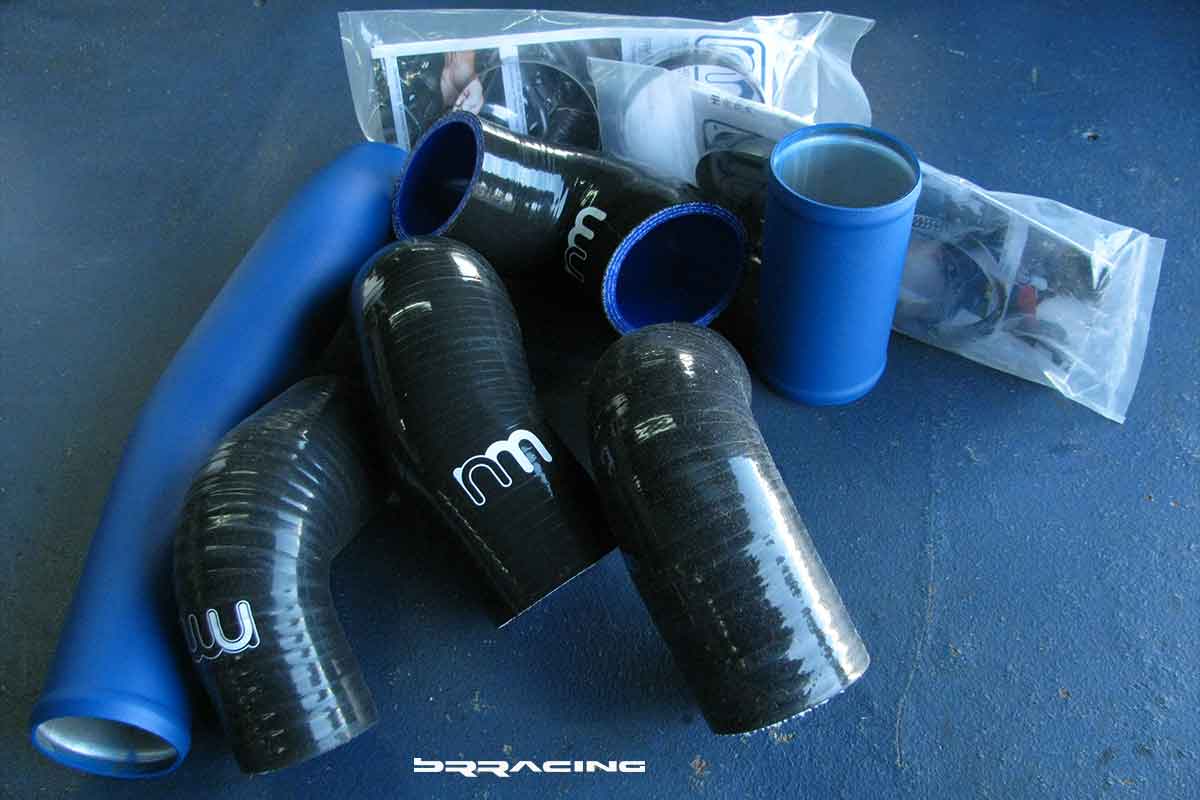
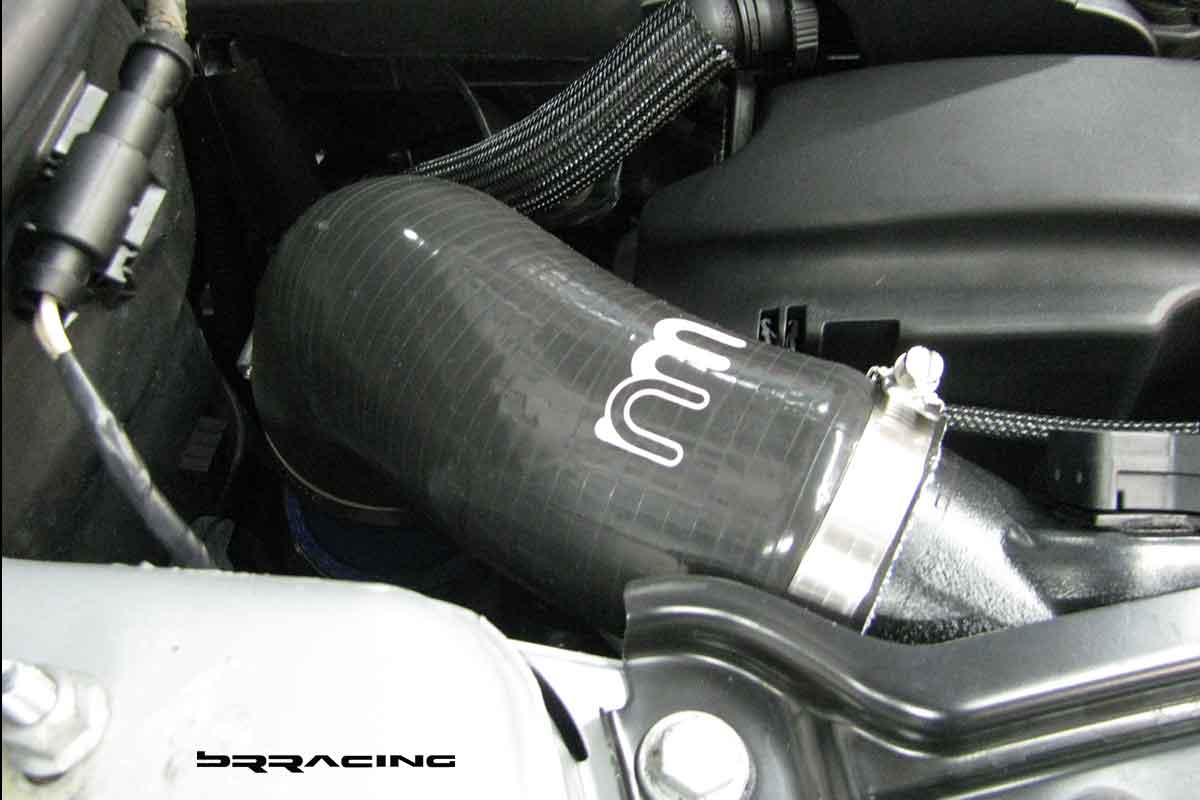
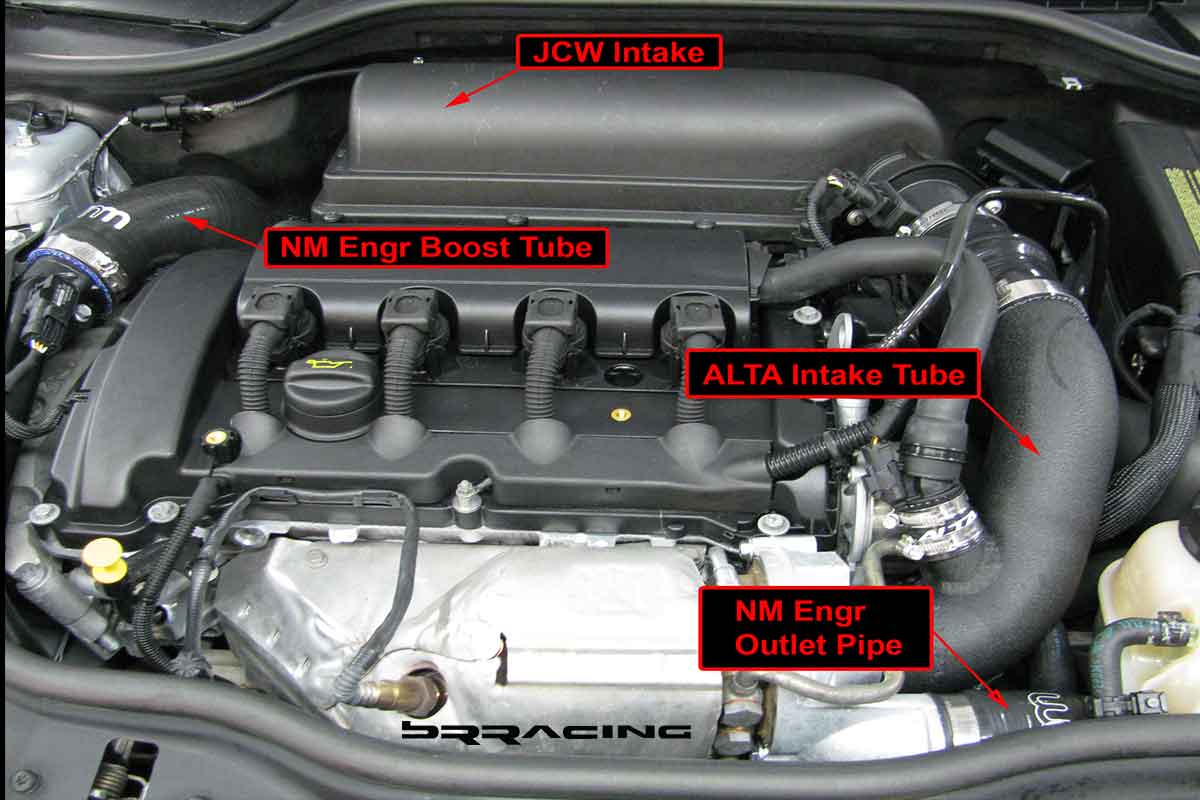
Now, no car would be complete for track duty if we just did the safety aspects. We need some performance to make this car handle and scoot. The easiest upgrade for a MINI Cooper S w the turbo motor is the software upgrade. “We need more power, cap’tn”.?? More power it is! The Cobb system is what we used for this project…and it is as easy as plug and play. Plug into the OBDII port, select your upgrade, and voila, you’re car is transformed. More power, more torque, more get up and go, and more pull when you want it most on the track. You can read in our www and other write ups on the many advantages of this system. If you are going to upgrade the software and turbo power, then we need to feed the engine more, and let it flow better. There we added a new JCW intake, along w upgrade turbo hoses. Now, the car pulls and accelerates and pushes you back in your seat. Get in and hold on.
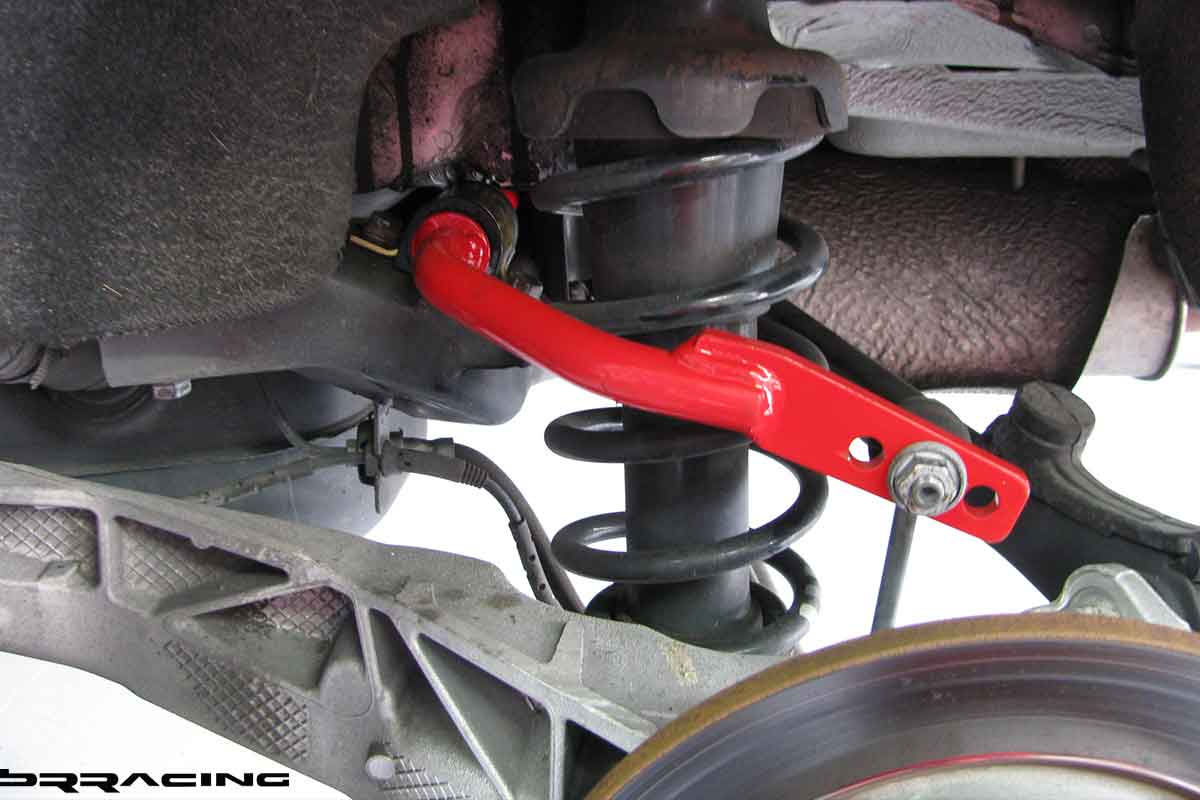
The MINI is such a great handling car to begin with, that there is not a lot of improvements that are needed at the initial stages of DE use. The car is flat, handles much like a go-kart, but like almost all front wheel drive cars, it has a touch of understeer. This is easily addressed. The MINI just needs a slight upgrade of the rear sway bar. This little addition will help the car to easily rotate when initial steering input is given…but don’t get carried away here w the thought that bigger must be better. There are a wide range of sway bars for the rear of the MINI – 19mm, 20mm, 21mm, 23mm, and even a monster 25mm bar. You ONLY want the 19mm bar. Anything more, and the car over rotates on initial turn in, and makes the car a handful when driving…and reduces the stability of the car, and makes it very twitchy, even just when taking off ramps on the freeway. So, if you are doing this upgrade to your car, just go w the 19mm rear bar. The bar comes complete (ALTA) w upgraded sway bar bushings. For hard core DE users, we would recommend upgrading the sway bar end links as well.
But, this car is targeted for track use / driving, so doing the rear sway bar is not the only suspension upgrade that is needed. If we were upgrading the R53 or R56 for just aggressive street driving / mountain driving, then the only upgrades that are needed are the slightly larger rear sway bar, the front lower control arm bushings (upgrade to poly), and to add some front negative camber adjustment (front camber plates).
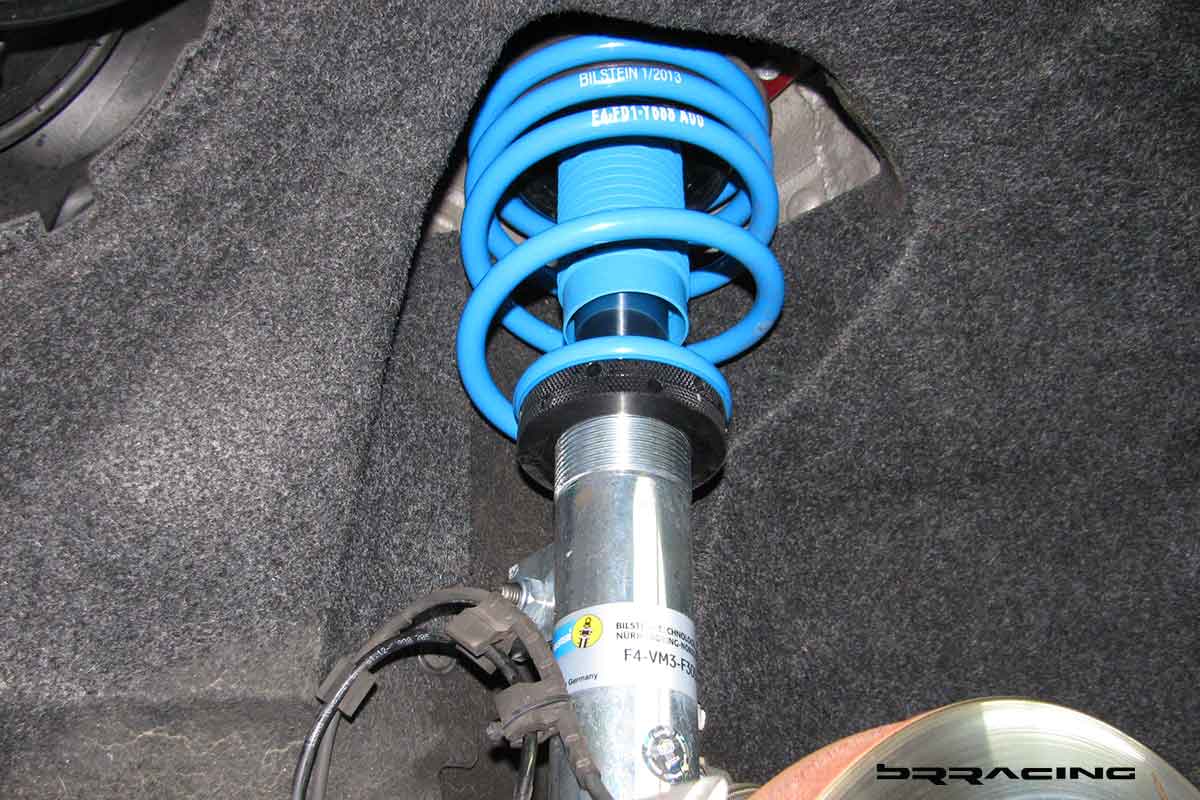
Here, the objectives are for more. Therefore, the shocks need to be exchanged for true adjustable coil-overs. The best solution here in our view is the Bilstein PSS10 / B16. Great shocks, easy to adjust (a key issue), full range of height adjustment, and great price / value.

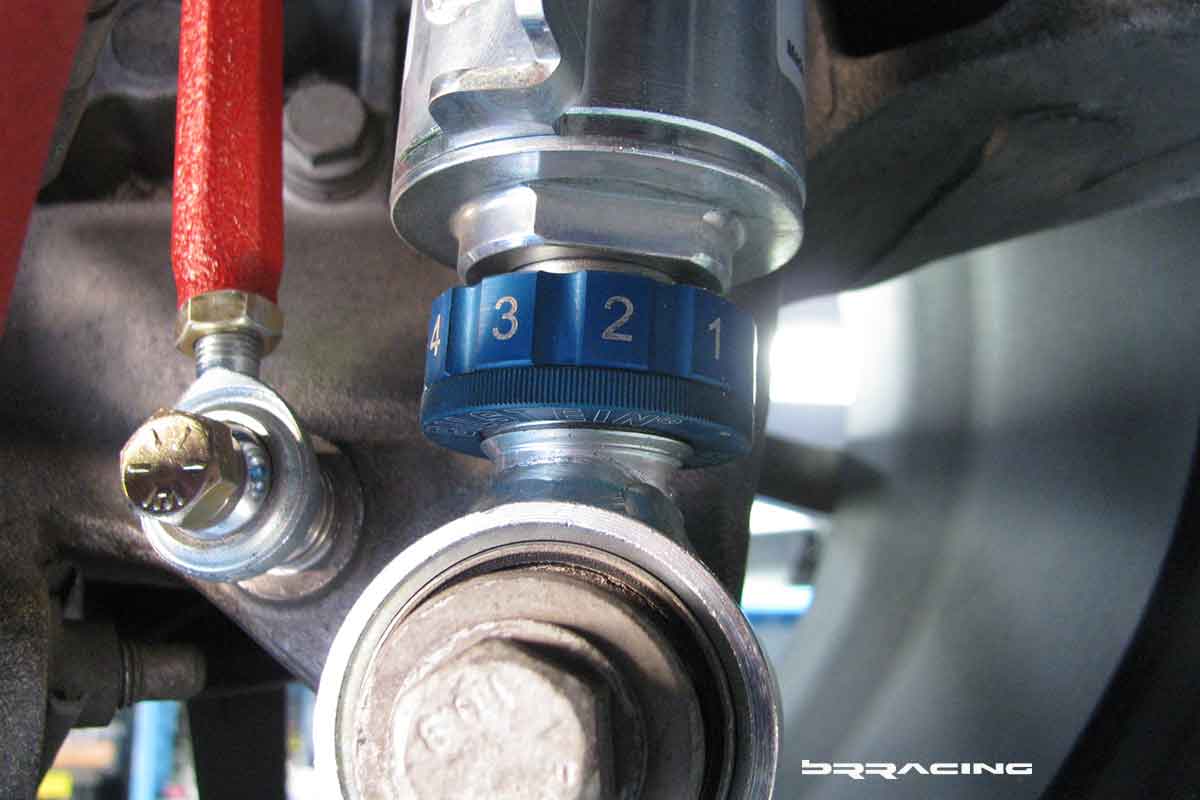
Note the big, easy to see and reach shock valve adjustment knob. Many of the coil-over manufacturers make adjustable shocks, but put the adjustment knob somewhere that you can’t reach….like, on the MINI, on the rear shock, they put it on top, which is completely hidden.
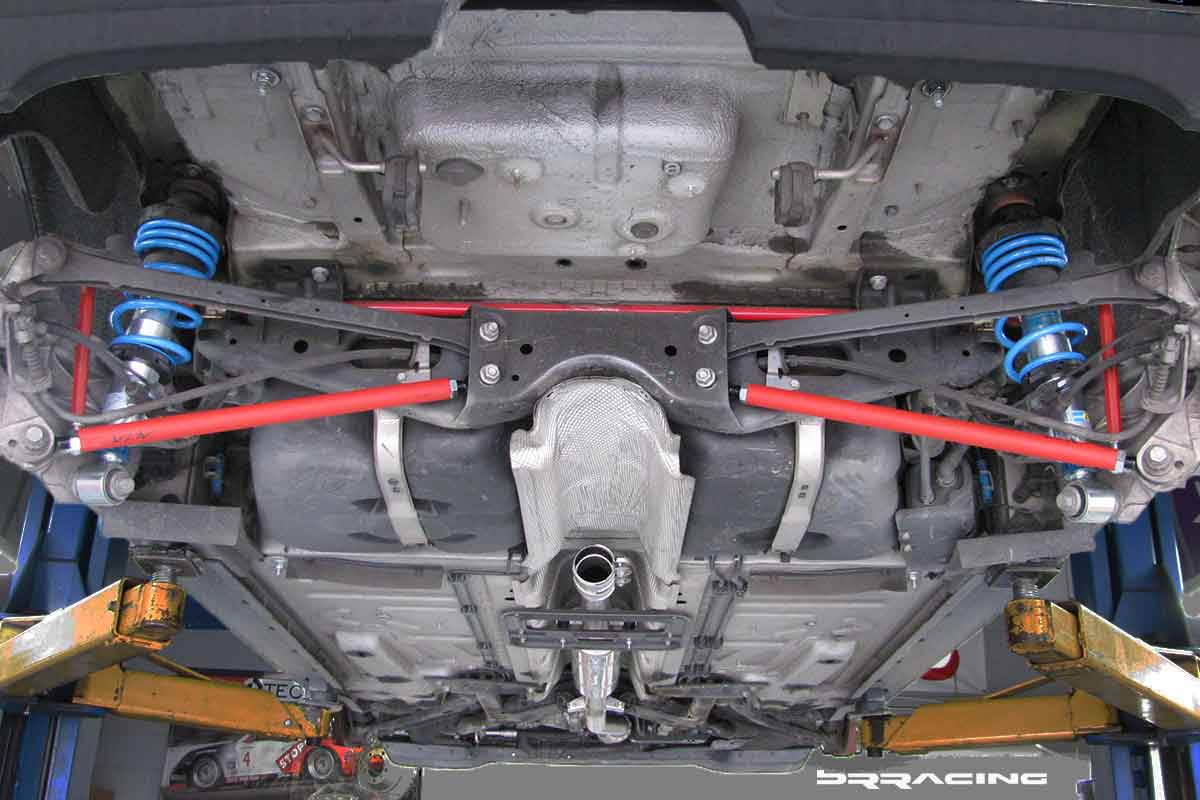
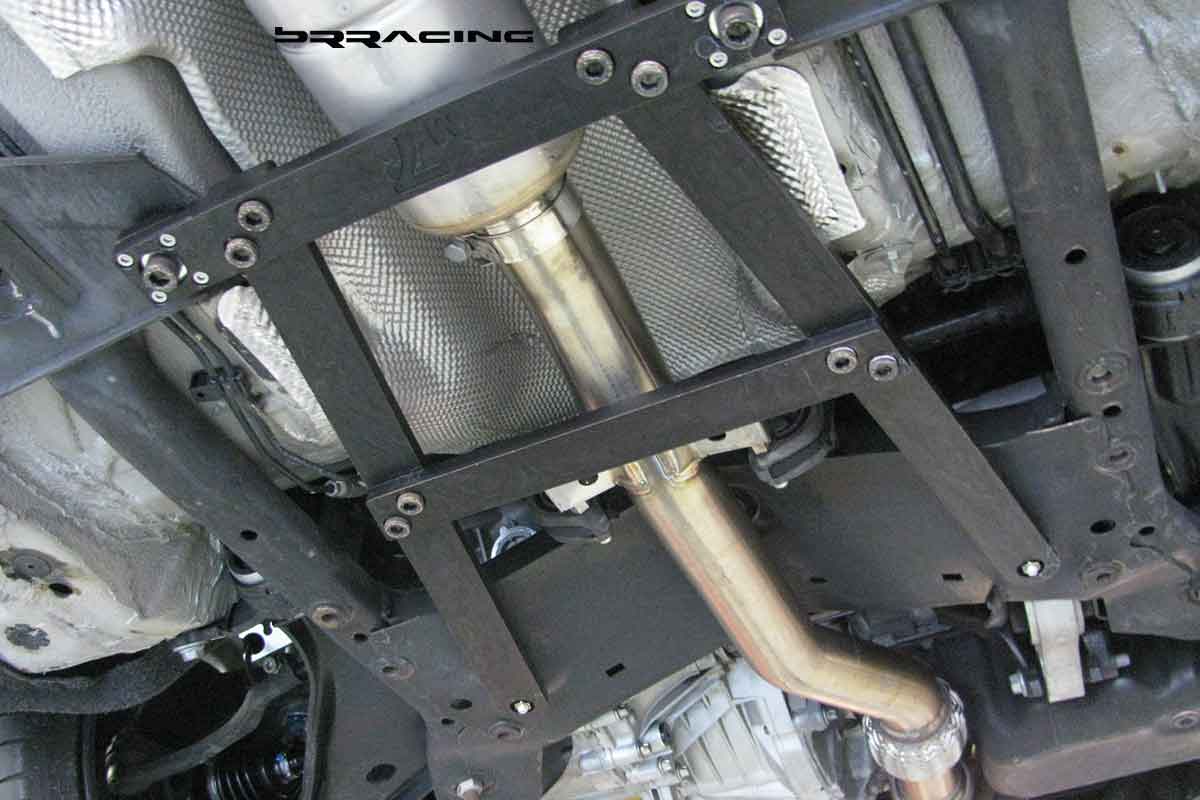
Another area that can use some attention is the strength or torsional rigidity of the front body. The underbody brace you see below helps tie the front subframe to the main body.
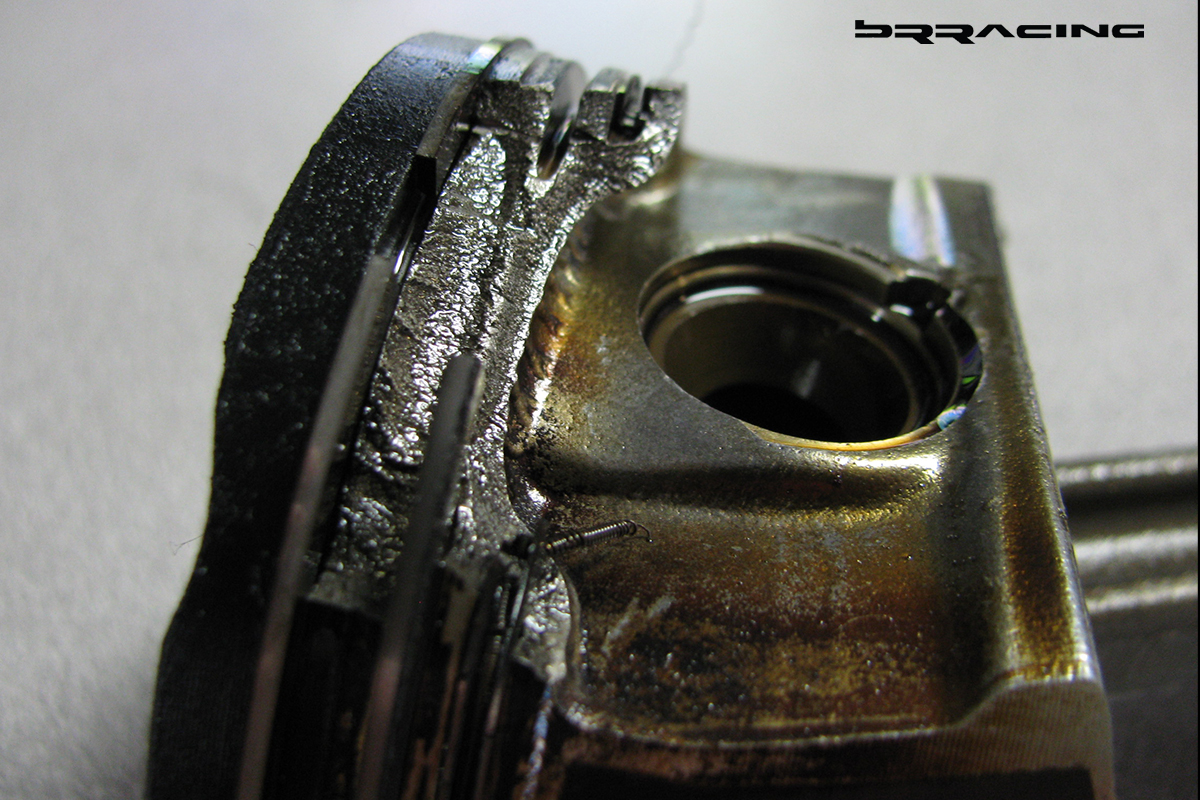
Now…the project took a little bit of a turn. The engine suffered a complete failure…piston seized, damaged the block, complete engine build necessary. Well, if we’re going to do this, might as well build a complete track suitable engine.
Engine came out, dis-assembled, and the root cause can be seen –
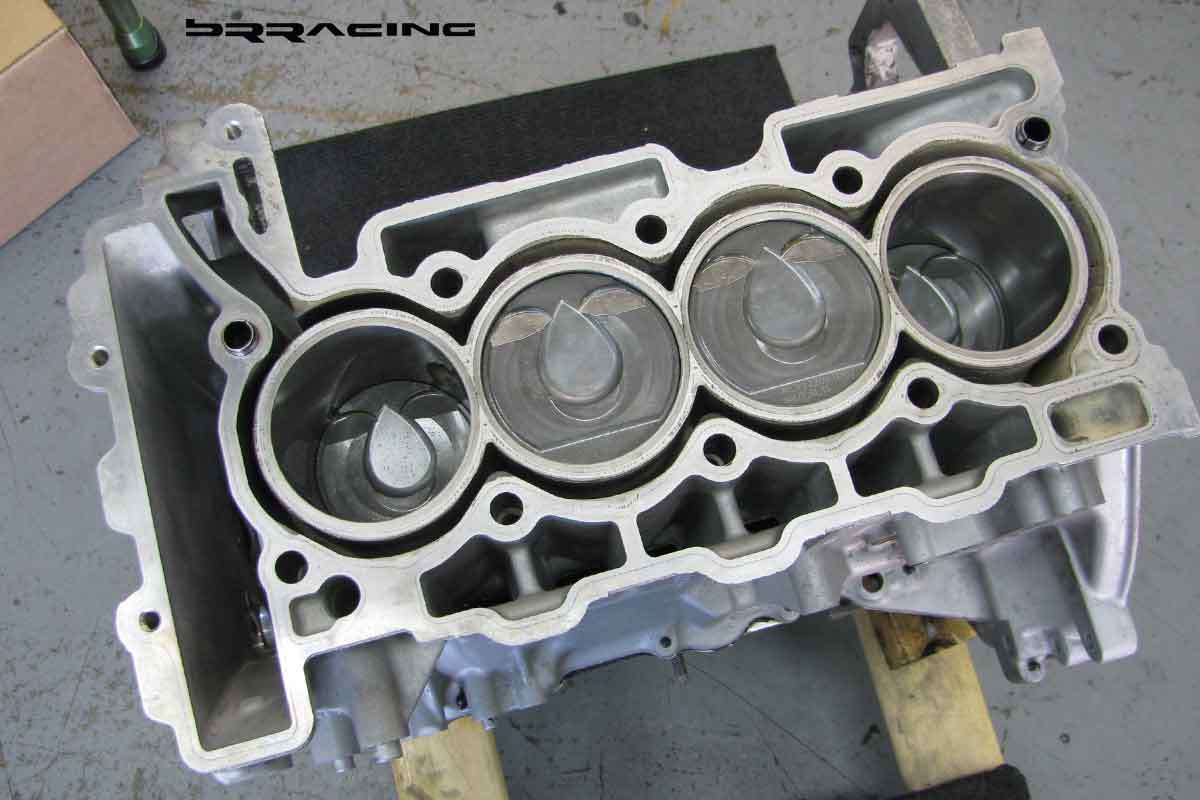
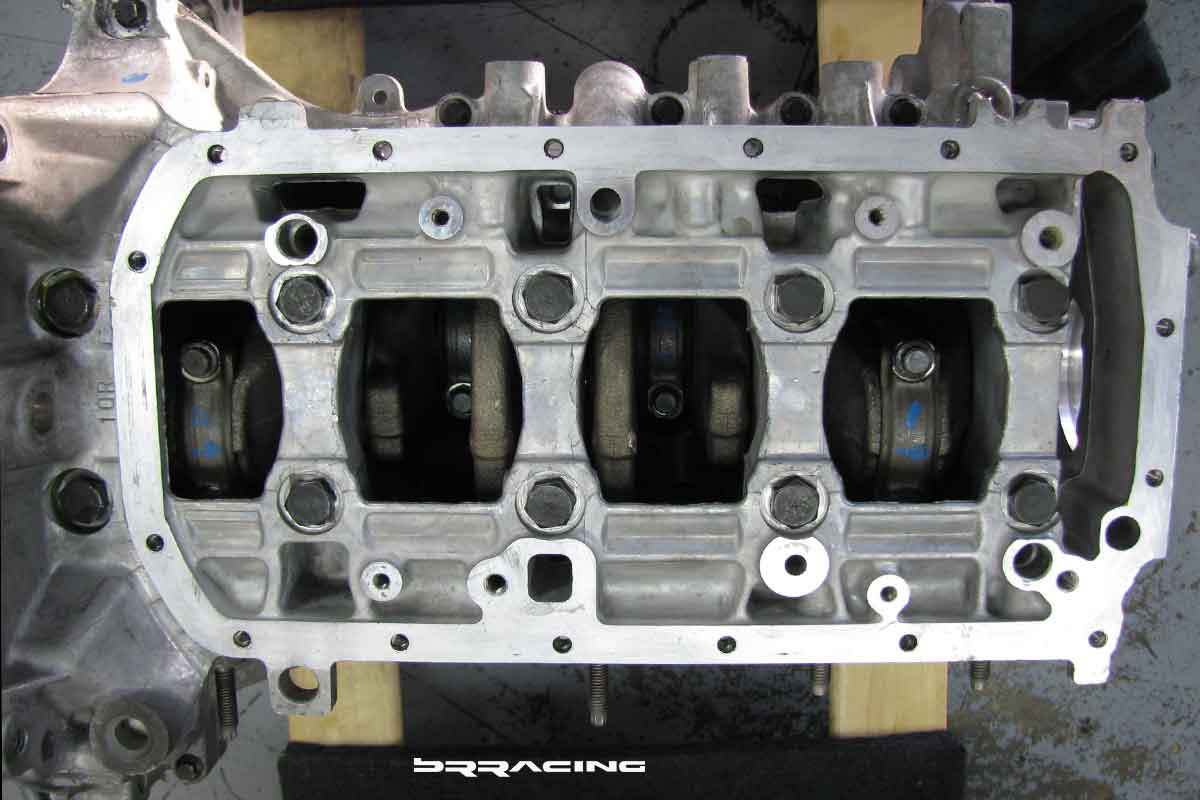
Engine taken apart, all the way down to the base block. Block steam cleaned, top “decked”, cylinders bored and honed, and ready for a complete new build.

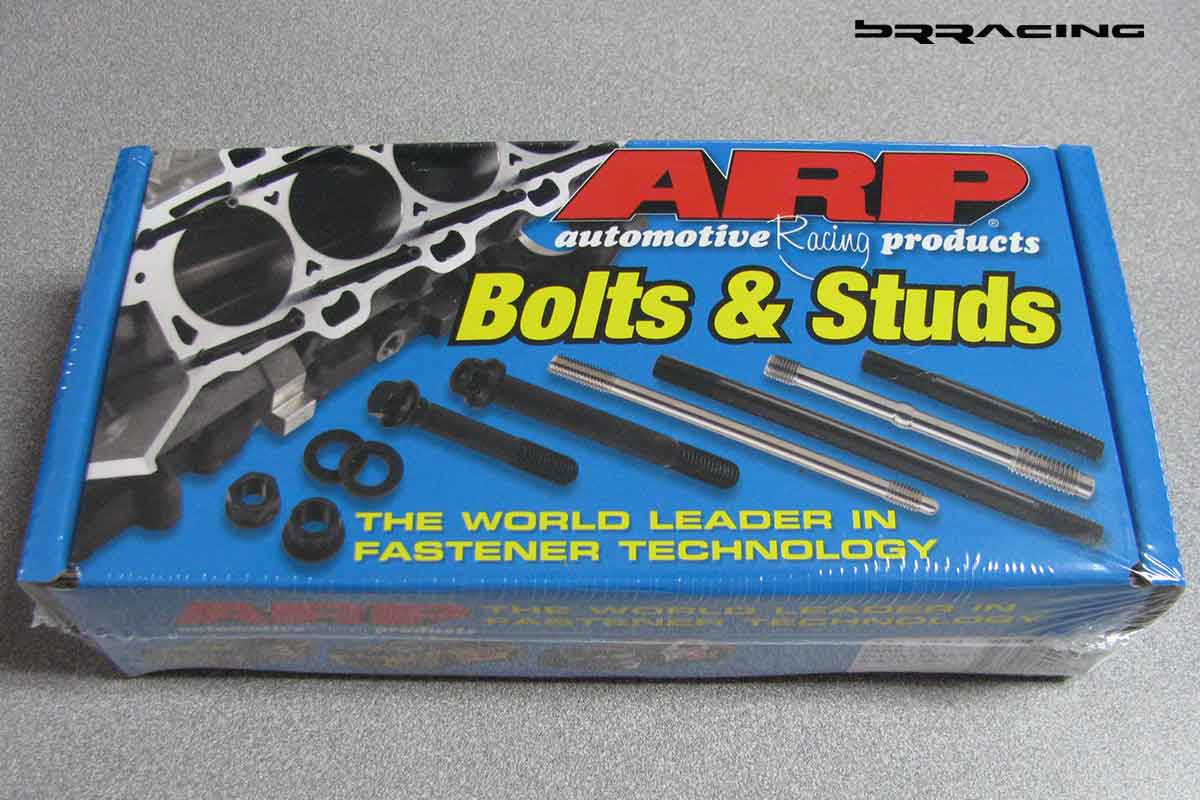
With the engine block now prepped, and ready, we selected new “forged” pistons and connecting rods that match the new “bored” cylinder width. Normal prep and assembly, and installing of the pistons / connecting rods into the block. The crankshaft had been “balanced”, and installed, with new main bearings (upgraded) and new ARP hardware (ARP hardware used for the connecting rod bolts, head bolts as well).
New pistons and connecting rods inserted into the block –
Next, pistons / connecting rods connected w new ARP hardware to the crankshaft.
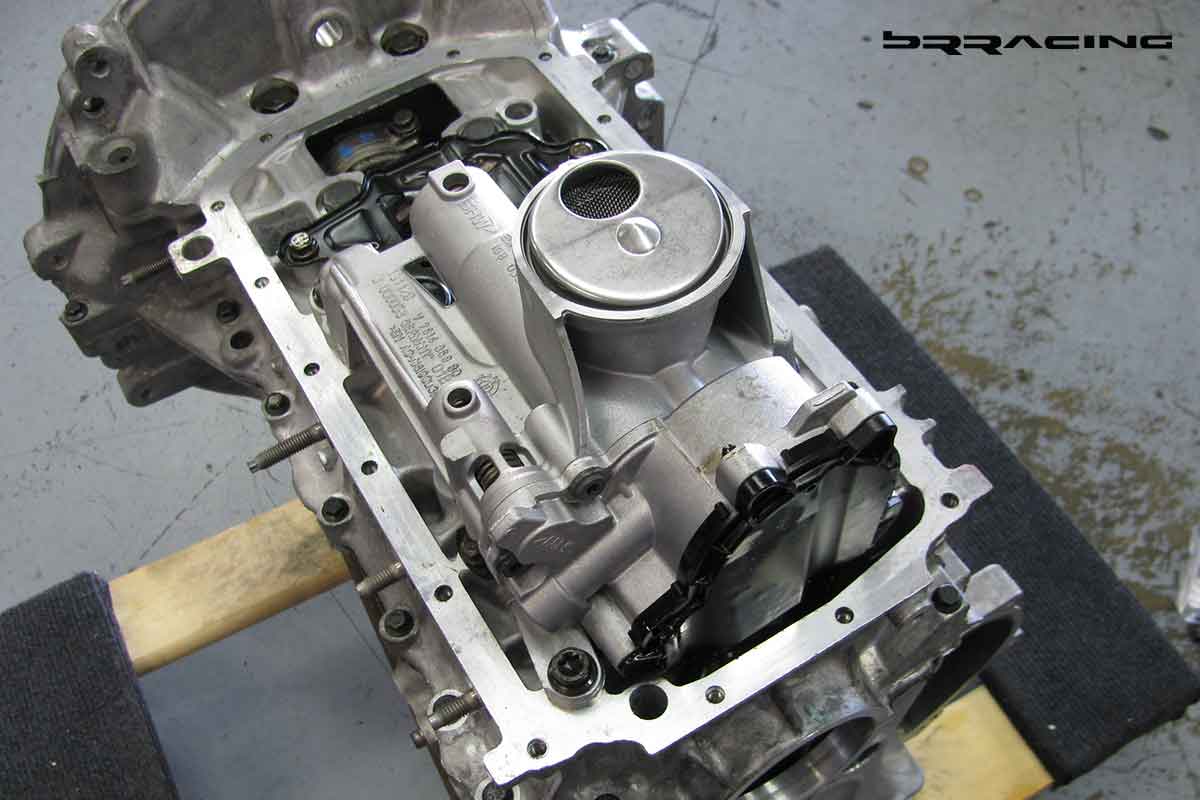
Now ready to assemble the bottom end of the motor. New oil pump (don’t know what the old oil pump digested, so, not taking any chances, replacing with new) –
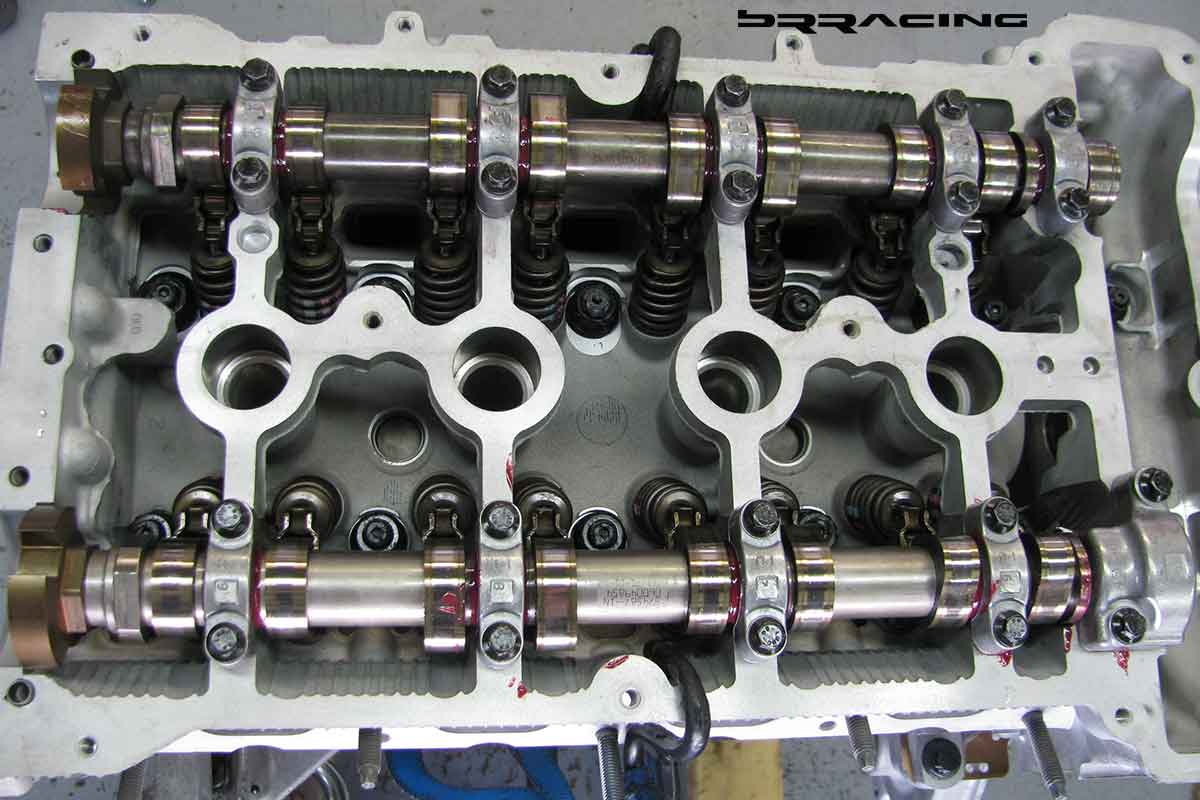
With the bottom end done, now time to turn our attention to the head / valves / camshafts
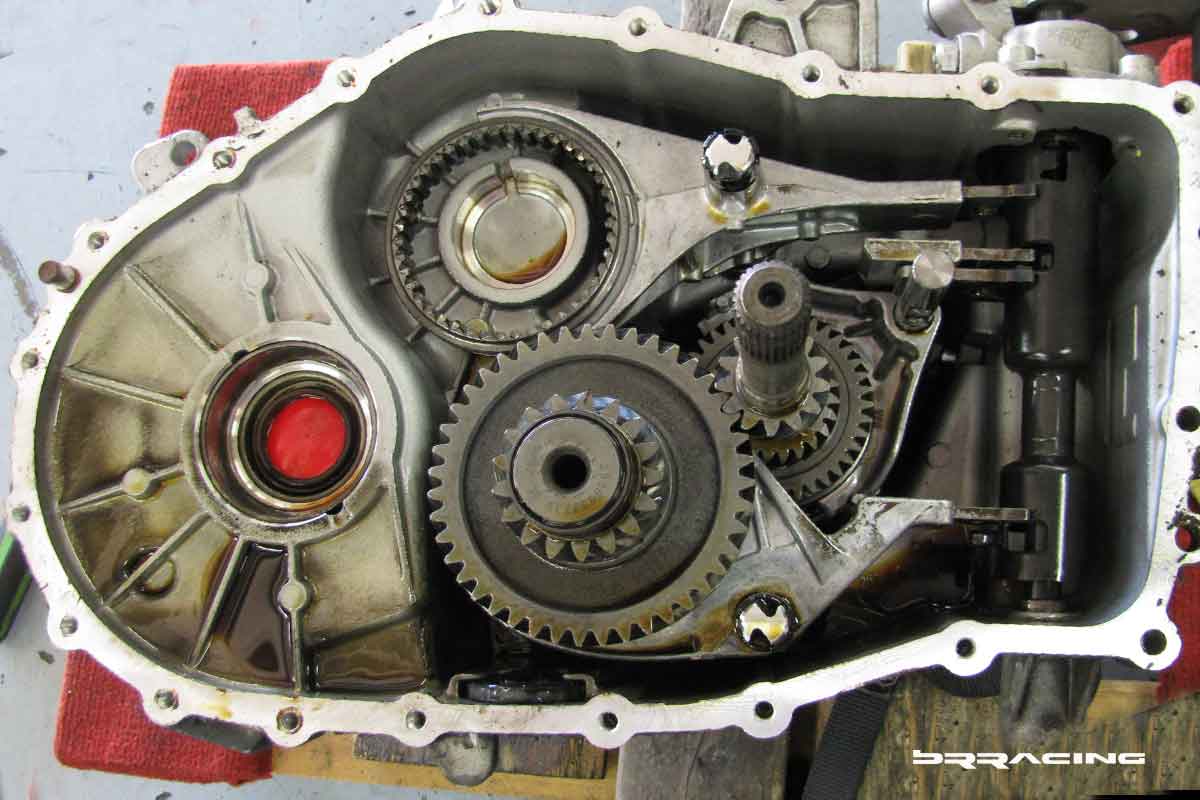
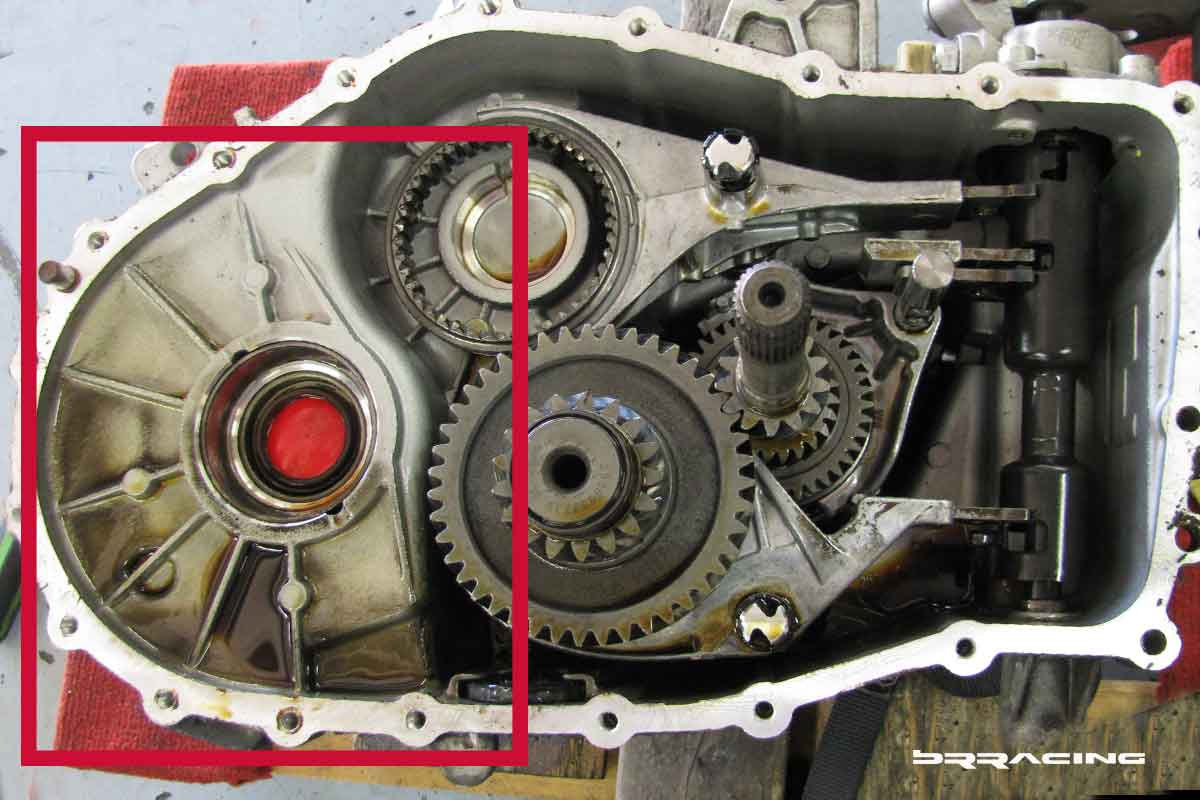
With the desire to put the power down, and the potential of more HP from the engine, we needed to add an LSD (limited slip differential), and the perfect time with the engine / transmission out of the car. Separating the transmission from the engine provides easy access to the differential.
There are many options when selecting an LSD – Quaiffe, WaveTrac, OS Giken, or custom mechanical / disc LSD. Of those, we believe the OS Giken offers the best solution (quickest release when off throttle, better engagement when applying throttle). If this were a pure race car, then we would likely opt for the mechanical clutch based solution, as we could then select the “lockup” percentage we wanted.
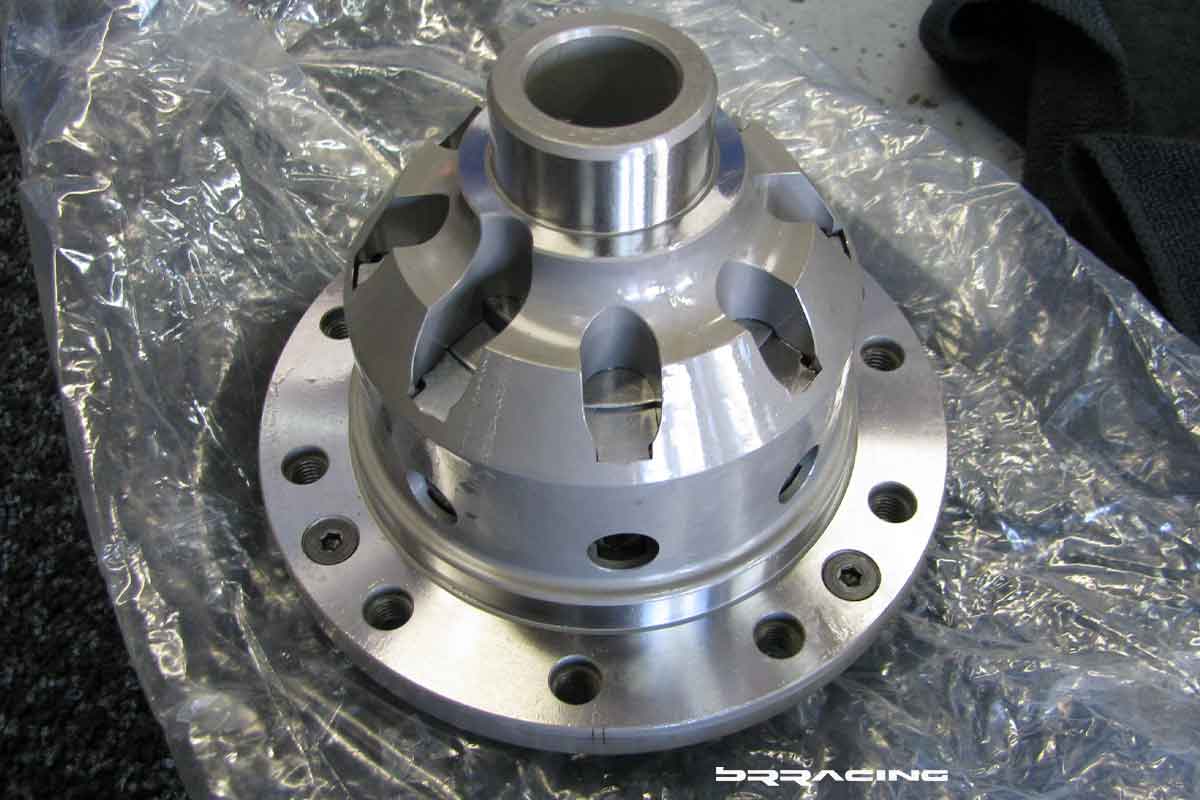
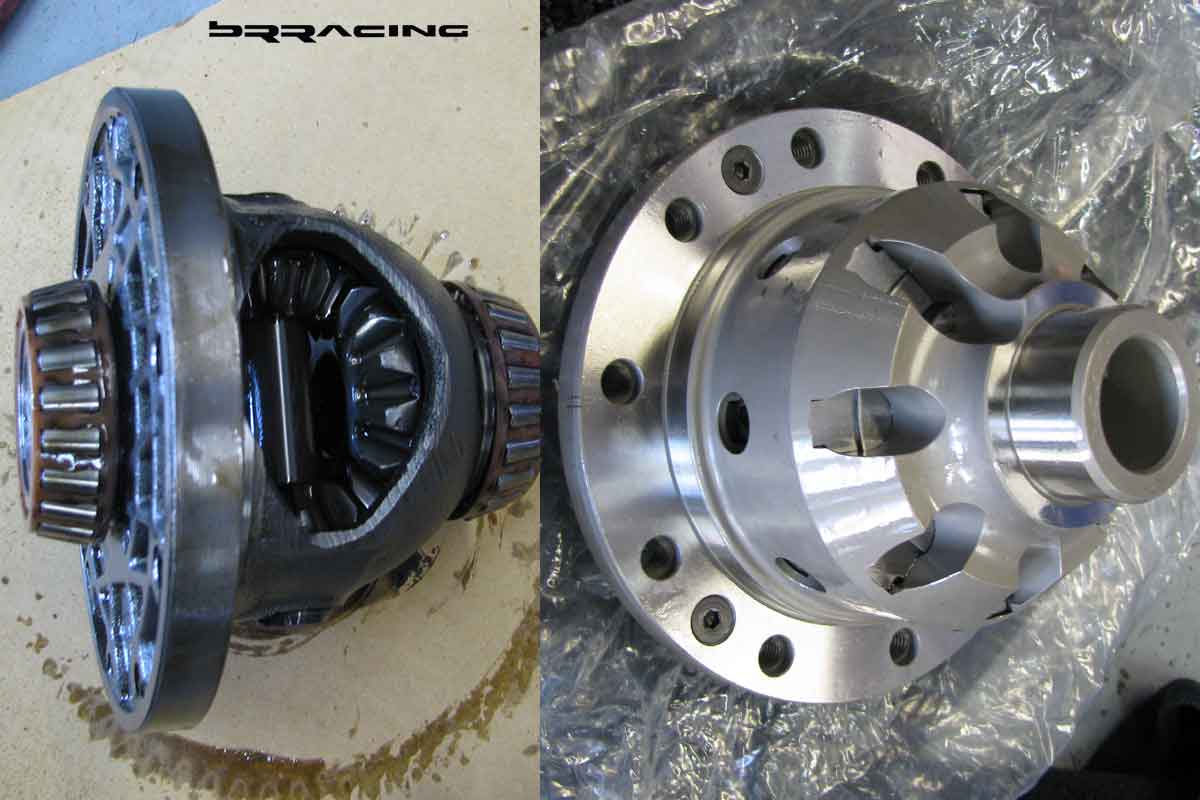
Here you can see the pure “open” design of the stock unit, versus the OS-Giken solution.
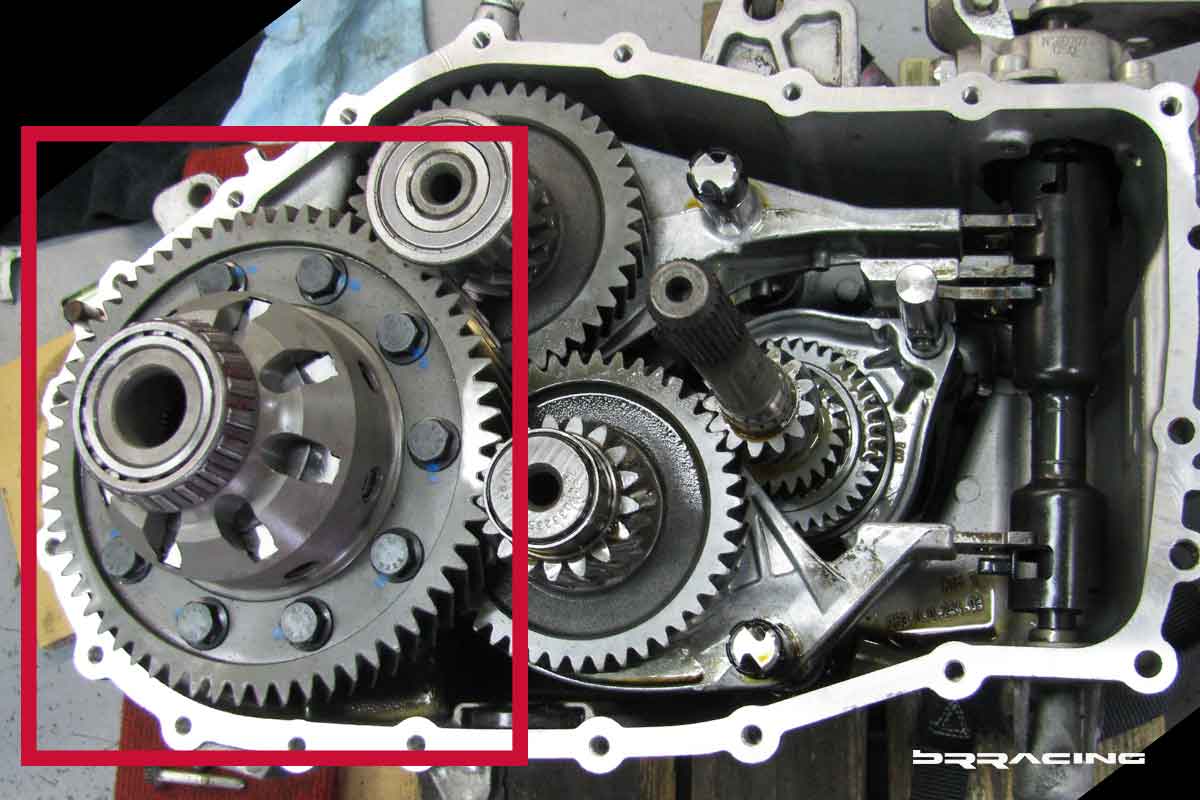
New LSD fully installed in transmission housing, and ready to be mated to the engine.
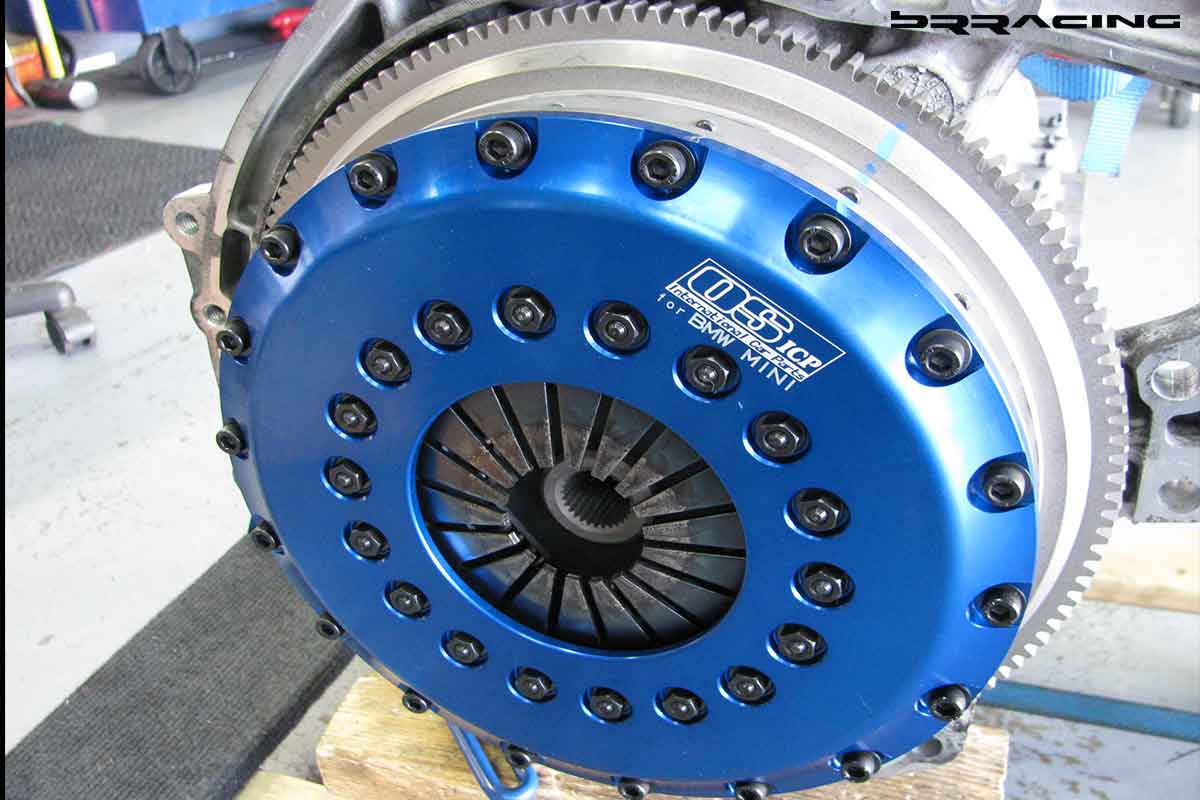
Continuing with the wholeistic /full build approach, if we are adding HP, adding a LSD, then we also need to upgrade the clutch.
In with a “multi-plate” OS Giken Stage 2 clutch kit.
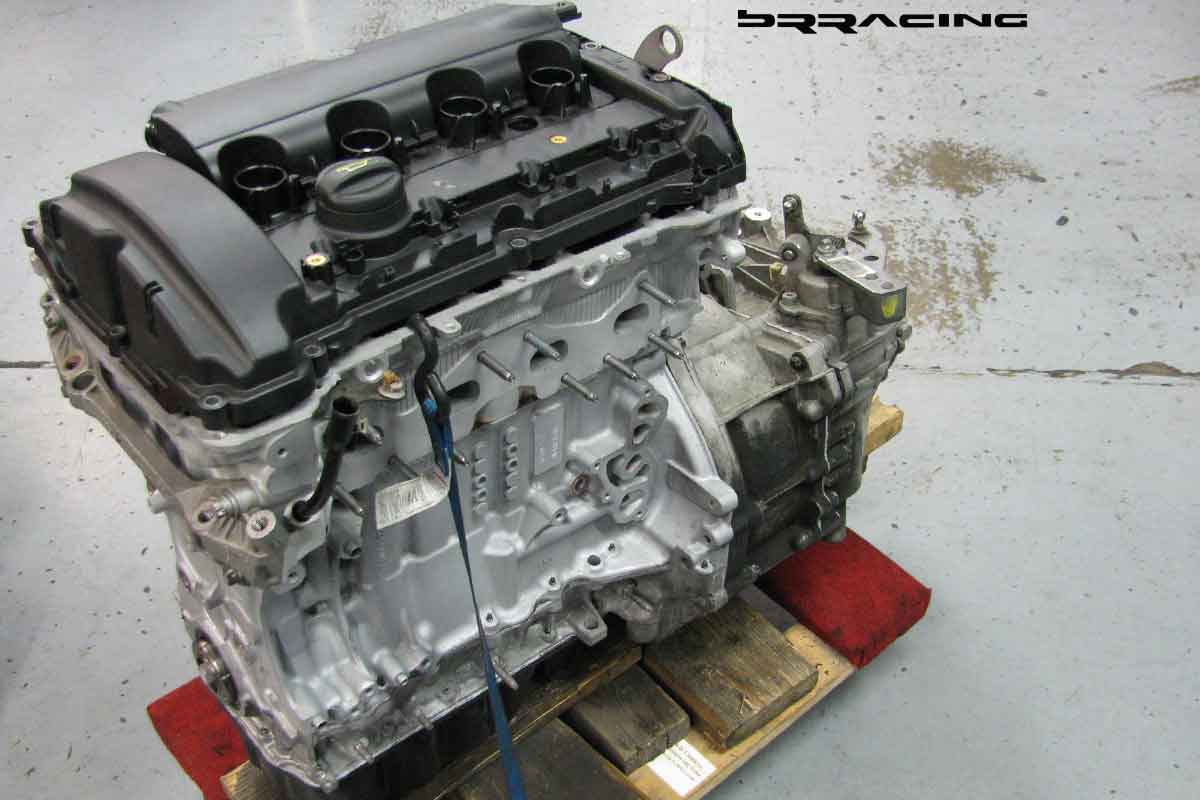
Button all this up, now ready for installation back into the car. (will do the intake and exhaust elements once engine is installed in the car). We did not, and we do not recommend changing the engine mounts to something firmer…on a MINI, they make the car rattle like a coffee can.
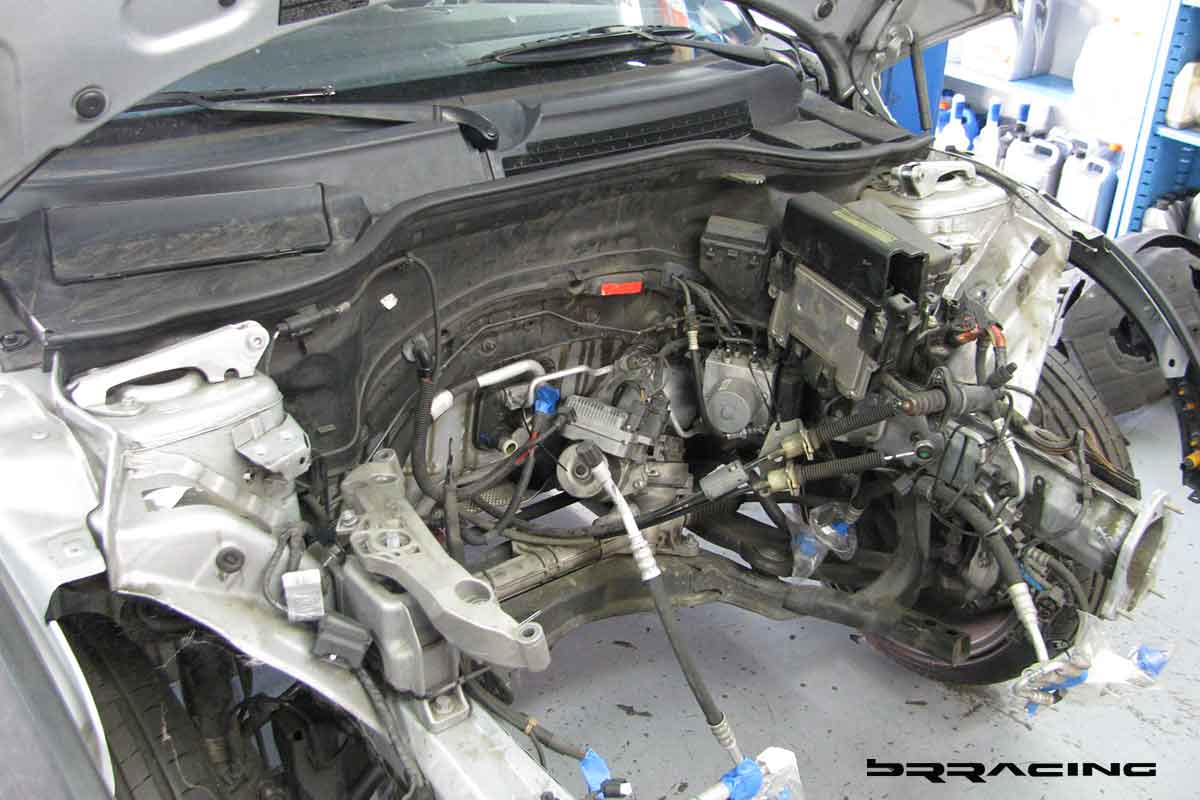
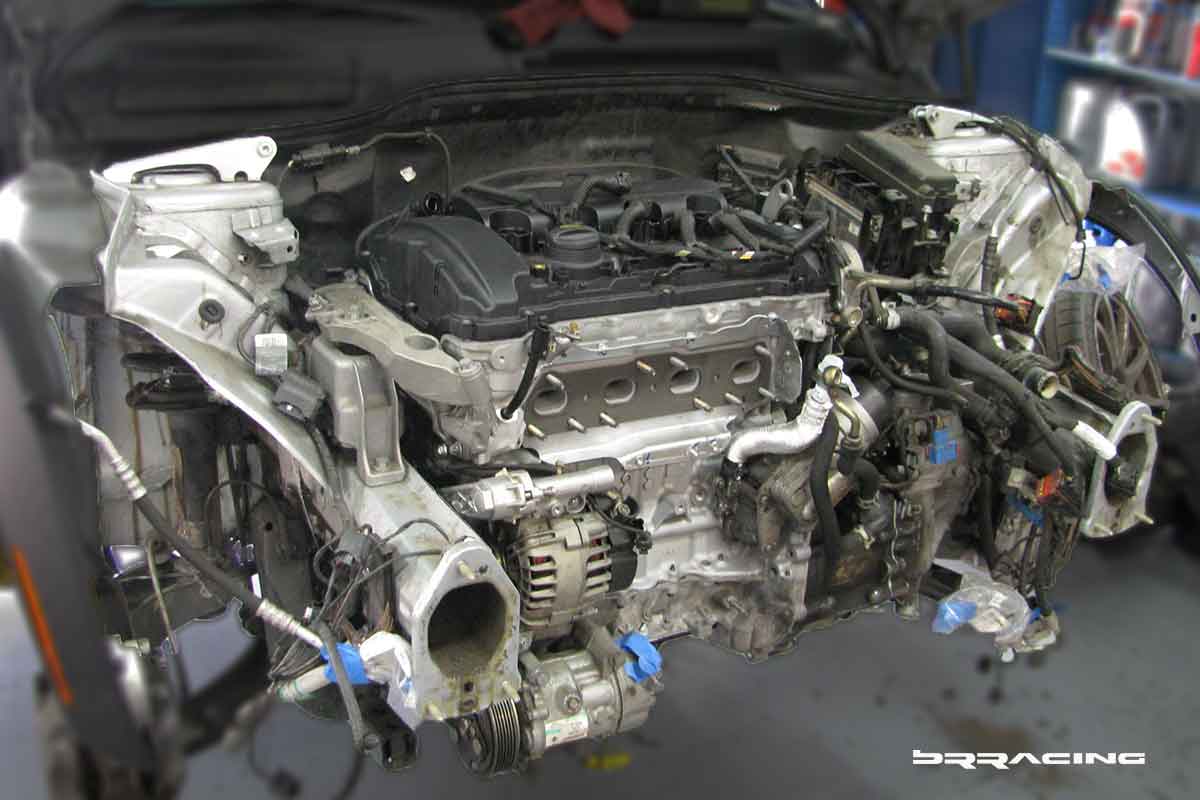
Here is what the engine bay looks like minus the engine / transmission.
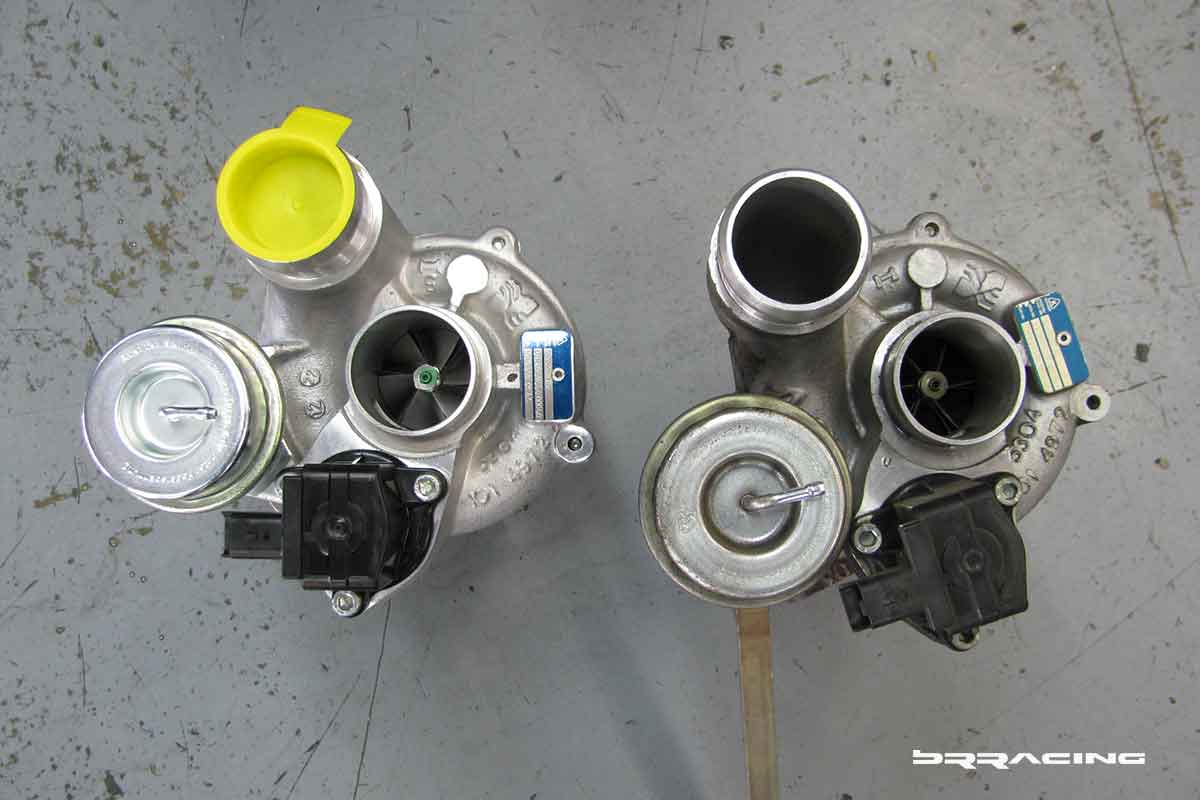
In the above picture, you can see the new exhaust manifold gasket. This engine / car was a 2007 MINI Cooper R56 MINI Cooper S…but, there is a JCW version now. We know the JCW engine uses a larger exhaust manifold, to feed the turbo better, and also utilizes a larger turbo..work needed to be done to properly match all the elements together. Here you can see the additional “porting” done to the exhaust head ports, and exhaust manifold gasket (port matching).

With the exhaust ports matched, now ready for the JCW larger exhaust manifold
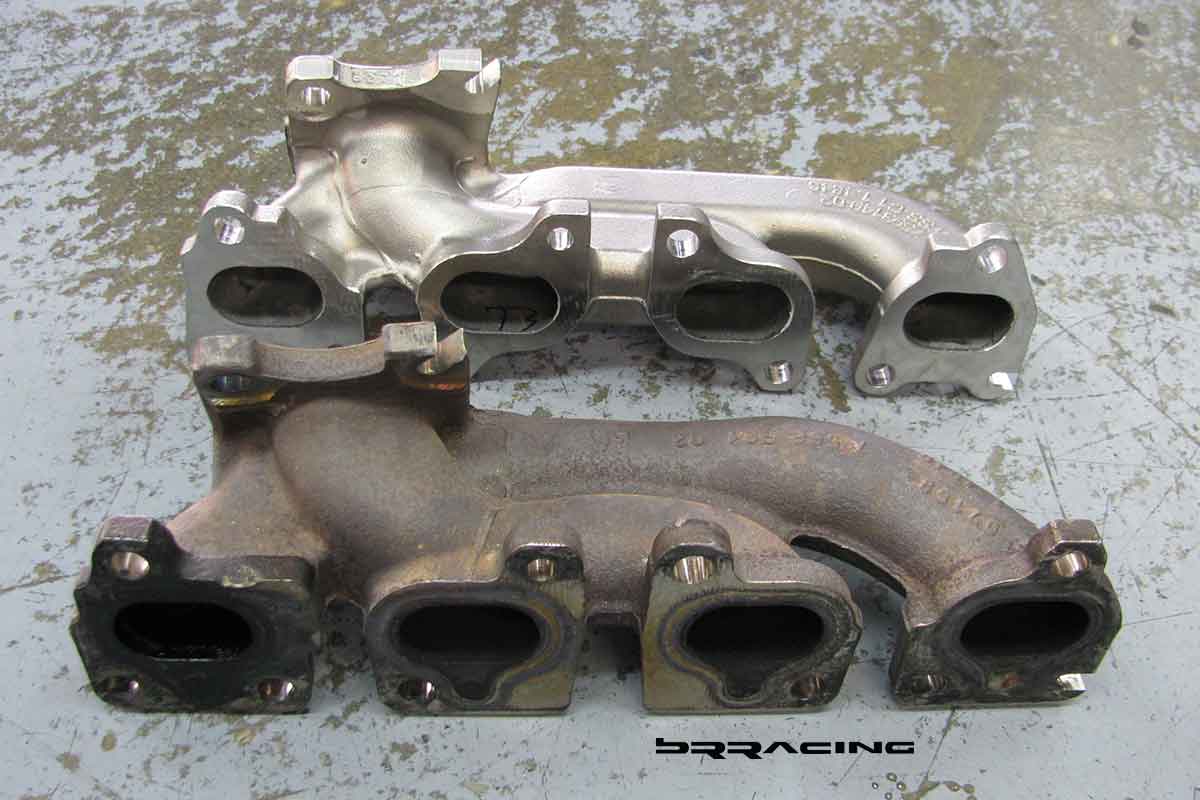
Match the larger ports to the ported exhaust manifold gasket, then to the matched exhaust manifold, then the larger inlet offered by the larger JCW turbo.
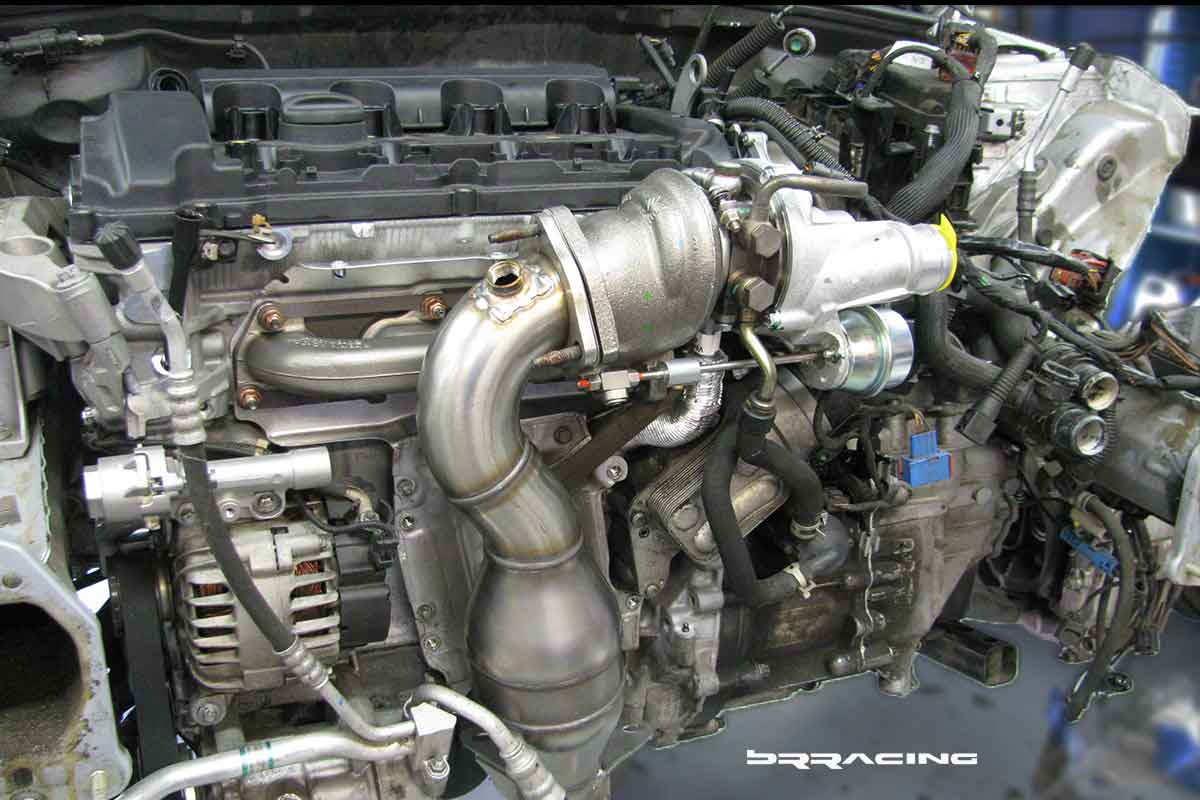
And the logic continues. If you want more boost, more power, nothing can be a throttling point. So, the “downpipe” now needs to flow better.
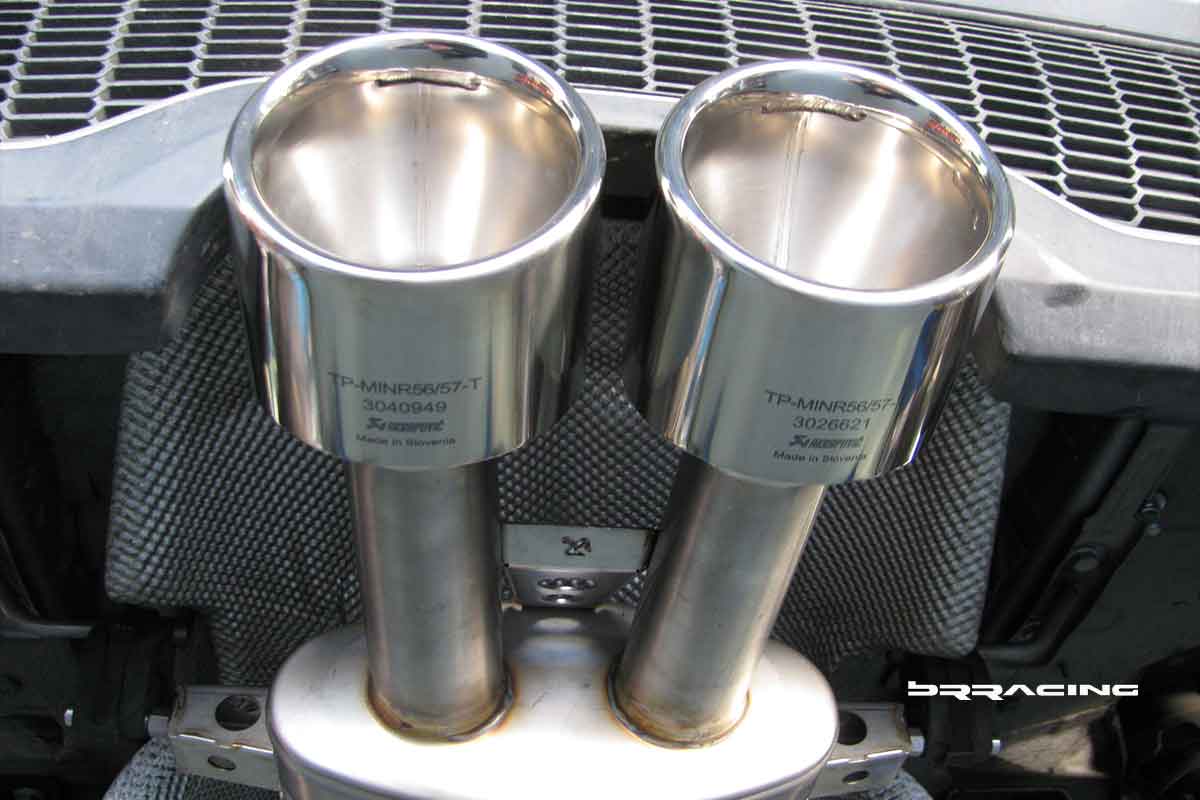
The last piece in this program, is the exhaust. There are many, many exhaust options. Since budget wasn’t a main priority, that meant we could consider the truly expensive, nice, exotic exhausts like Akrapovic Titanium. The Akrapovic is a complete system, from the downpipe all the way to the exhaust tips. Beautiful, light weight, great fitment, great looks, great sound.

With all the upgrades…we desired to be able to collect data to both set alarms, but also for track driving evaluation. Enter an AIM MXL dash and data logger with custom mount.
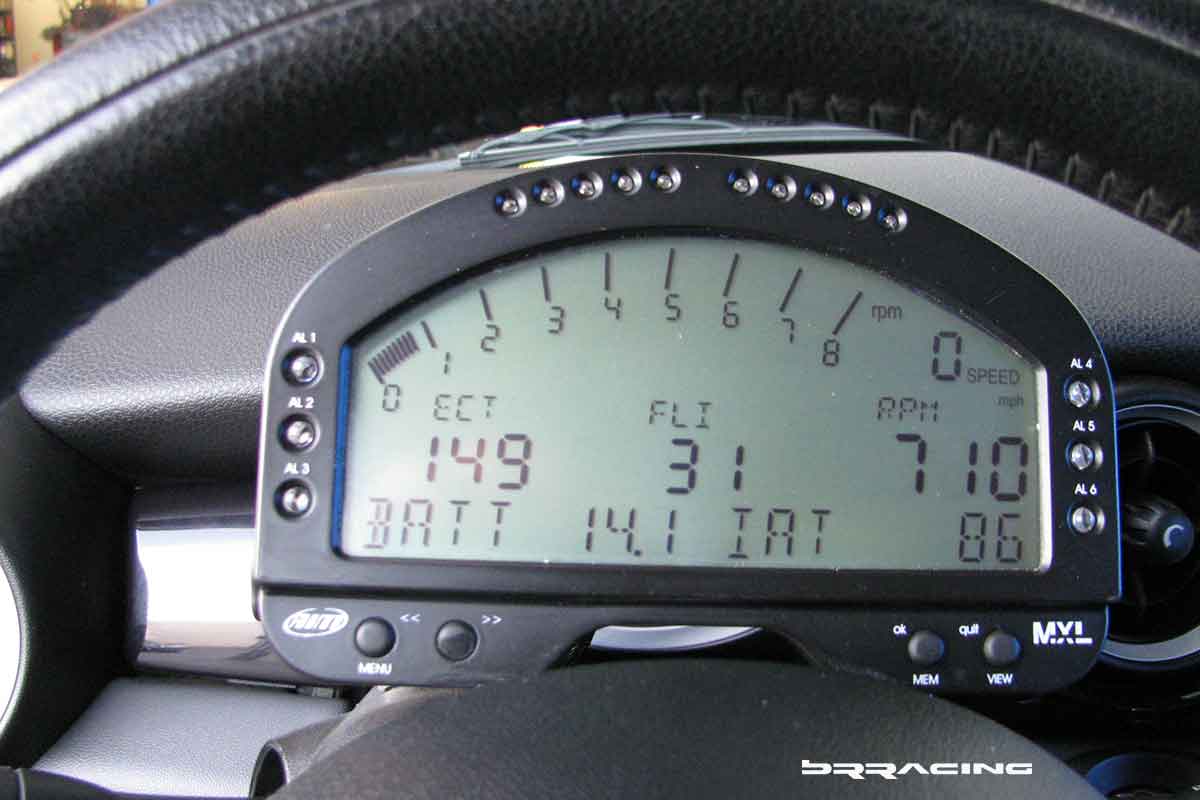
NOW, that’s a PROJECT.
Car was built in 2011….and even today (2025), the car is still running, running strong, and we never had a single failure.
Like all projects…they never are done, and there is more to come as we match the capabilities of the car to the needs of the driver. The MINI is such a great platform to build on, and is so easy and fun to drive hard….smiles for miles.
BRracing – what kind of fun can be build for you?


Hey, I ran across your web www by way of Yahoo when researching an identical make any difference, your website got here right up, it appears to be beneficial. I have combined with favourites|combined with book marks.
I would like to know if the person still has the Lounge leather seats with the beige piping? I have been looking for these to upgrade my Mini but cannot find them. My Mini is 2013 Hatchback S – just like the Pepper white in the picture. Are they for sale?
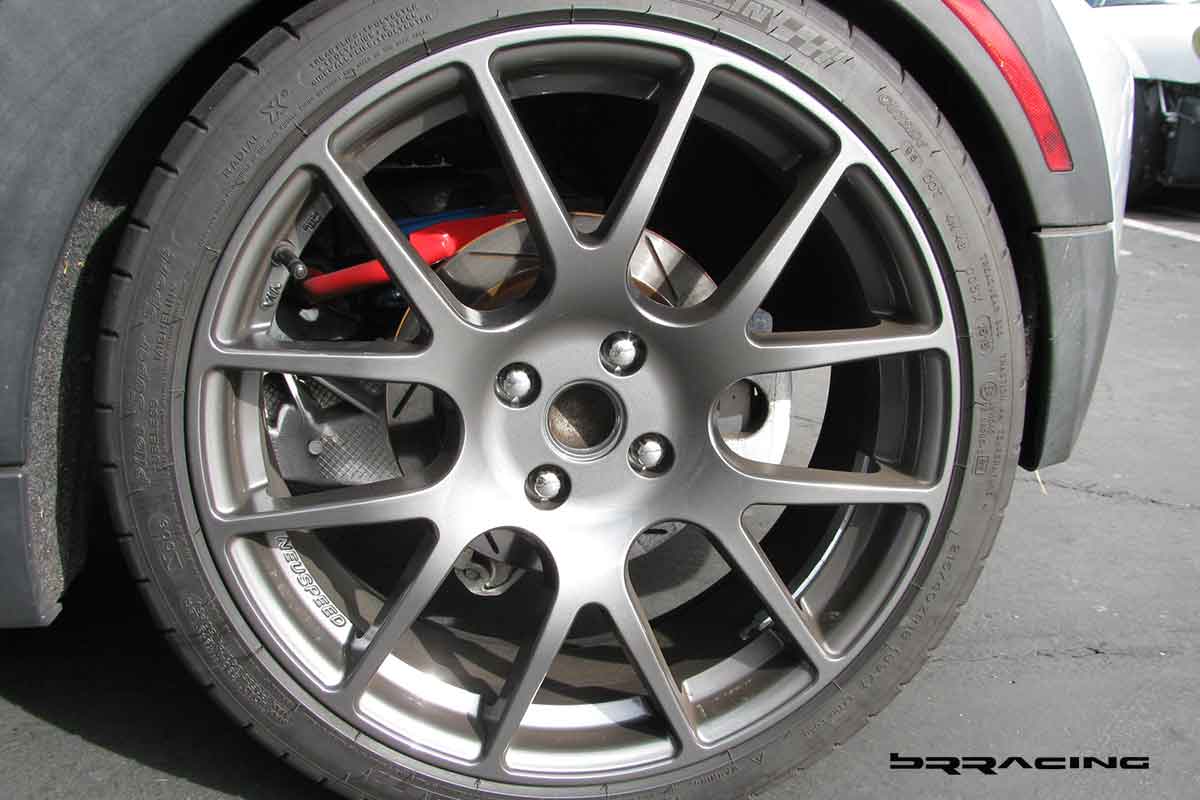
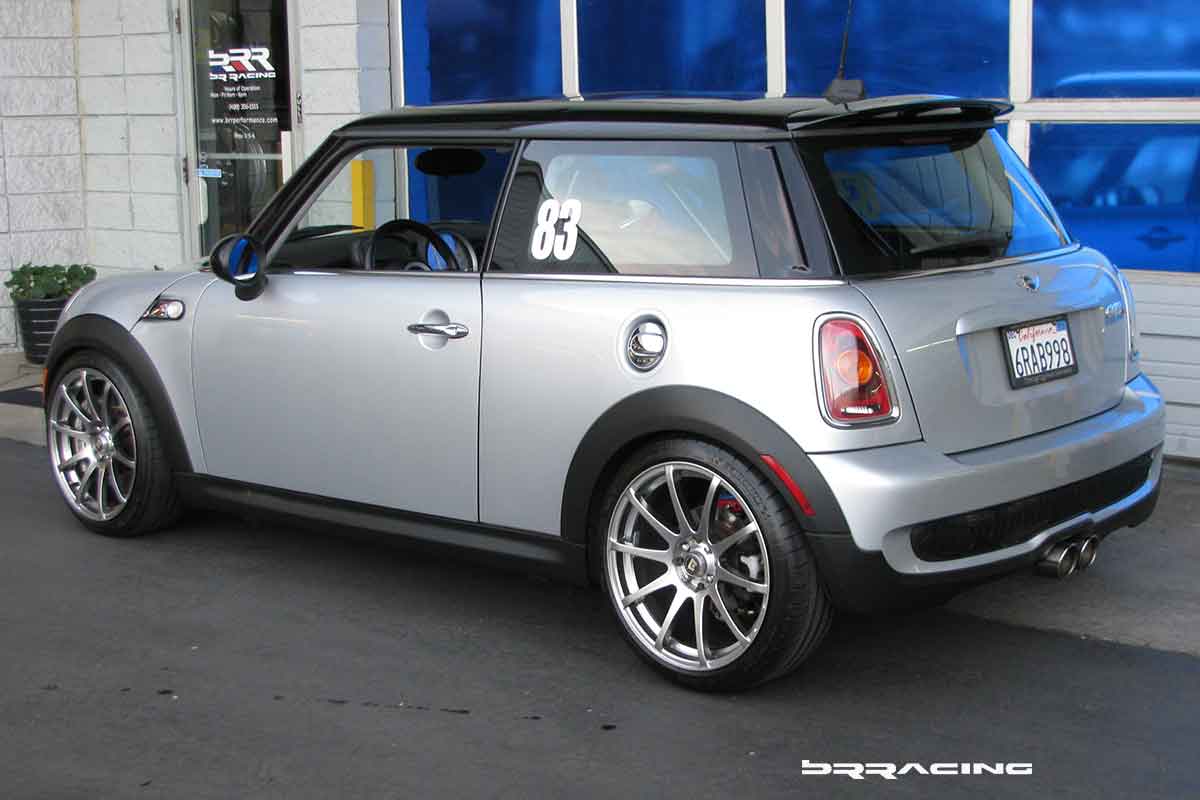
Hi, could you tell me what kind of wheels are those? They’re pretty cool. Thanks in advance!
OZ Ultraleggera, in 18″ diameter.
Could you pls tell me what is the resistor you used for the seat airbags?
I need that roll cage for my GP2 please tell me i can buy one in red? Thanks Troy
Condo fire Safety
MINI Cooper S R56 Project Upgrade