So…what if you wanted to change the look of your car, but wanted a custom color and look? The normal options would be to just paint the car. Or, maybe you could add vinyl graphics to the car. Or, in the last couple of years, you could even “wrap” the whole car in vinyl. The last option has many attractions, but it was limited in the colors and was still vinyl, which has some limitations. So, how do you get the combination of both?
Enter a brand new solution from 3M, which is PAINTED vinyl. What the heck? Yep, it’s exactly what it sounds like. You can pick ANY color and any style (want a matte color, but you want it to stand out in the sun and have a different tone? You could do that w paint, when you did different layers of paint….look at all the pearlesence custom painted cars). Now, you can achieve the same, but w PAINTED vinyl. It has all the benefits of paint….you can make ANY color combination, you can wash it, wax it, buff it…everything you do w paint, but you also get it on vinyl and the benefits of that approach. This truly a WIN-WIN solution.
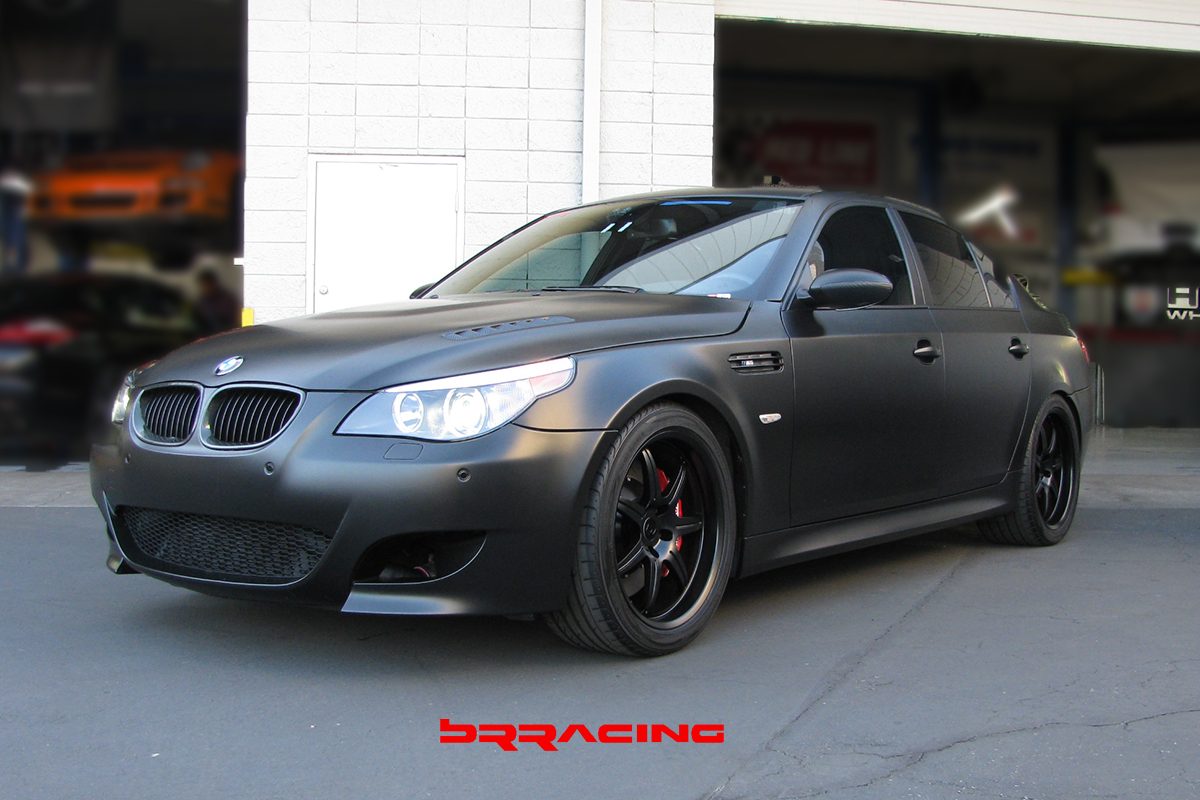
And….like many times, BRracing is on the forefront of this solution for our customers. Enter a BMW E60 M5 customer, who we have done many mods already on his great car, but now who wanted to create the total solution, which included the “look” for the car to go w the theme for the rest of the car. And, as has been the latest rage, the customer wanted to do the car in “matte” black. We produced several color samples, from plain flat black matte, to a fascinating pearlesence black that changed various colors depending on how you looked at it in the sun.
So, just like painting a car, the car needed to be prepped before the work could start. A full wash, and cleaning of the body surface (including clay bar of the whole car). Then, off come all the exterior elements (all badging, all decals, all BMW roundels, all grills, side vents, lights, door handles, trim pieces, hood elements, light reflectors, license plate lights and frame, antenna…..you get the idea). But, unlike painting a car, you do NOT have to take off the windows and windshield. Now the car is ready for the painted vinyl application.


When you finally decide on the color, you order the vinyl w the paint, and the material comes in huge rolls. But, unlike normal vinyl, you do NOT apply w heat (and you can tell from all the vinyl decals and colors that we add all the time to our project cars…we do know the details on how to do regular vinyl, and yes indeed, we do use heat guns). You apply this solution with water, steam, and alcohol. Sort of a mix of approaches between clear bra applications and vinyl applications. But, you also do NOT stretch the new painted vinyl to fill the curves and body shape…..which also means it will not alter its shape in the future (which was another shortcoming of traditional vinyl wraps or graphics).
You lay out the piece you want to do, and then just cut the painted vinyl to the approximate size that you need. You then go through the application process, laying it over the car form, and applying the fluids and using steam to help the vinyl to fit the shape. Once you have the shape, you flush out the surface to eliminate any bubbles, and when the surface is PERFECT, you can start cutting the pieces to the final implementation. You can go over curved surfaces, and fill in the background. Like in the image below, we shaped it under the fender lip so that the car doesn’t just have the exterior surfaces covered, but all surfaces, so that it truly mimics a painted car. This also allows the background areas like inside the grill openings to be completely covered and filled….all without ANY seams. Just like paint, everything is covered.

You start with sections like a fender, that lend themselves to piecemeal approach, but then you move on to the bigger pieces….like doing the whole A-pillar, roof , and rear quarter panel in ONE solid piece……just think of the size of the piece that you need to manage….WOW.


And….if it doesn’t look PERFECT, then you just peel it off, and start again, as the shape of the base material has not been stretched or distorted, and since you have not allowed it to dry and adhere to the surface yet, you can peel it back and reapply to get it just right. Taking the car a piece at a time, you start to see the metamorphosis of the car into it’s new “look”.

All the surface fine details are retained…the fine lines of the BMW shape, but look at the perfection in the paint. This is one uniform, complete, perfect application….and it looks, feels, and has the texture of a painted surface. AMAZING.
This is NOT easy, but WOW, what an amazing project. And you get some additional benefits…..if the car ever gets dinged or scratched, then you just peel off that section (not easily, but it does come off in rather large pieces), and you apply a new section. Can also be done in less time and hassle than paint. And, with the vinyl backing, you gain some minor absorbtion benefits….it can take impacts without immediately scratching or cracking like traditional paint.
Look for more soon as we complete this project…..IT’s WRAP
PART 2 – the completion of the project
What we detailed in the first write-up were the major exterior body parts. But, what we didn’t mention is how far we were going with this project. This wasn’t just an external wrap with the new “painted” covering, but we wanted the car to look like it had been completely painted. This means that all the exterior curved surfaces needed to be dealt with, but also ALL the interior seams and pieces. The trunk interior, the drain rails, the doors themselves, the door handles and the inside of the door handles, the door trim outside and in, the door jams, all elements of the door jams….even where the hinges and lock mechanisms are, the hood drip rails, the hood seams, take out the front grills and do the inside of the front radiator opening, the interior of the brake ducts, the rear exhaust enclosure, the rear diffuser, the rocker panels, the inside of the gas lid and its enclosure…..this car is complete.


Not only did we work over the exterior paint….but we paid attention to every surface element, and tried various looks and treatments to enhance the complete theme of the car. Here we try the CF covering on the antenna area, to break up the solid look of the roof.

The BMW E60 M5 had a rear trunk lip spoiler, but we pulled that off, and added this CF element…which, when seen from the rear, helps outline the dramatic and aggressive lines of the M5.

The mirrors lent themselves to both treatments….both the new matte covering, as well as the CF touch. You can also see how all the trim around and surrounding the window was done….no surface was left untouched.

We took the side vents out, which we had previous to this project upgraded to the CF look. We took out the vents, and had the grills painted matte black, and added new BMW M5 decals to keep the look fresh. This tied in the whole side of the car, as we had the CF touch on the mirror caps.

An example of how little changes can have a big effect. Along with prior work on the front grills, we had CF units, which you can see in the image below. They look nice, and for most cars, are a great upgrade. But, for this project, they were not exactly the look that we wanted.

Here you can now see the new matte front grills, along w the MEAN yellow headlights. The grills make the car look 100% complete and integrated, even better than the stock ones, or the aftermarket CF grills….
You also get a peak here at the ASR intake system installed in this car, as you can see the stainless steel twin intake filters and tubes.

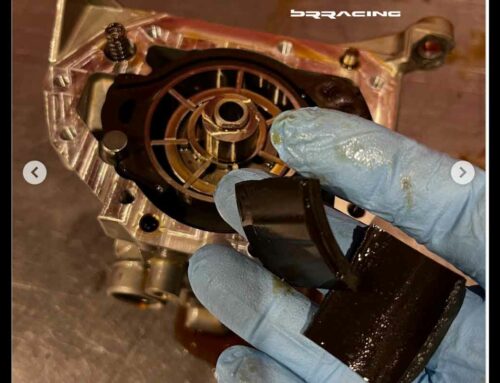
In addition to the exterior upgrades, we also addressed some more performance upgrades….like the brakes –
Here is what the car had previously ….


Comparing the old and the new brakes –

I don’t know about you…..but these calipers are soooo nice….so light, the curves, the surface…oh me oh my, and I haven’t even talked about the pistons….we have 6 custom tailored pistons…..sweeeeeet


BRracing……what can we build for you?
BRracing – performance beyond expectations
